Video Tutorial
Find this video useful? Access our full Wizer Admin Masterclass here.
Before adding users, Wizer recommends establishing department names or checking if the list of departments offered by us is suitable enough for your company.
Go to Departments from the main menu on the left-hand side of your screen check existing default options and add departments adequate to your company, if needed. You may learn more in the linked article How to Create and Manage Departments (opens in a new tab).
When the users are invited/added, their first status is Not Registered/Not Started. The users get an email notification if they have a task assigned. After they click the link and fill out the form with their name and newly created password, they register their profiles and can log in to the Learner App and complete the task.
Wizer offers the following convenient ways to add users:
-
Single-Sign-On - You can set this up in the settings of your Admin Console. Instructions for Azure, Okta, OneLogin, or G Suite can be found by selecting either and clicking the links or downloads provided.
-
Manual Entry - You can add users manually by entering email addresses or doing a CSV file upload (bulk).
Go to Users from the General section of the menu on the sidebar of your screen and click Add Users in the top right corner of your screen. A pop-up will appear with available options.
You can also export the users' list in CSV format, or range the users by task status (not started, in progress, completed), or by other columns such as email (alphabetic order, name, last login, or added date) by clicking the ![]() button that resides above the "Added" column.
button that resides above the "Added" column.

Once you click on the ![]() button, the menu will appear.
button, the menu will appear.
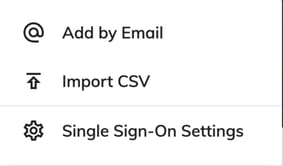
Adding Users by Email
By choosing the Add by Email option, you will be able to add manually users one by one, selecting the department and access level.
Type as many email addresses (separate multiple email addresses with a comma or enter key) as you need and click Next. Here, please, keep in mind, that for each group of users, you will add, you will be able to assign to only one department or save it as No Department.
Select a department from the list. You may assign users as Admin or Learner (or invite them through SSO if you use one by adding a checkmark). Assign a group (is optional) and click "Next".

Now it's time to customize Notification & assignments. You'll have the ability to:
- Send the email notification now or to skip it
- Customize the subject or message of the notification
Click ![]() to save the customized text before selecting
to save the customized text before selecting ![]()
IMPORTANT: A user's email can be changed if necessary from the user's Edit profile menu

If there are no active tasks assigned, users will not get any notifications.
Click ![]() to save the changes and proceed. New added users will appear on the Users tab and will be assigned to the existing tasks and get the notification automatically. If there are no active tasks, the users will not get any notifications till the admin sets up one.
to save the changes and proceed. New added users will appear on the Users tab and will be assigned to the existing tasks and get the notification automatically. If there are no active tasks, the users will not get any notifications till the admin sets up one.
If the user's email already exists, you will see the notification about it "These emails are already in use" as pictured below.

Adding Users by CSV
If you want to Import CSV, you'll be prompted to attach a CSV file (the CSV template can be downloaded on this tab).

To use our template, enter all of the emails and departments and save the CSV file. If the department field is blank, users will show up in “no department” by default.
Click Attach CSV.
Map the columns of your file to the Email, First Name, Last Name, and Department Column fields.

After clicking ![]() you will see a notification that users have been added. Invites will go to all of your users who have active Training, Phishing Exercise, Policy, or Monthly Video tasks assigned.
you will see a notification that users have been added. Invites will go to all of your users who have active Training, Phishing Exercise, Policy, or Monthly Video tasks assigned.
You will get an error message at the bottom of the screen if any emails are invalid or duplicate.

Duplicated emails will not be added and will remain the same in the account.
The Departments and Groups mentioned in the CSV file will be created automatically in the account and users will be assigned to them according to the file.
Users who show up in your Users list will remain in pending status until they sign up via the email invite. You can also resend the invite manually, by choosing a user-->clicking on the horizontal 3 dots--> selecting "Send Reminder".

Alternatively, reminders can be sent in bulk by selecting the checkbox of the desired users-->Clicking the ![]() button--> selecting "Send Reminder".
button--> selecting "Send Reminder".

When your user signs up, the pending status will be replaced with their last login information. They will be assigned any active training campaigns.
Users' Tasks Statuses
Not registered users who did not start training will have a Tasks Status "Not Started" (red symbol for any task).
Registered users who did not start training or are in process, will have a Tasks Status "In Progress" (orange symbol for any task).
Registered users who completed the training will have a Tasks Status "Completed" (green symbol for any task).
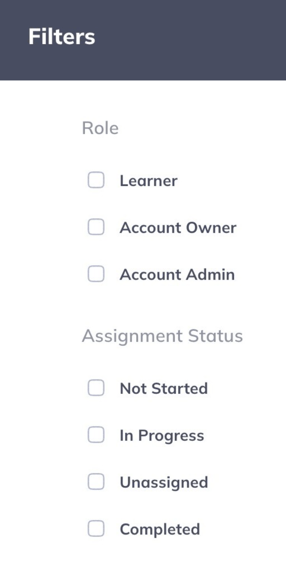
Filters and Searching
You can search users by name, email, or part of it. Also, you can filter users by Tasks Status (Not Started, In Progress, or Completed), and by Role (Learner, Admin, or Owner). You can switch on to Disabled users and there search, enable or delete the users.

Please check our article on How to Disable and Enable Users and How to Delete Users
If you want to use the SSO feature, click the Single Sign-On Settings option. You will be transferred to the page https://admin.wizer-training.com/settings/single-sign-on

Frequently Asked Questions about Adding Users
I want to use my CSV file, but it doesn't look like your template. Should I edit it?
Not at all! When you upload your CSV file, you will only need to map two fields and it doesn't matter what it is named as long as the information matches the mapping.
So, all of my users get all of the training?
Not quite. Your users would get the training assigned to all users or any training that is part of the department to which they belong.
Will users get notifications when they are added to the platform?
Users will only receive notifications if you assign training, gaming, policies, or Monthly Video tasks. If there are no tasks for the users to complete, they will not receive any reminders.
Why are some emails already used and hence cannot be seen?
The emails were disabled, they can be found by clicking Users and choosing the filter Disabled, in the search tab.
Can the users be updated (name, department, group) via CSV file?
No, the existing users will not be added, they will remain with the same parameters. You will get a notification about it.
Can I enable users via CSV file?
No, to enable users, please go to the 'Disabled Users' filter. You can enable them in bulk or by selecting users and clicking 'Actions' => 'Enable Users'.
What if my team members constantly change, and it is difficult to edit users' profiles manually?
Please set up SSO with user provisioning, so the changes will be applied automatically with every synchronization.
The user's name is incorrect. How can it be edited?
Please use the instructions from the article How To Edit Profile.
I cannot add a user due to the error "this user already exists", but they are not on the list. What is the solution?
Please check the disabled user list.
How can I disable and enable users?
Please check our article How to Disable and Enable Users
Any questions? Contact our support specialists at support@wizer-training.com