This article describes instructions that handle Step 2: Configuring the SCIM Automatic user provisioning
Requirements:
- Configured OKTA SSO application. SCIM application won’t work without it, users won’t be able to log in. Please, check the Okta SSO instructions (opens in a new tab).
- API Token (SCIM bearer token) that will be provided by the Wizer team. For this, please send a request to support@wizer-training.com.
- Active Okta Administrator Account.
Instructions for SCIM application setup
SCIM application should be set up in order for Okta Provisioning (users synchronization) to work. Users will continue to use the SSO application to log in. Please, follow the step-by-step instruction.
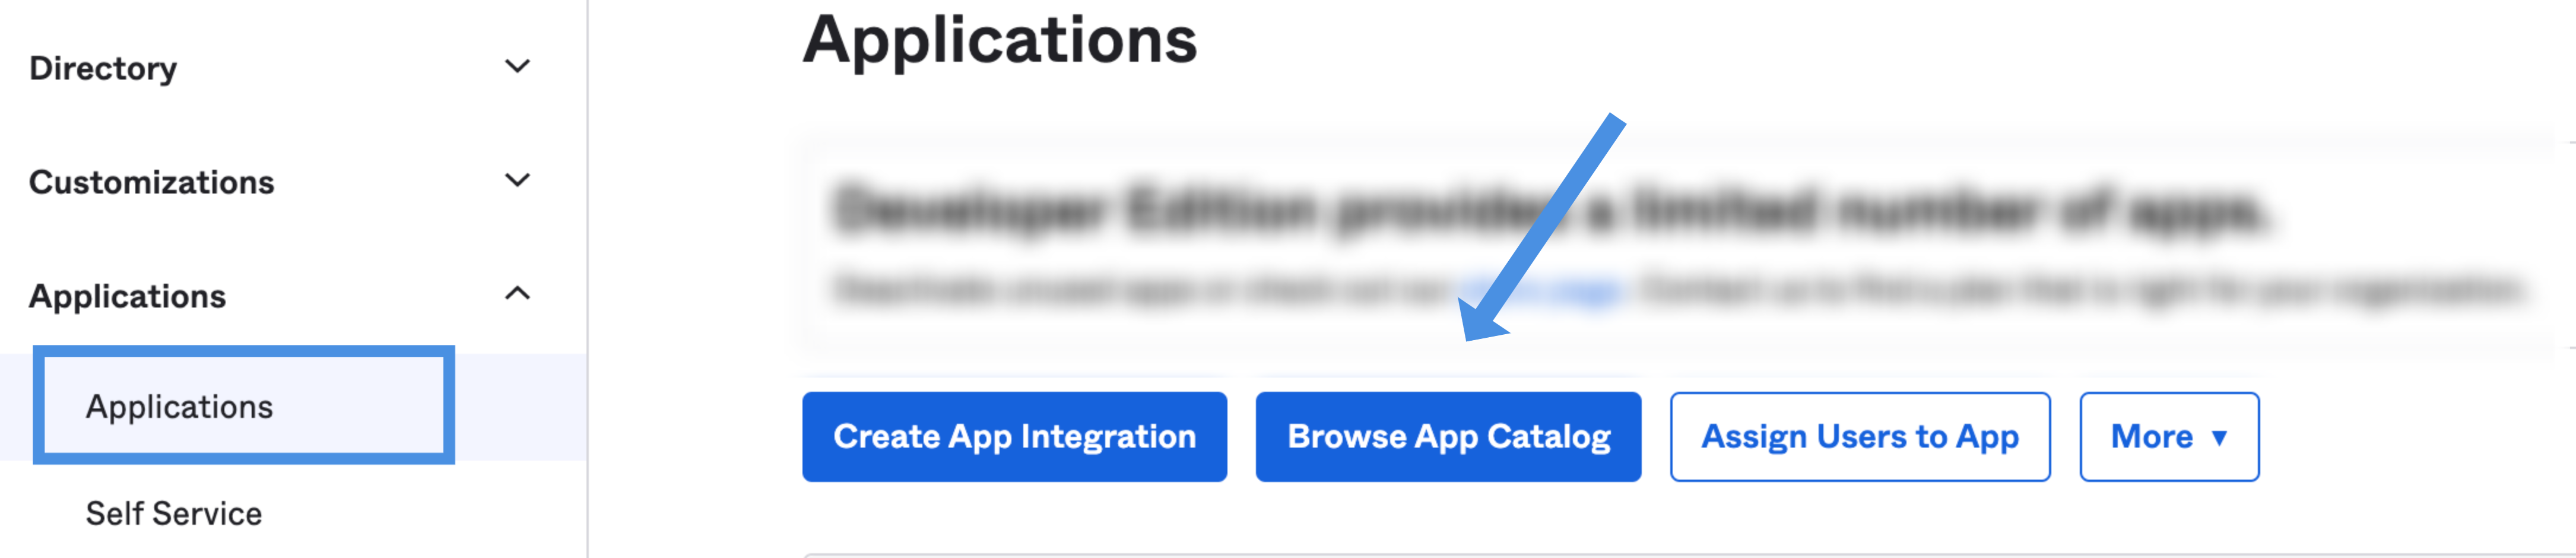
1. Click Applications → Browse App Catalog:
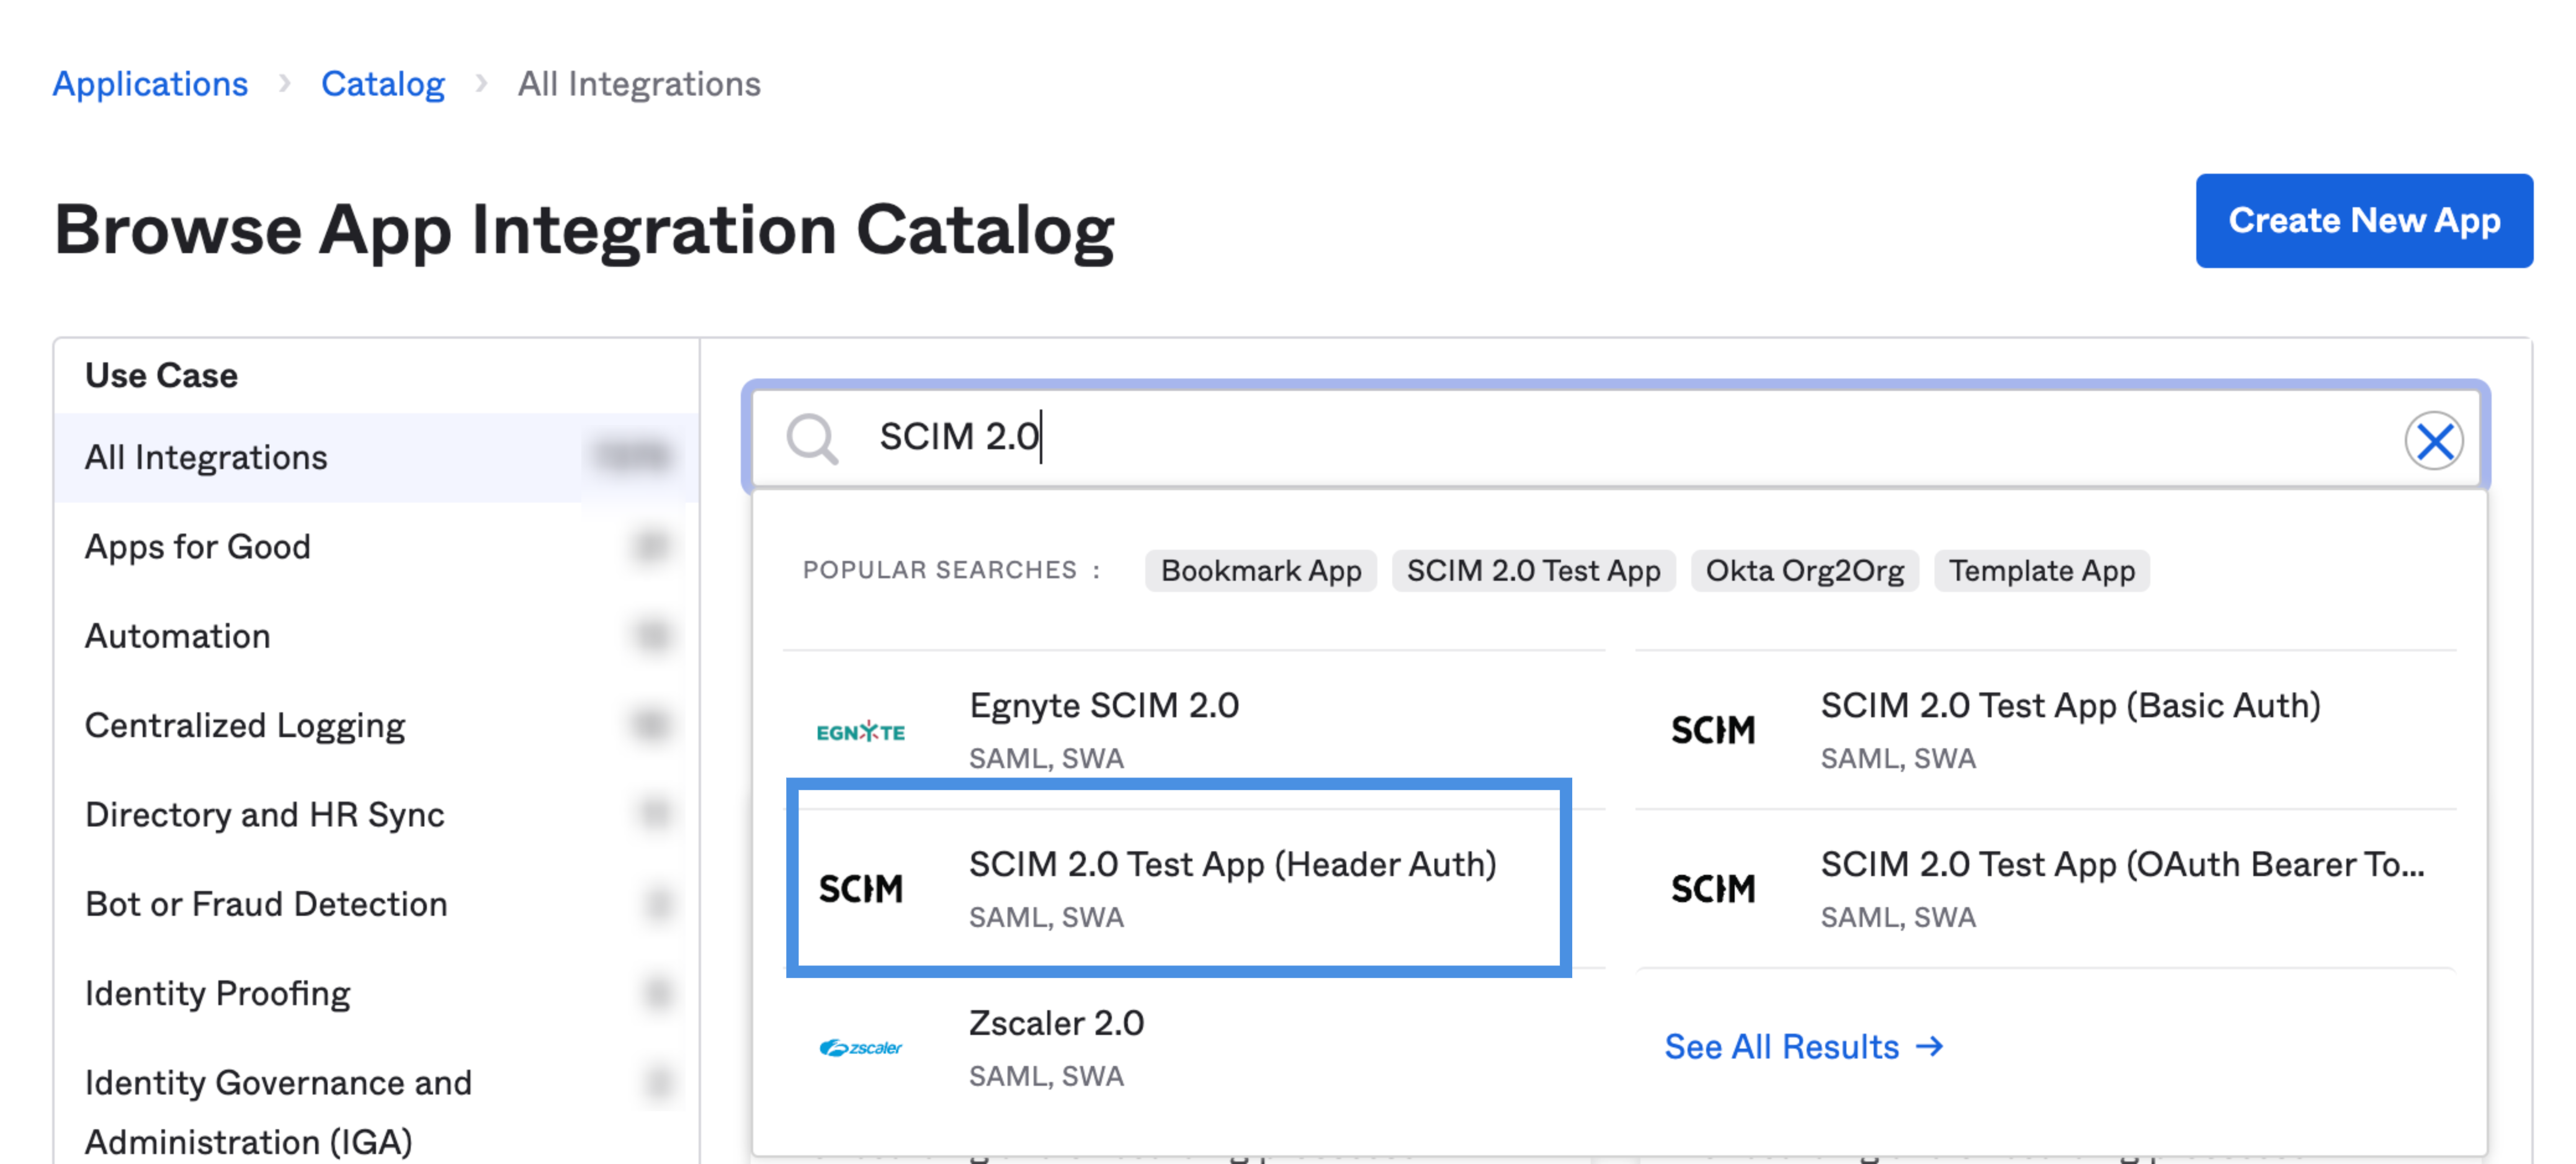
2. Add SCIM 2.0 Test App (Header Auth) application:


4. Under the Sign-On Options, Credentials Details section change the Application user format to email:


6. Enter the SCIM Base URL and SCIM Bearer Token:
-
- For the Base URL enter: https://api.wizer-training.com/api/v1/scim/v2;
- For API Token enter the value that was generated in the Wizer admin console (SCIM Bearer Token);
- Click Test API Credentials to verify the app;
- After you get notified that the supplied credentials are authorized, click Save.

7. In the Provisioning tab select the To App tab and click Edit:
8. Configure Provisioning settings. You can enable Create Users, Update User Attributes, and Deactivate Users capabilities.
Note: Our application doesn’t support the “To Okta” Provisioning
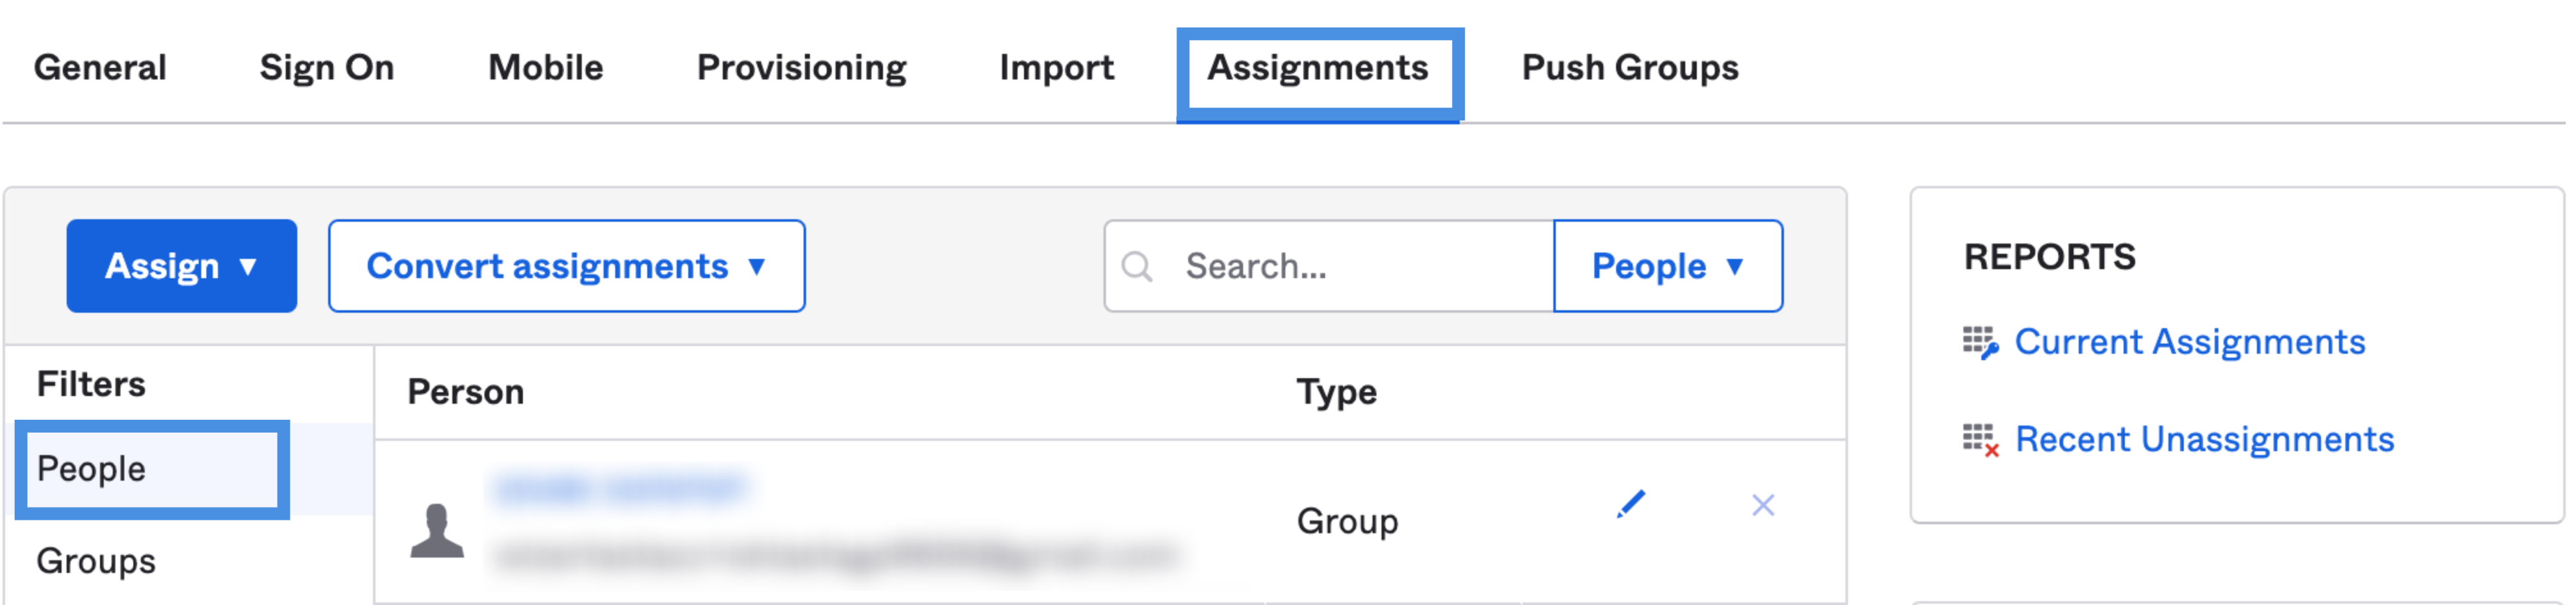
9. Assign Users (user provisioning). Only assigned users will appear in Wizer. We recommend provisioning users by assigning groups.
Note: Assign the same users and group of users as for the SSO application. If some users are assigned to the SCIM application but aren’t assigned to the SSO application, they won’t be able to log in.
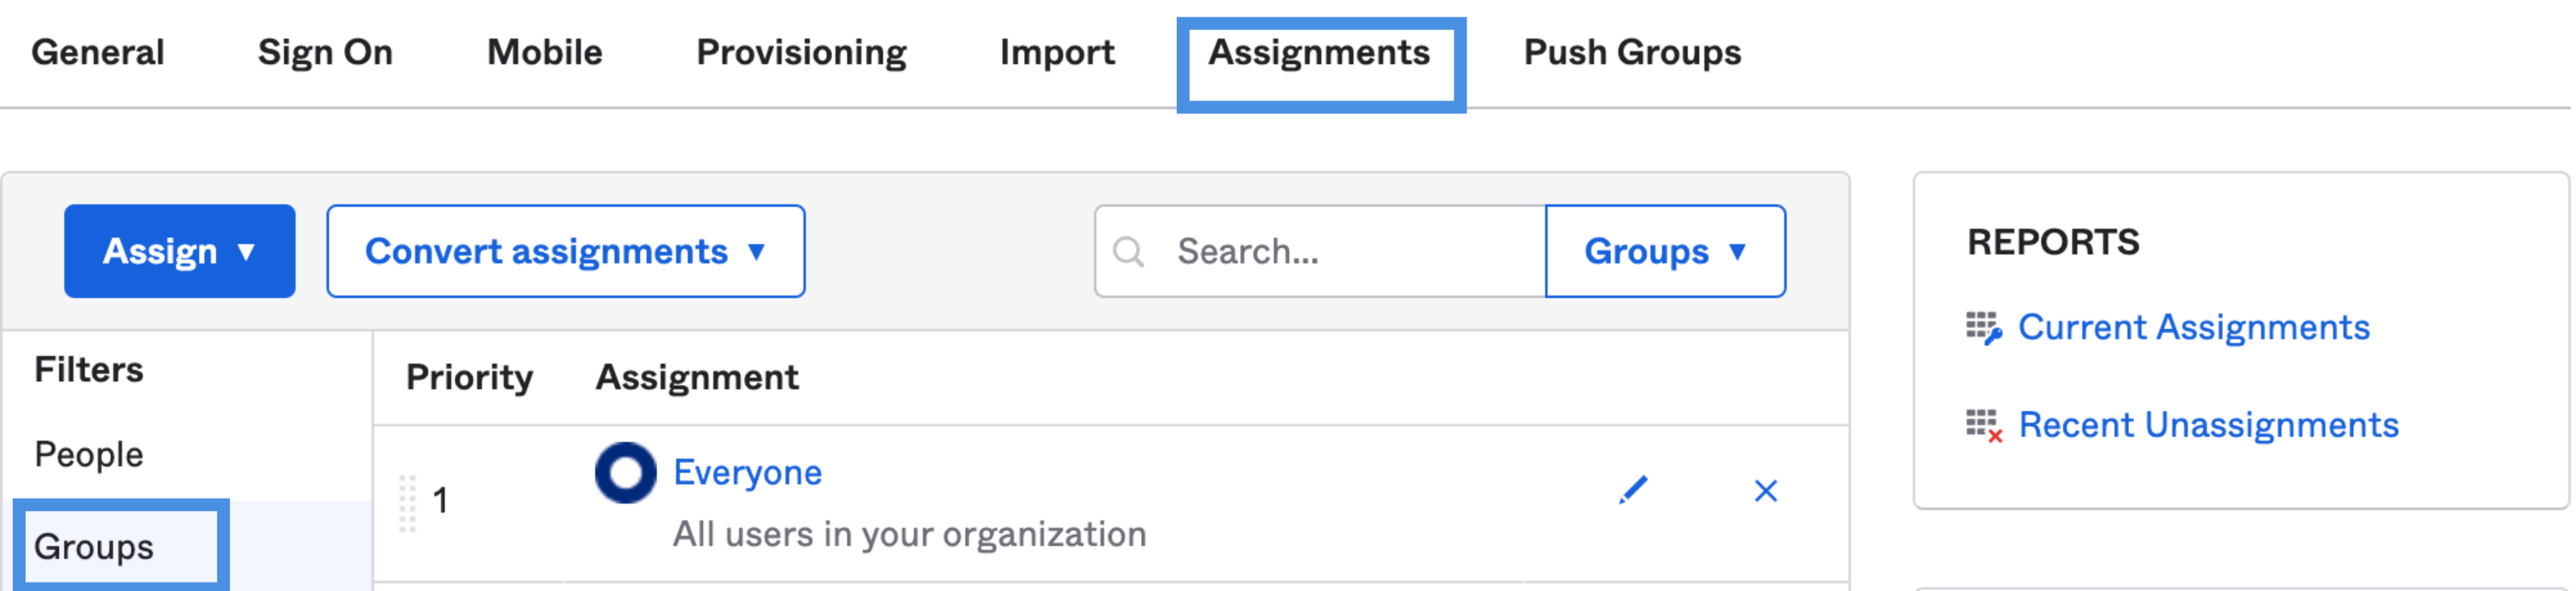
10. Under the Assignments tab click on the Assign button and click.
b. Assign to Groups to assign groups of users:
11. Provisioning should start immediately, but it may take some time before you start seeing users in Wizer. The first initial sync might take a while, depending on your directory size.
Note: If you experience any issues with provisioning - like a user or group (Wizer department) not showing up in Wizer, it's important to check the logs section for errors.
Groups Provisioning (OPTIONAL)
By default, the SCIM application synchronizes the department field from the user profile with Wizer Departments. Following Instructions in this section will allow you to extend this functionality and synchronize Okta groups with Wizer departments.
- If you want your Okta groups to be created in Wizer as Departments you should Push Okta Groups manually. Each time you push a group, the department gets created in Wizer. However, only those members of the group who are already assigned to the Wizer SCIM application will become the Wizer department’s members.
- In the SCIM Application Push Groups tab, click on the Push Groups button and choose - Find Group By Name:
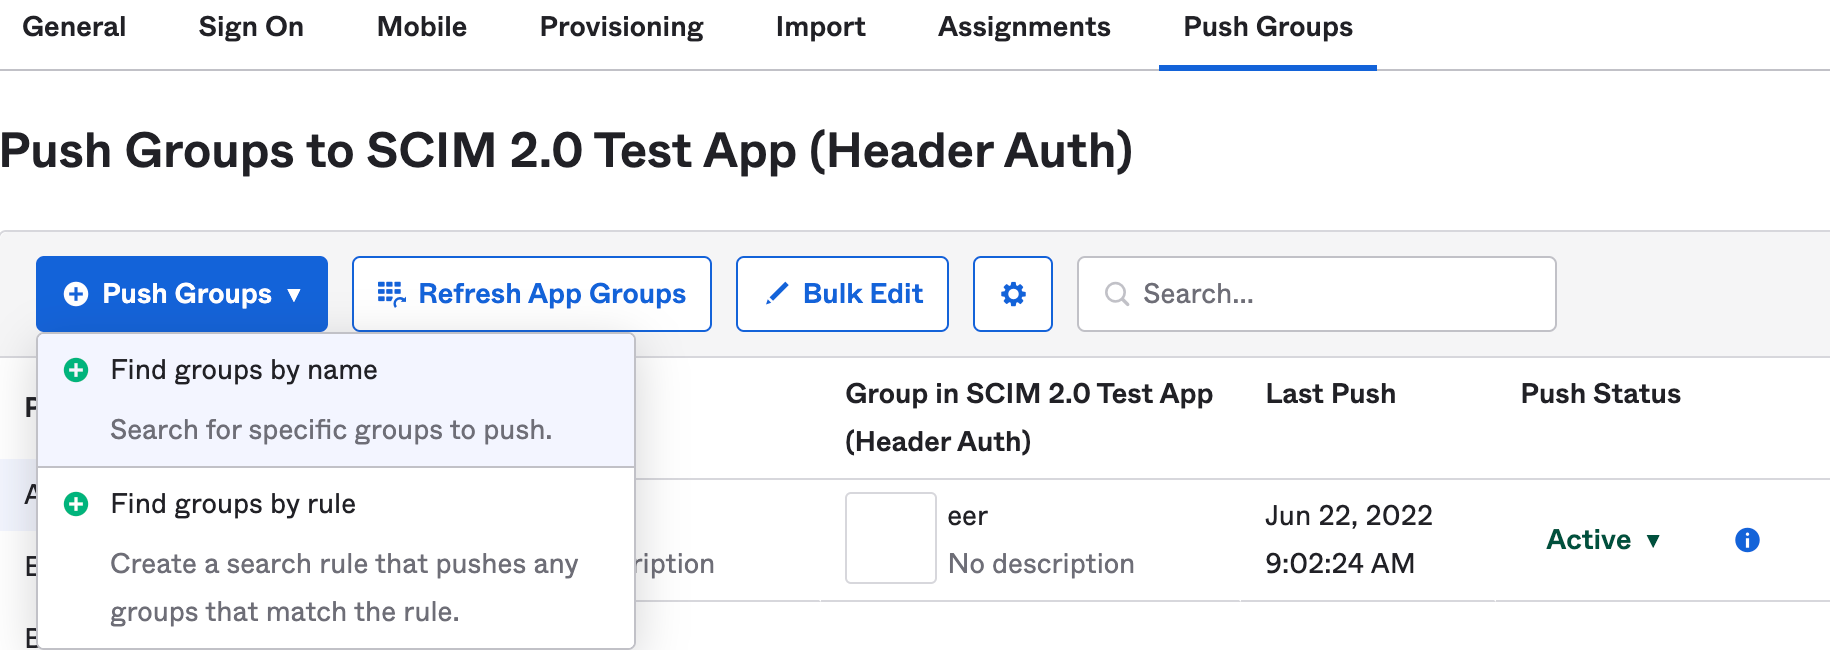
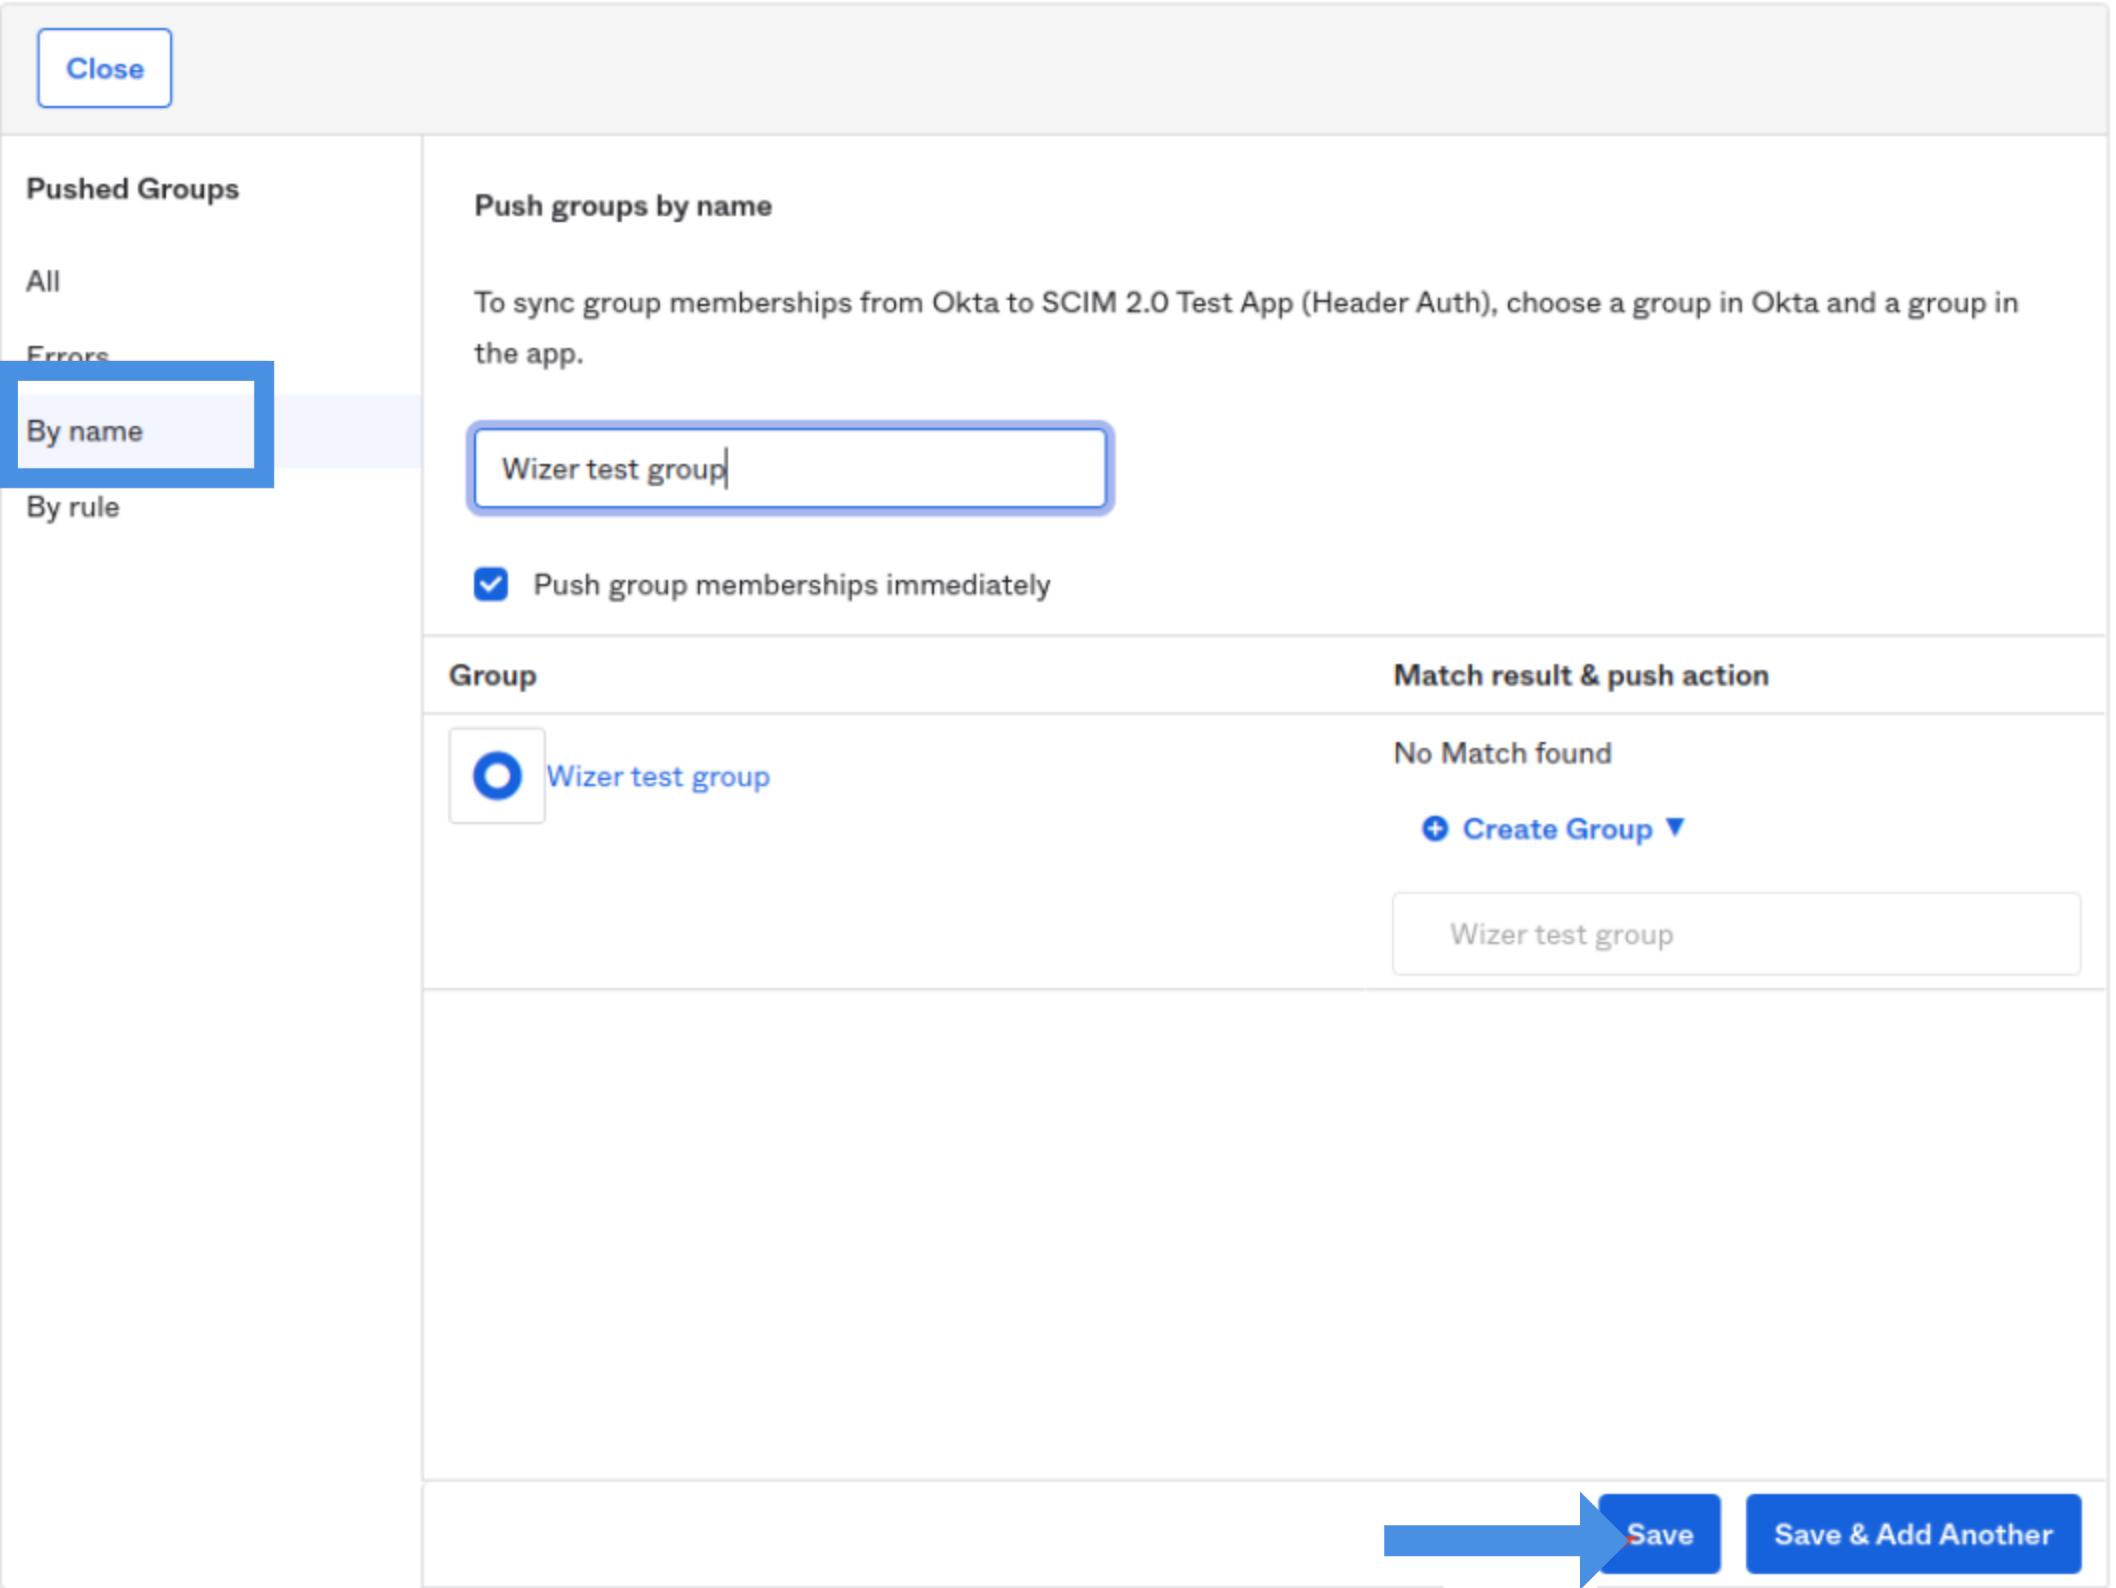
- Start typing the name of the group you want to synchronize. Select the group in the dropdown and click Save:
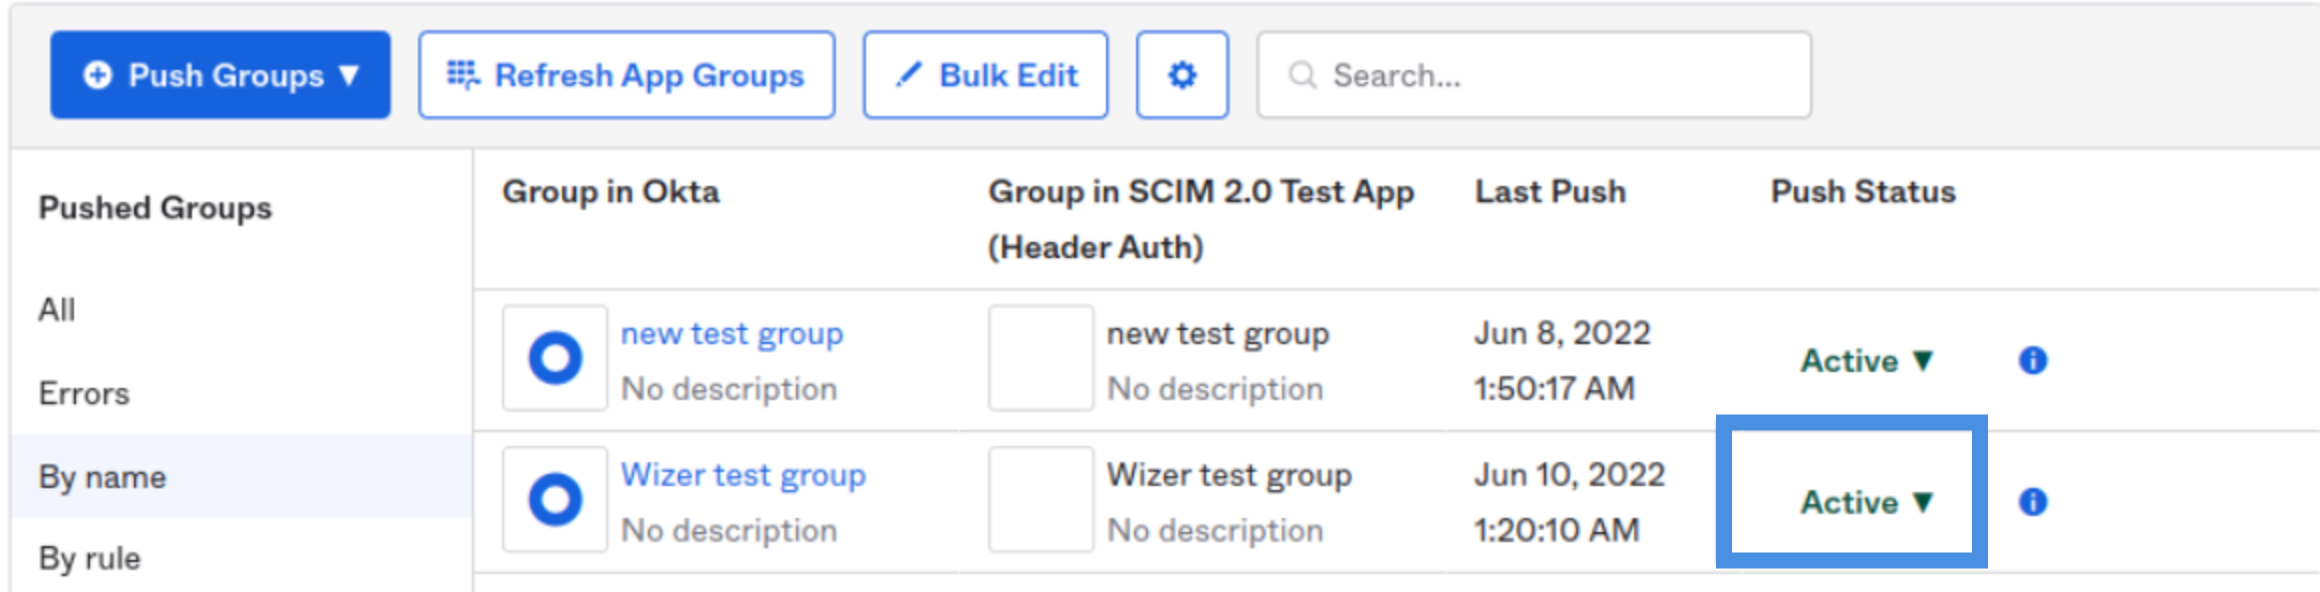
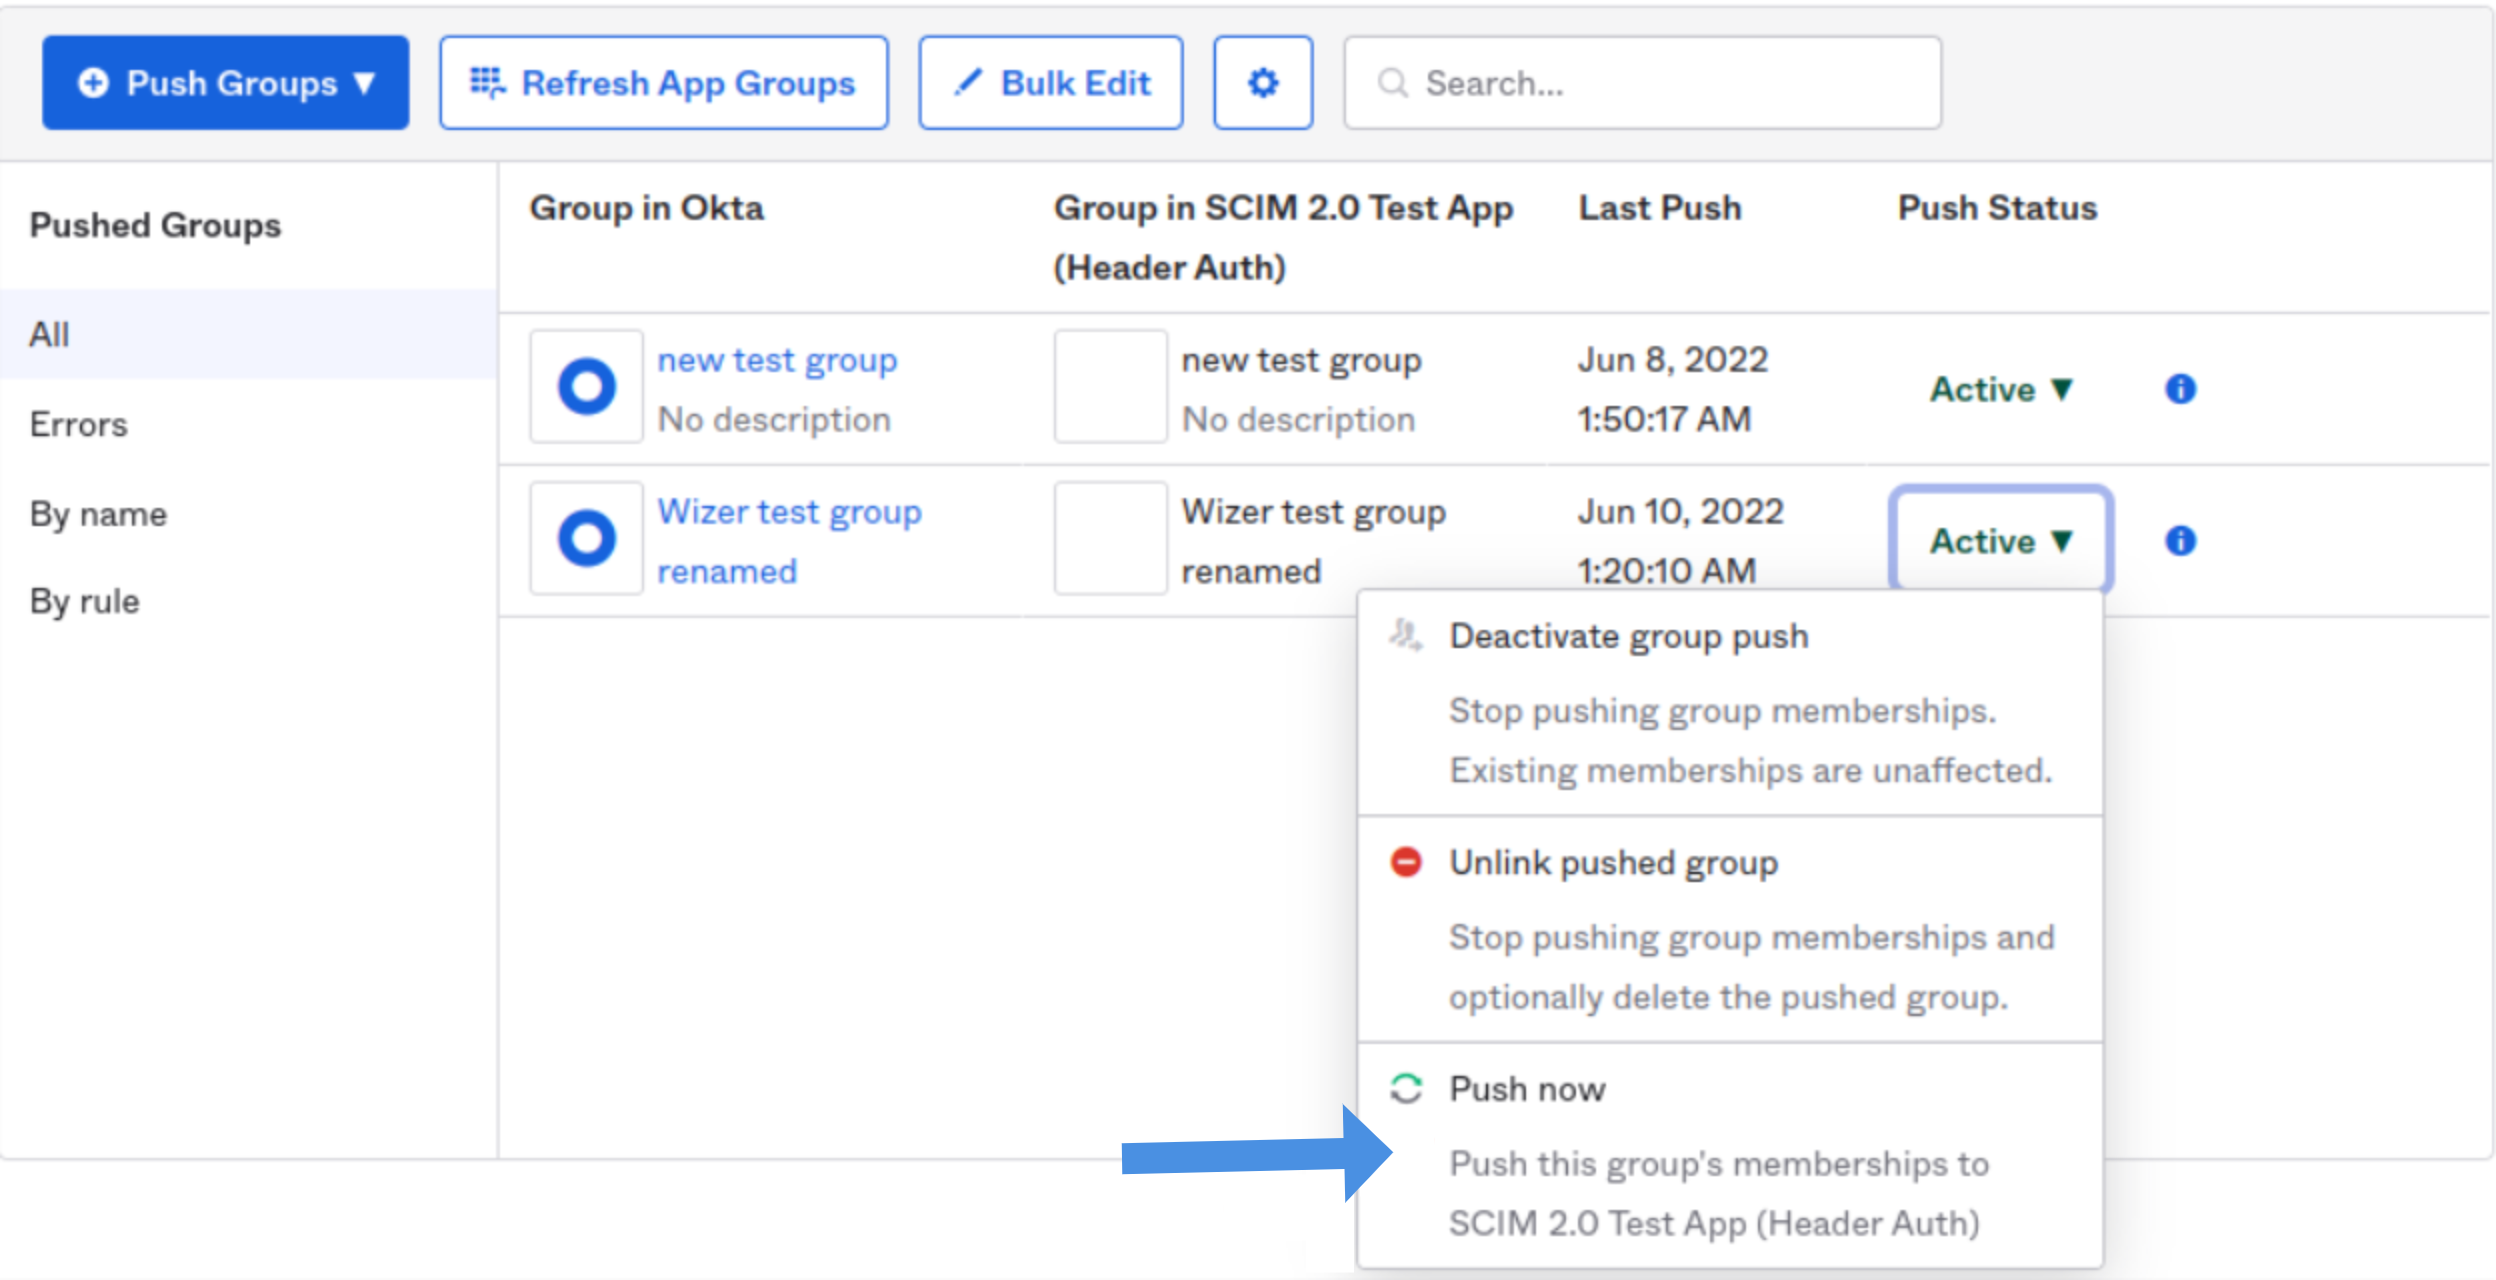
- The group should appear in the By name tab with the “Active” status:
Note: If you rename a Group, you should push the Group again because it becomes disabled.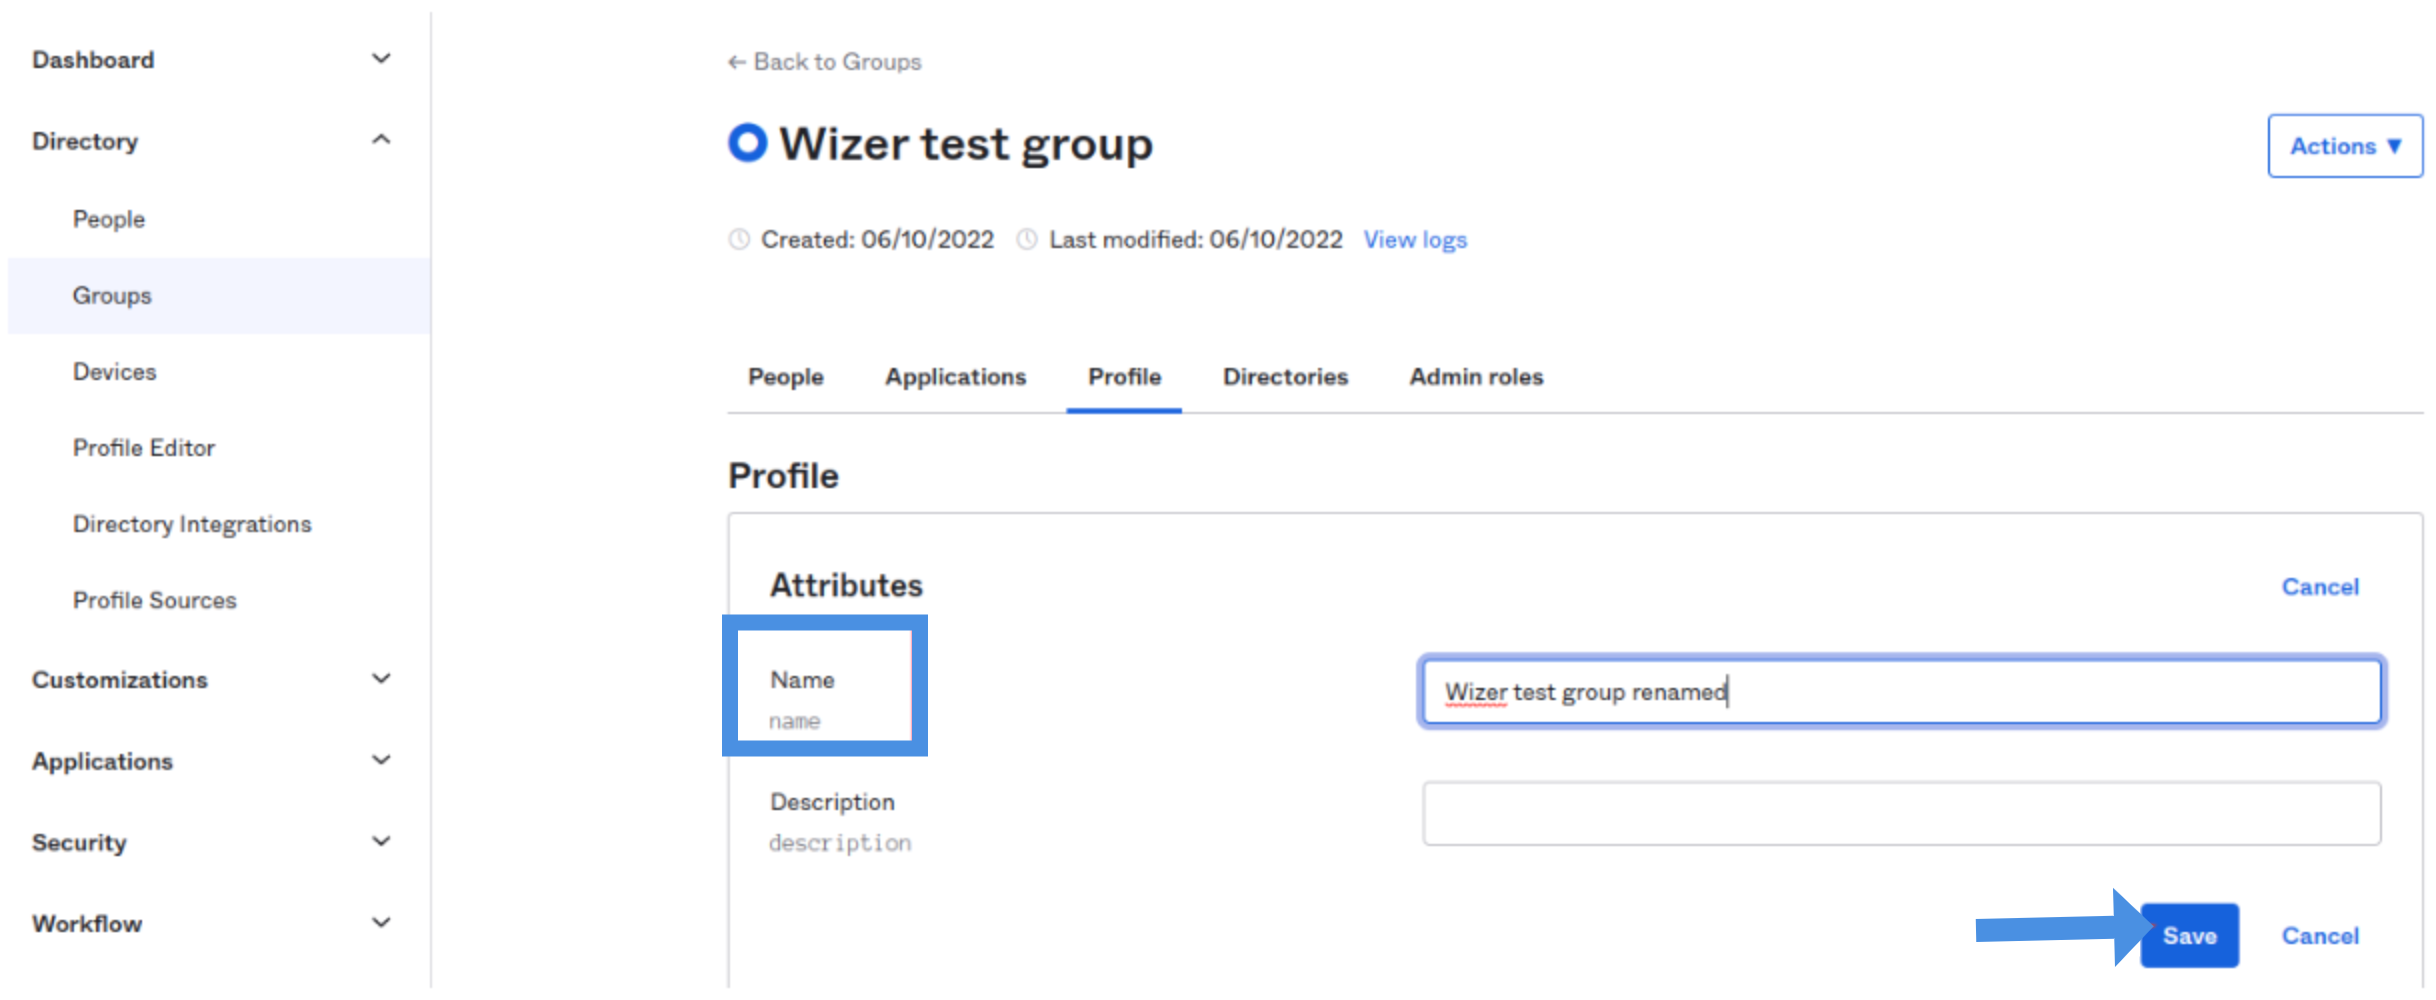
Any questions? Please contact our support specialists at support@wizer-training.com.