How To Set Up Okta SSO
| Attention Setting up SSO and Directory Sync requires two consecutive steps: |
Step 1: Connect your OKTA directory with Wizer
1. Create a New App in the Okta admin portal
As an Okta administrator, log in to your organization’s Okta Developer console here:
Please make sure you’re logged in to the admin portal
Click Applications → Create App Integration

Choose OIDC - OpenID Connect and Web Application → Next

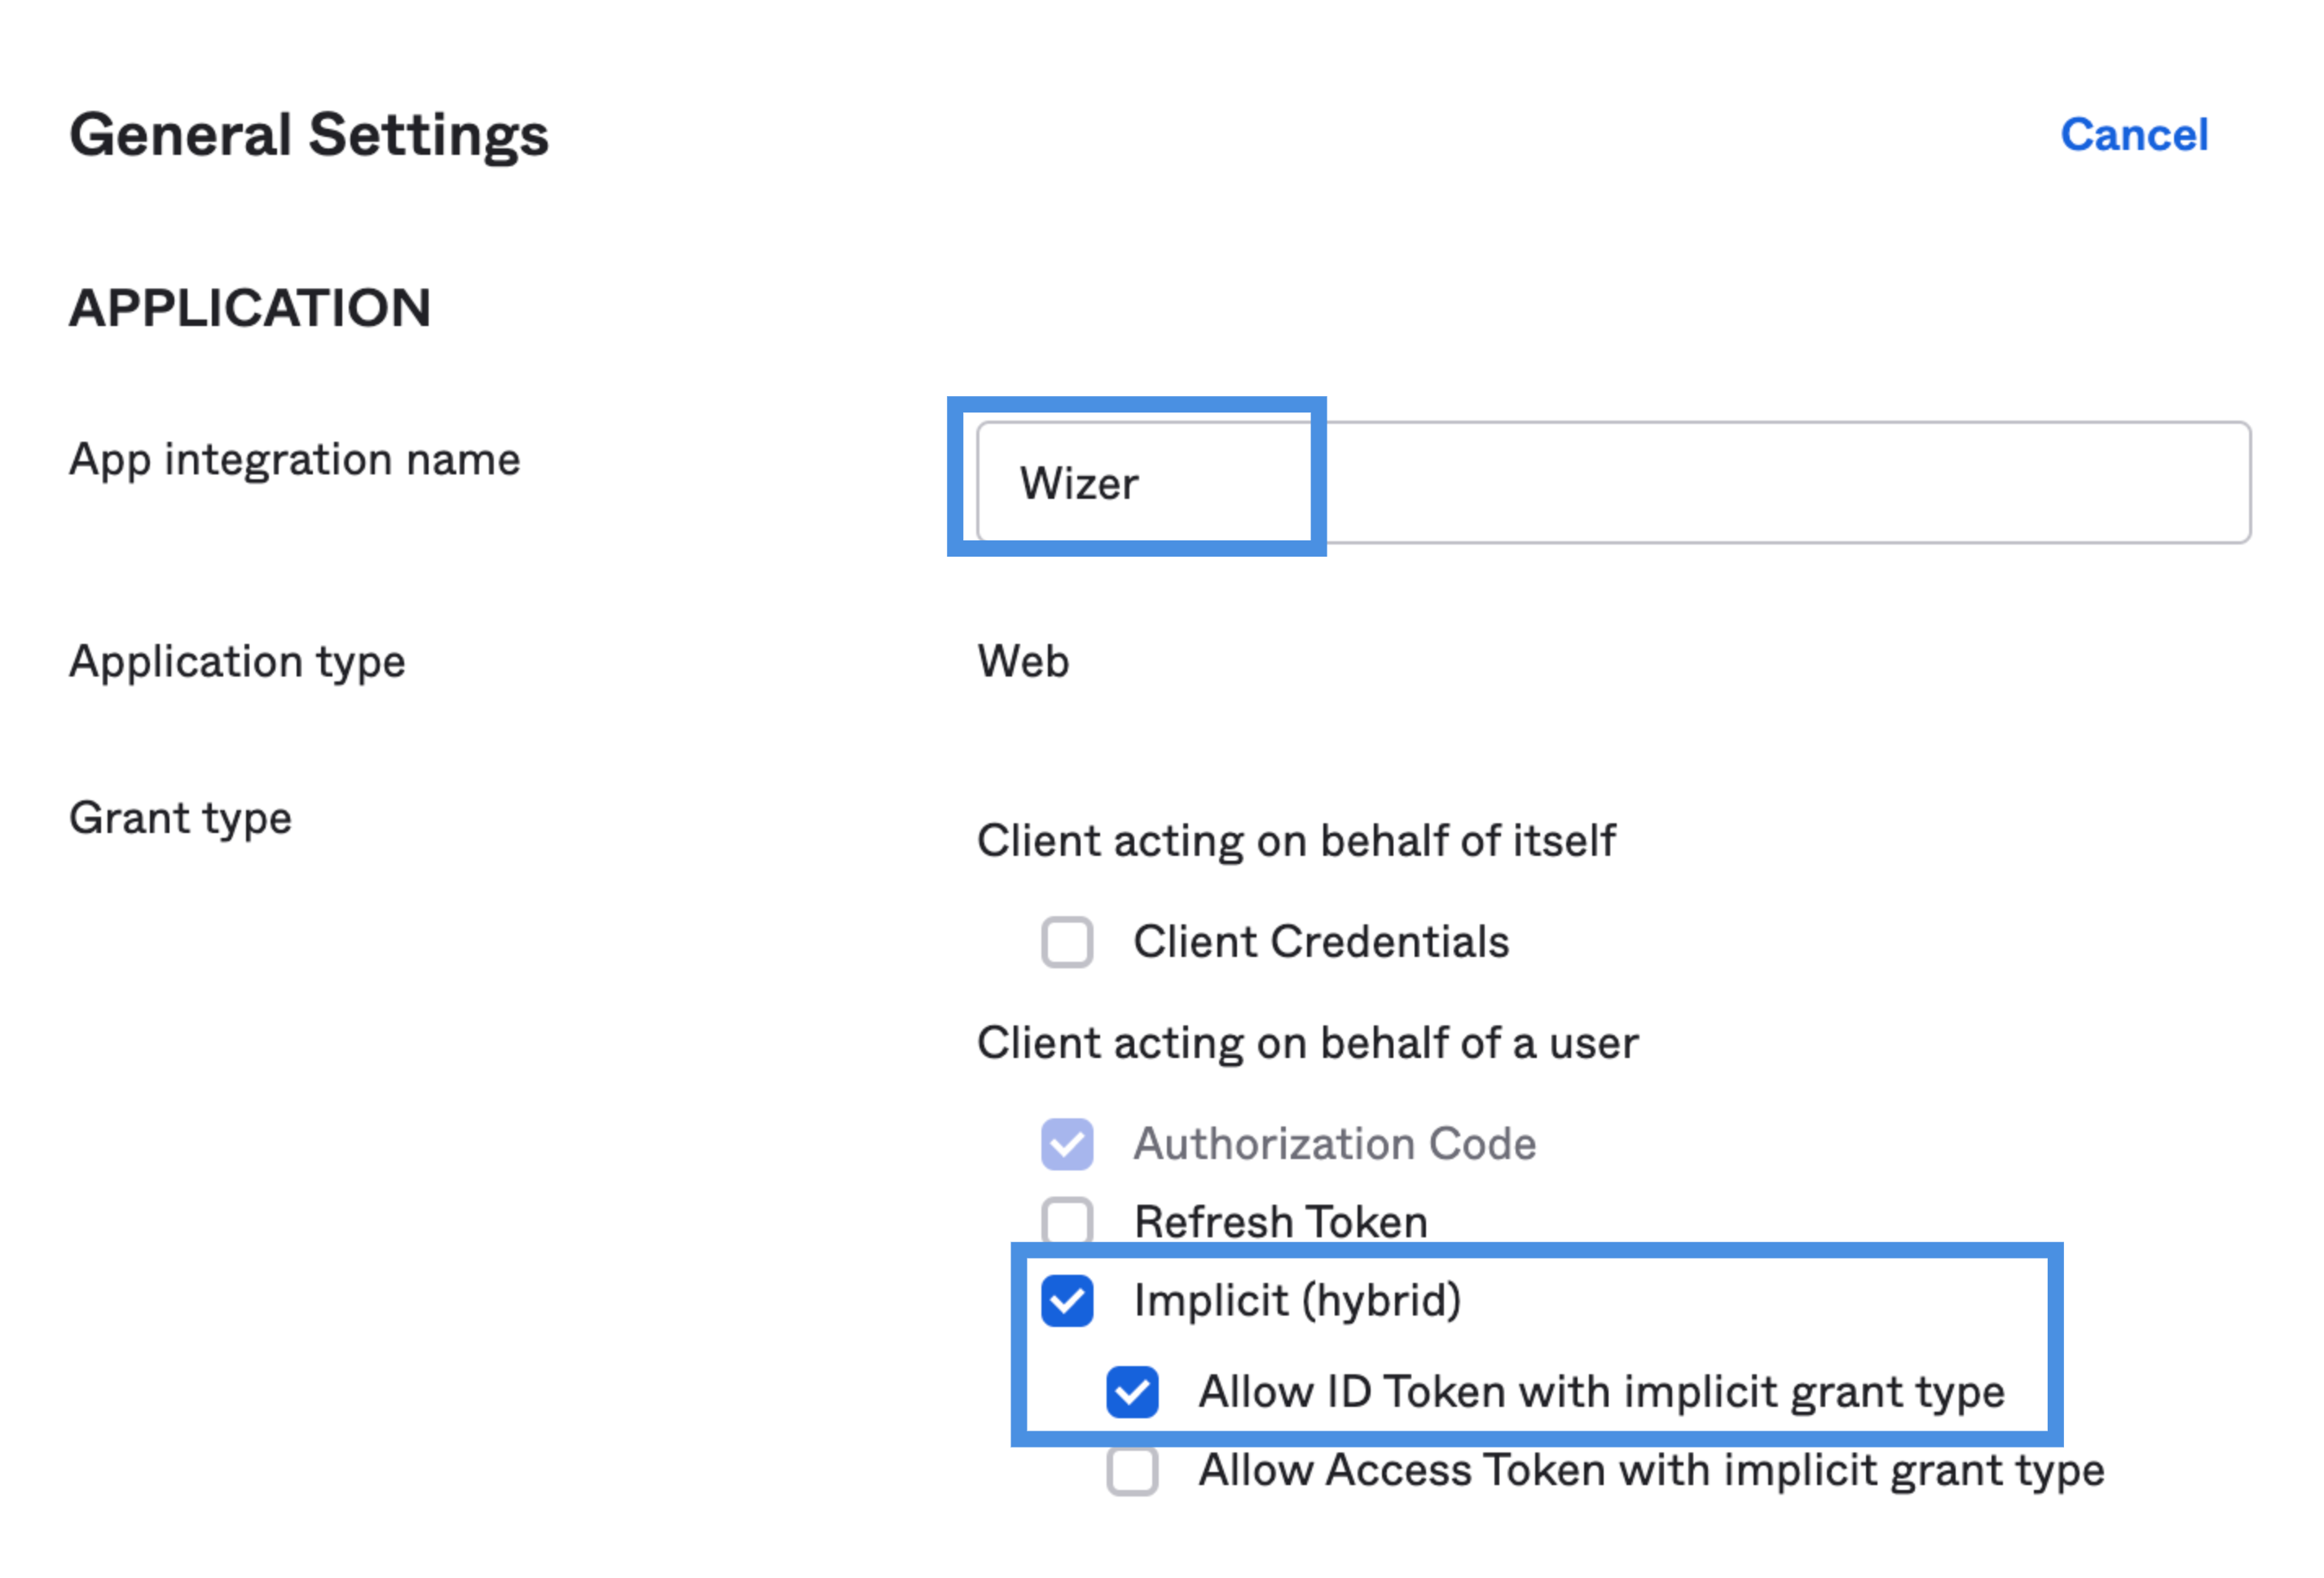
2. Please enter the following under Application Settings:
Application name: Wizer
Sign-on redirect URLs: https://api.wizer-training.com/api/v1/sso/okta/callback

Please select Skip group assignment for now or select based on your organizational settings
Click Save and click Edit on the Application Page General Settings.
✔ Authorization Code
✔ Implicit (Hybrid)
✔ Allow ID Token with implicit grant type
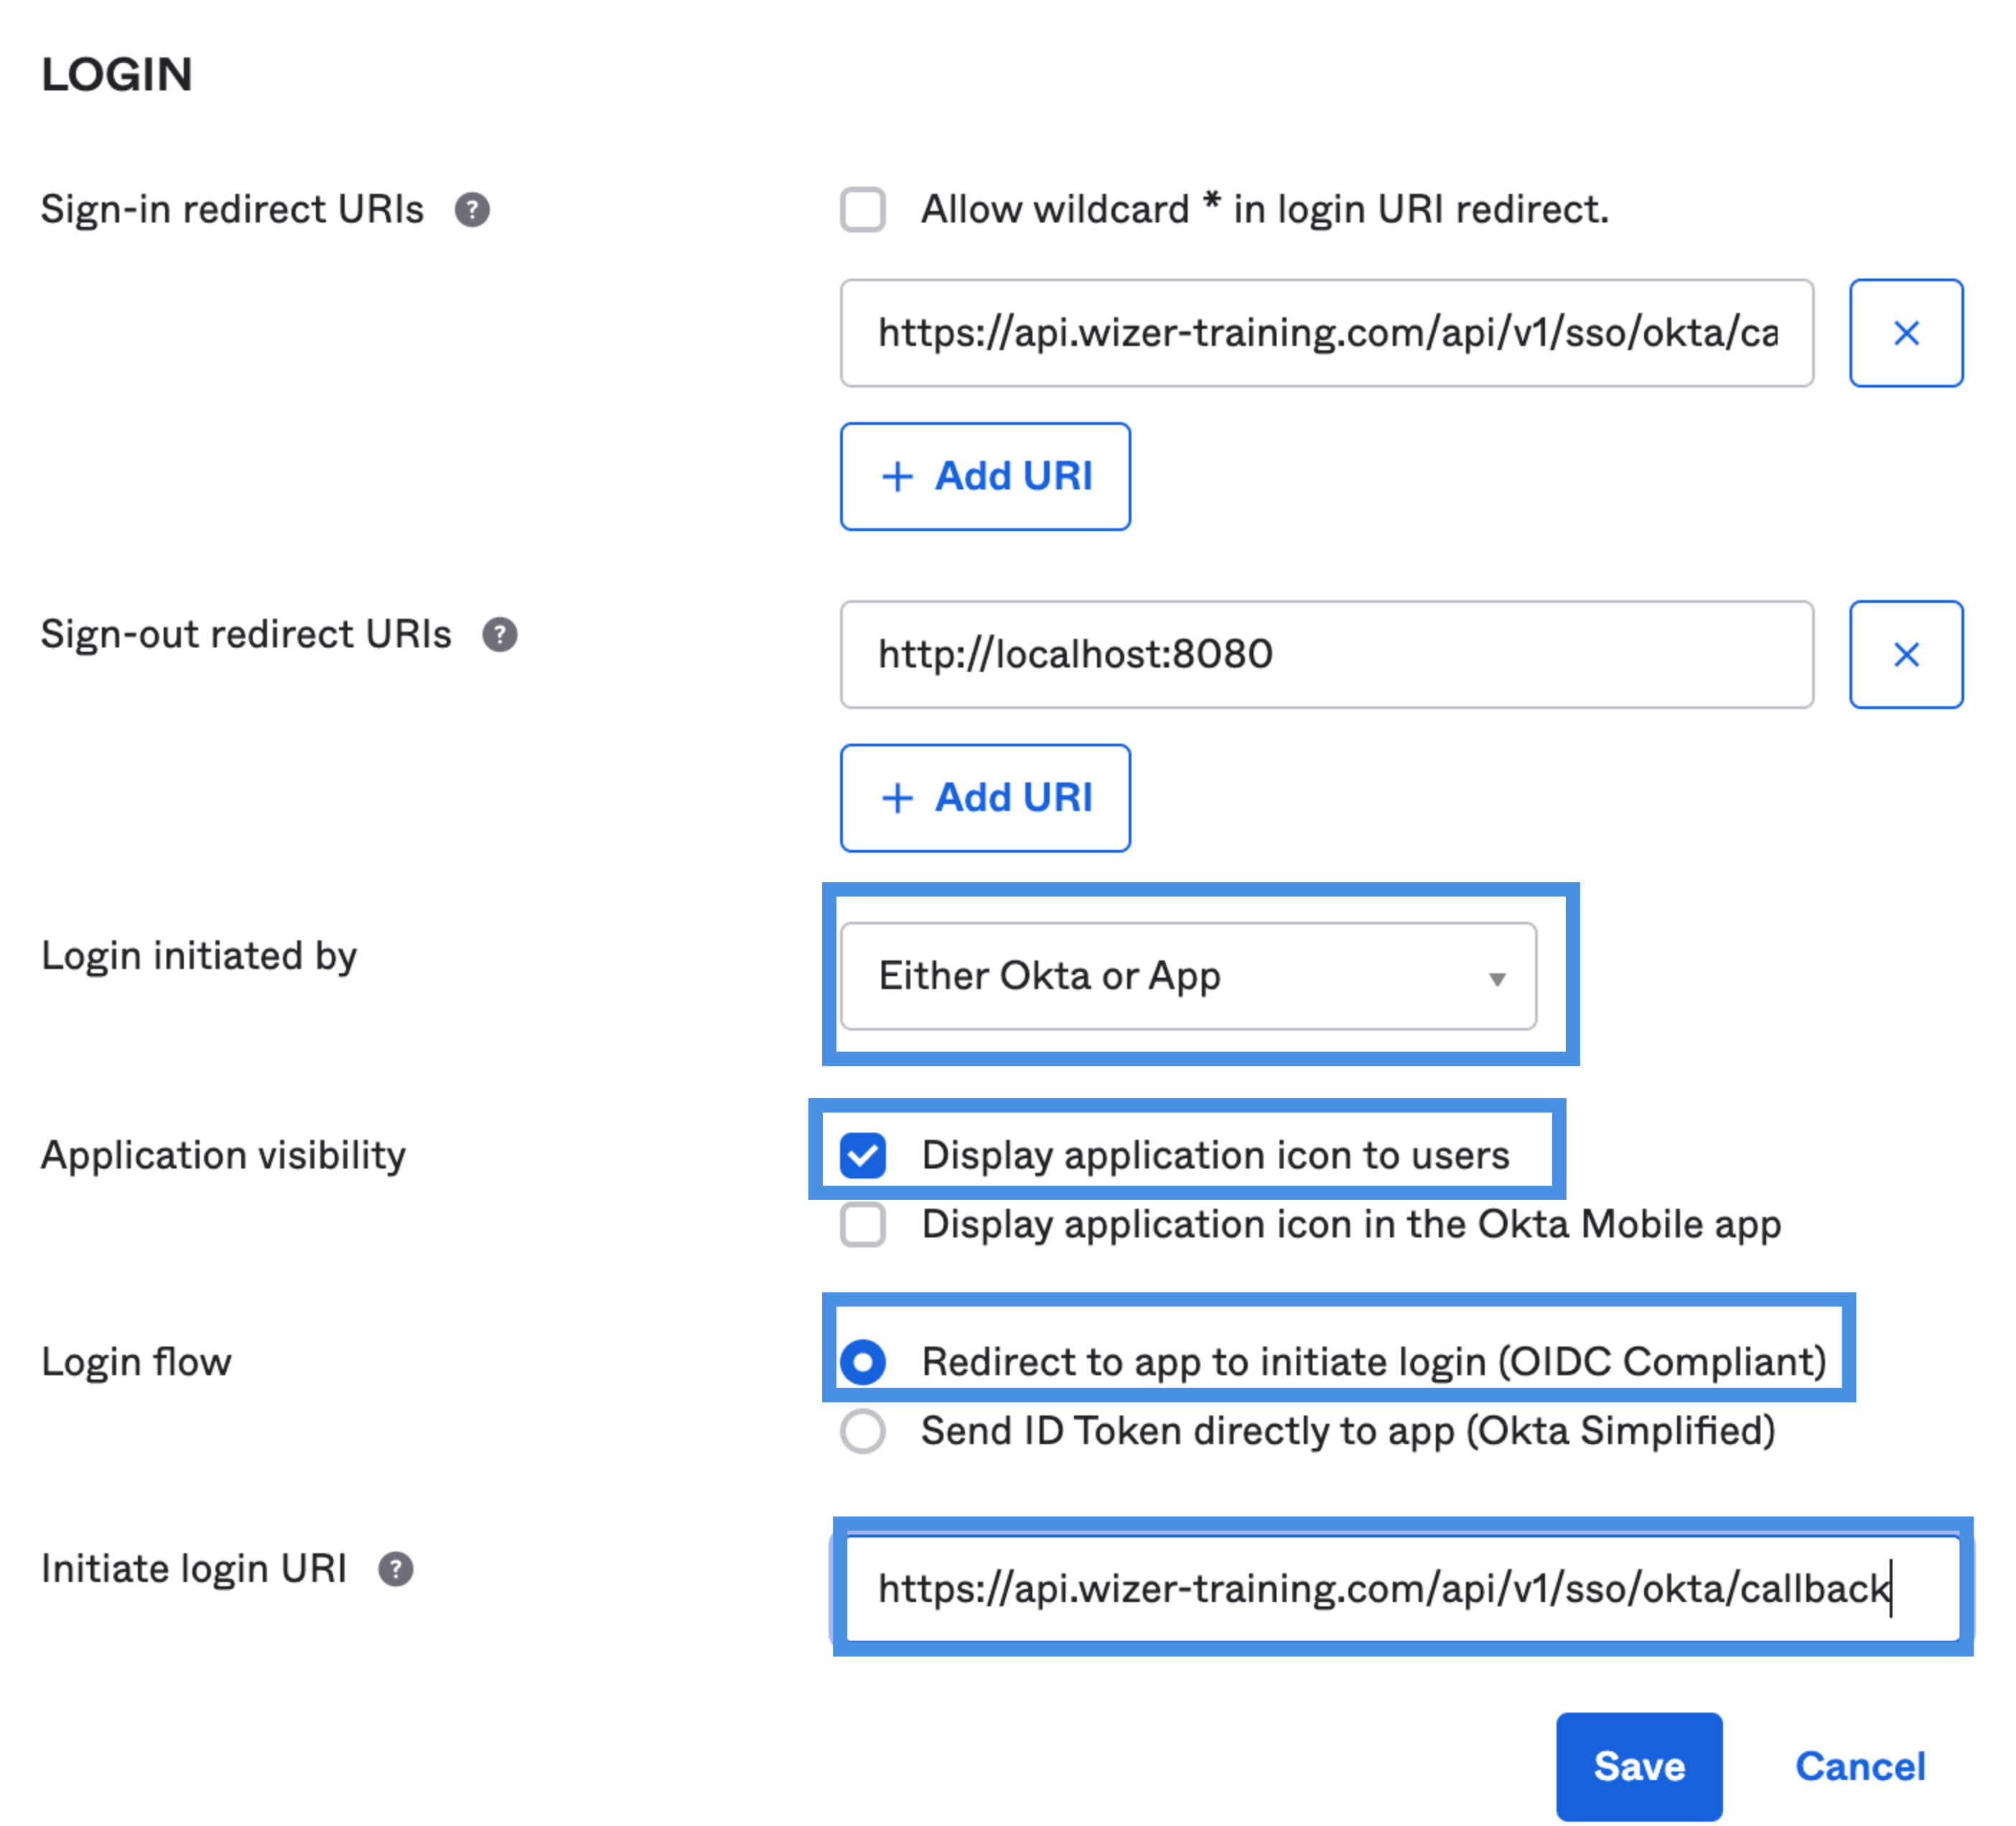
Login initiated by:
Application visibility:
✔ Display application icon to users
Login flow:
✔ Redirect to app to initiate login (OIDC Compliant)
Initiate login URL: https://api.wizer-training.com/api/v1/sso/okta/callback
Click Save.


3. Settings in Wizer Application
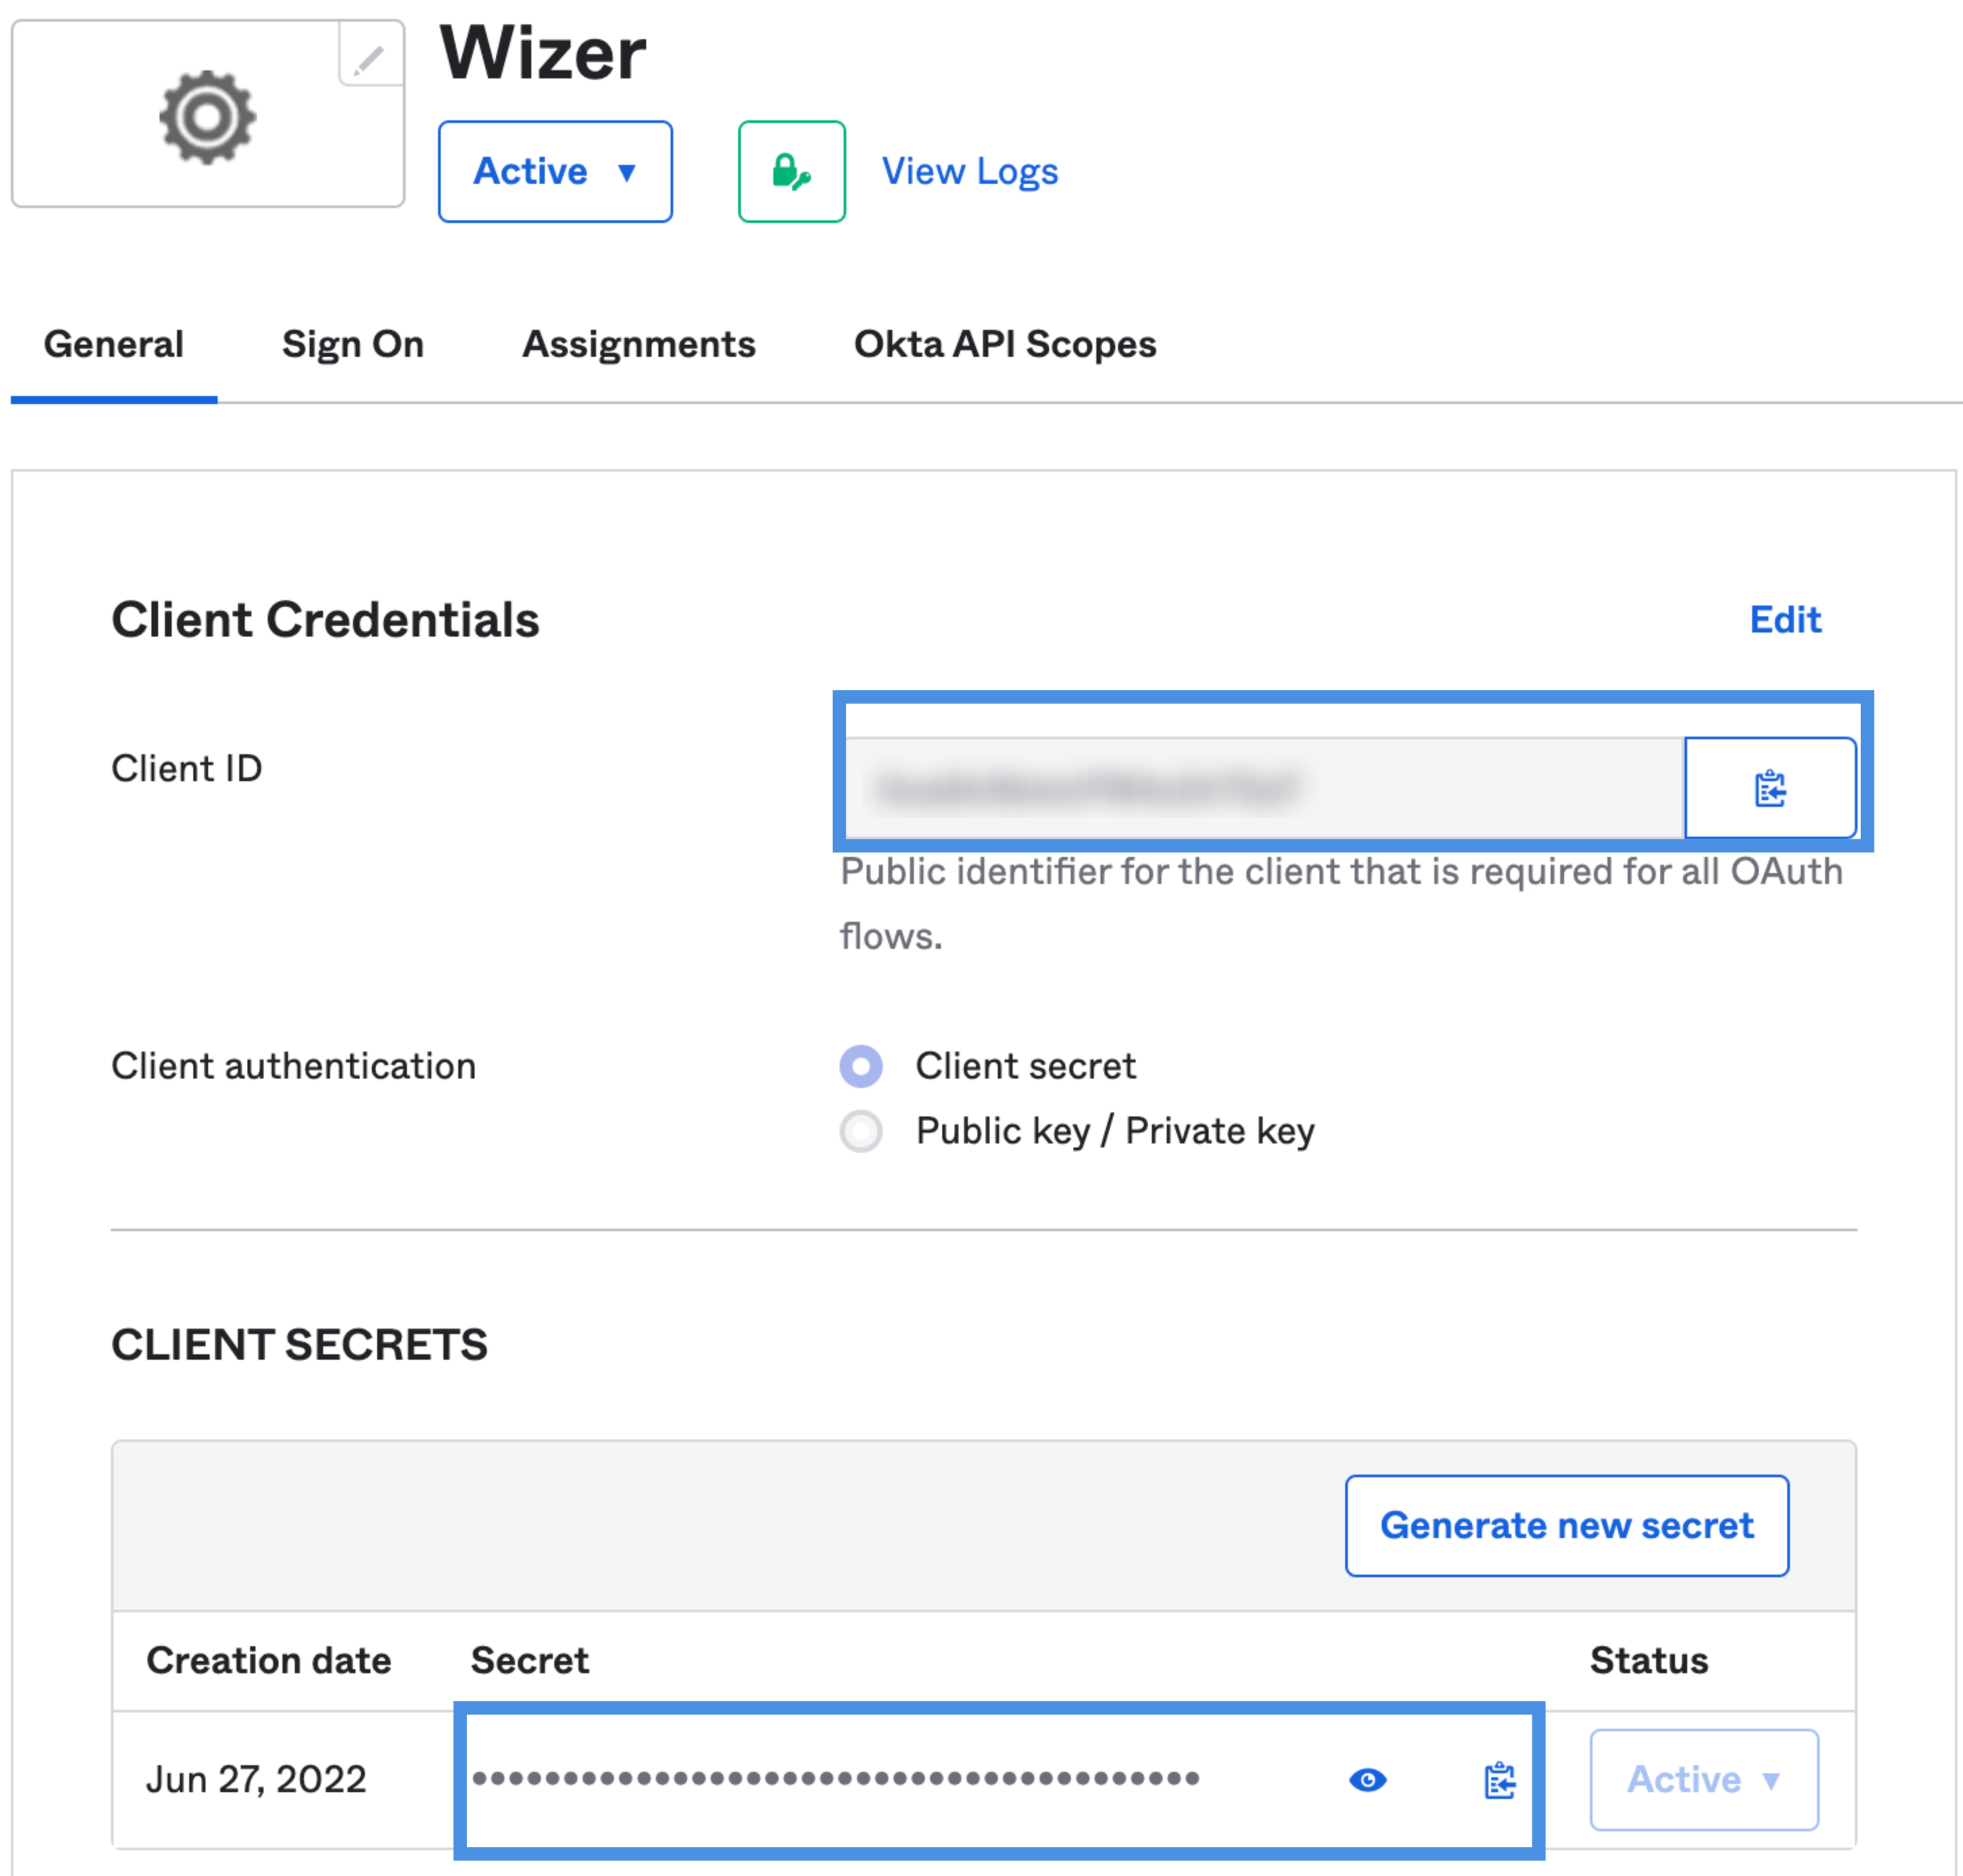
Copy Client ID, and Client Secret and paste them to settings in Wizer Application (https://admin.wizer-training.com/settings/single-sign-on)

Paste the Okta Domain from your Okta Org URL (Do not include https:// or the trailing slash!). Your org URL will look like this:
Example: mycompany.okta.com
Click Save.
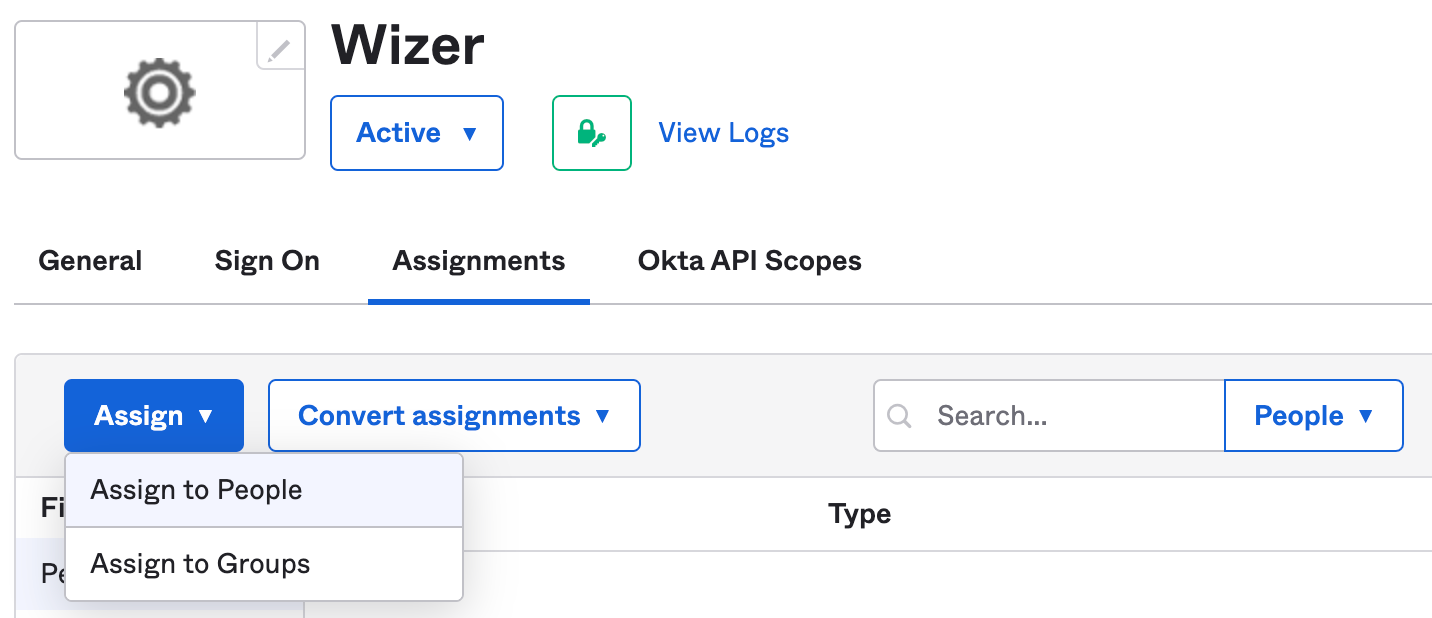
4. Assign users in Okta
Assign users to the Wizer application in Okta based on your organizational settings, so they can have access to it.
Please make sure the user assignment is the same when you configure SCIM automatic provisioning.

5. Test your Okta login
Log out if you are logged in Employee App (https://app.wizer-training.com). In the Wizer admin panel, click your SSO Link in the Okta tab https://admin.wizer-training.com/settings/single-sign-on.

You will be redirected to the Employee App.
Click Log in.
You will be redirected to your Okta login web page. Enter your Okta credentials. You should be redirected back to the Wizer Employee App and should be Signed In.
Step 2: Configuring the SCIM Automatic user provisioning
Now you can generate and configure a SCIM bearer token.

Click the link below to proceed with step 2 which opens in a new tab.
Okta SCIM - Automatic User Provisioning
You may also Enforce SSO. This feature allows configuring SSO user access to Wizer. When SSO is not enforced the users can sign in to Wizer with SSO and password by using the reset password flow. This is considered a security issue, as it contradicts the very essence of the SSO application. Now as an Admin you can Enforce SSO in Wizer UI and forbid password usage for SSO users. Non-SSO users will still be able to log in with the password.
Any questions? Please contact our support specialists at support@wizer-training.com.