Whitelisting for Google Workspace
Note that ALL the items listed below are required to be implemented, otherwise simulation emails will not be delivered as expected.
We recommend using DED (Direct Email Delivery) to improve reliability and delivery performance.
Here is our guide: How To Set Up DED for Google Workspace
Also keep in mind this is one step in the configuration process see the Wizer Phishing Simulation Checklist for more info.
Why Whitelist IP Addresses and Email Headers?
Whitelisting ensures the Wizer phishing simulation (PS) functions without issue and prevents PS emails from being automatically moved to the spam folder or notifying users about potential phishing emails. IP addresses and email headers are both required to be whitelisted.
Whitelist IP Addresses
The Wizer mail server IP addresses provided in this list (opens in a new tab) are required to be whitelisted to prevent Gmail from classifying the PS emails as spam/phishing. This needs to be done because Wizer PS emails are "phishing" by definition.
Steps to Whitelist IP Addresses
1. Log in to https://admin.google.com
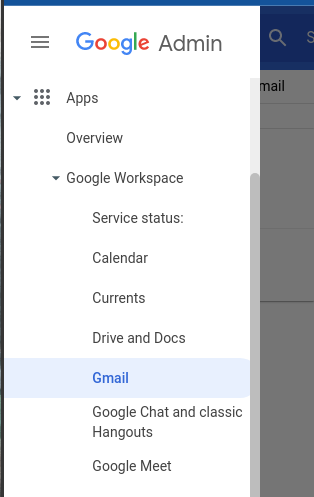
2. On the left side panel go to the Apps → Google Workspace → Gmail
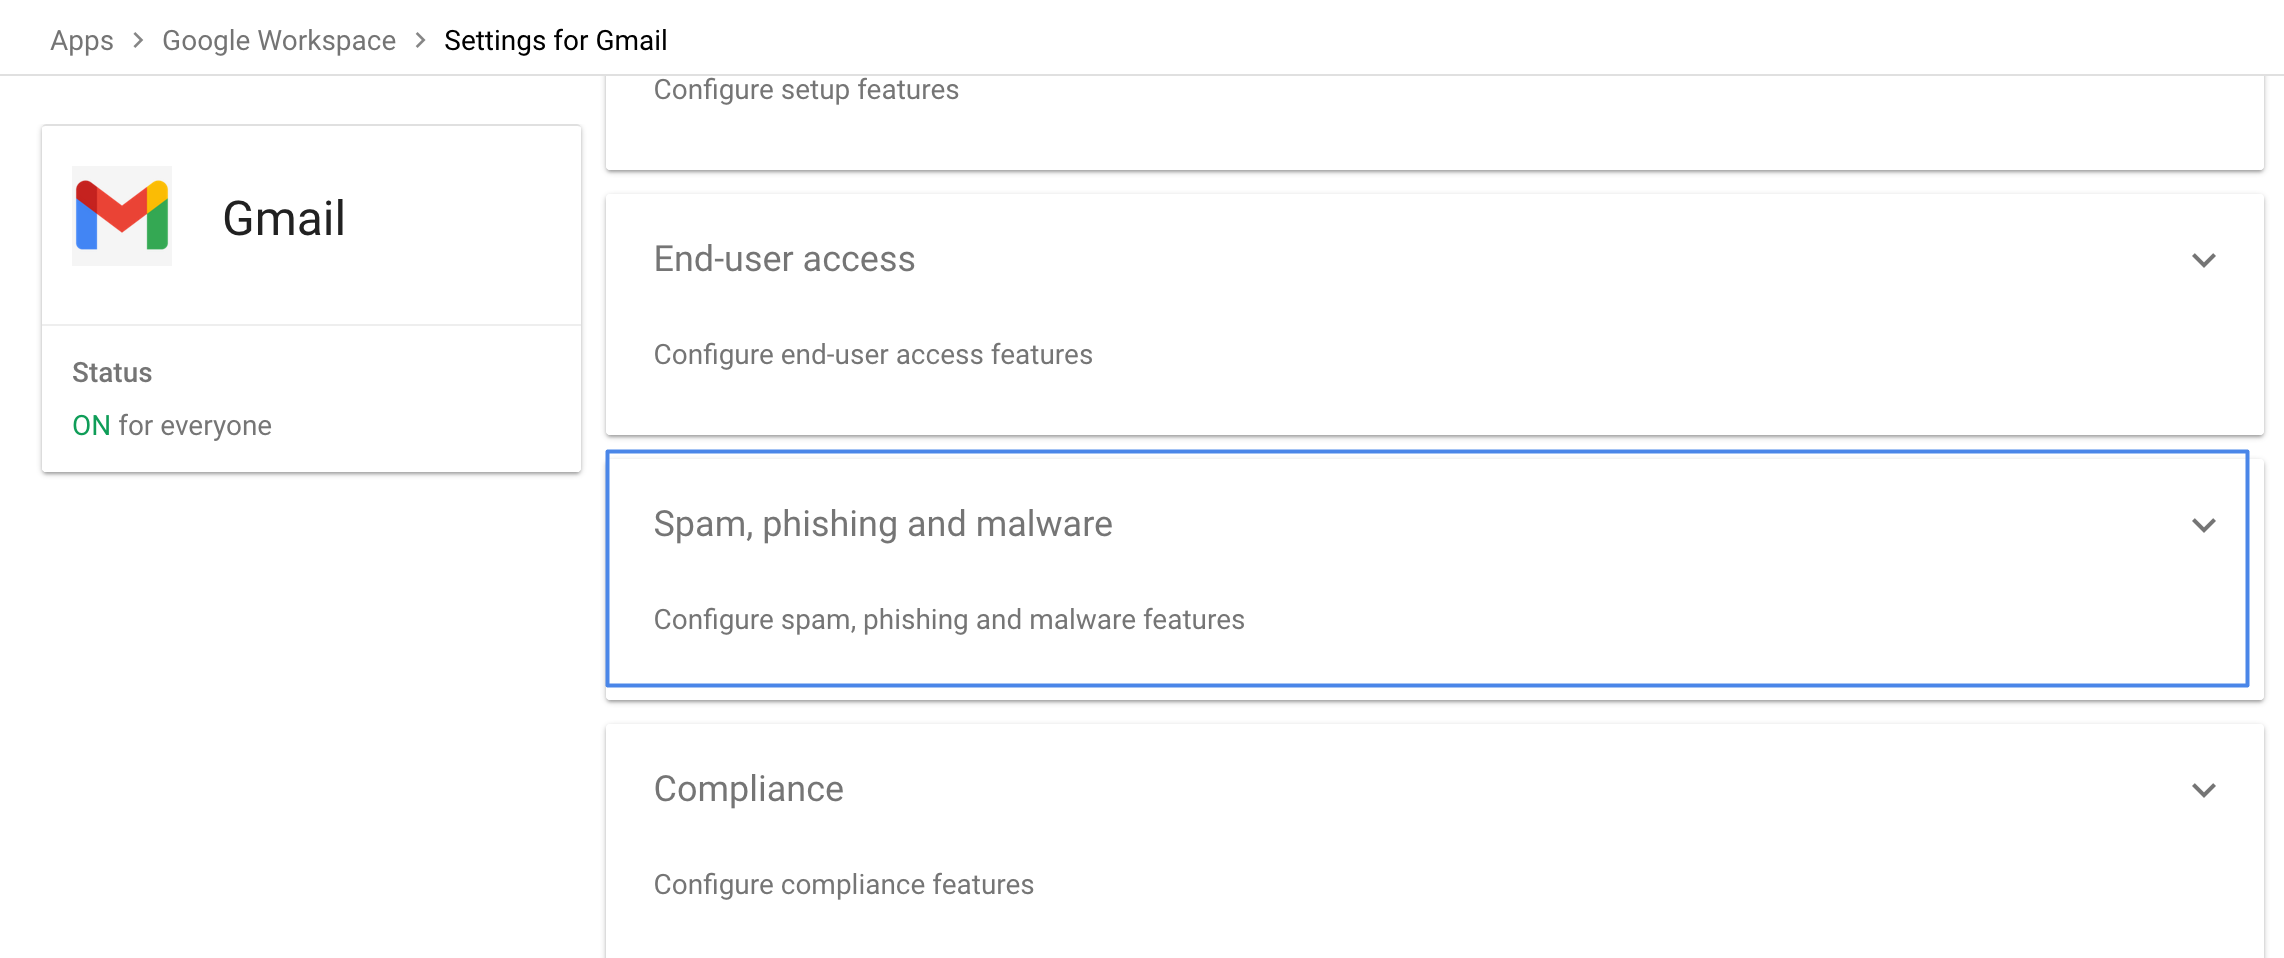
3. Select "Spam, Phishing, and Malware"
4. In the Email Allowlist section, enter the IP addresses from this list, separated by commas.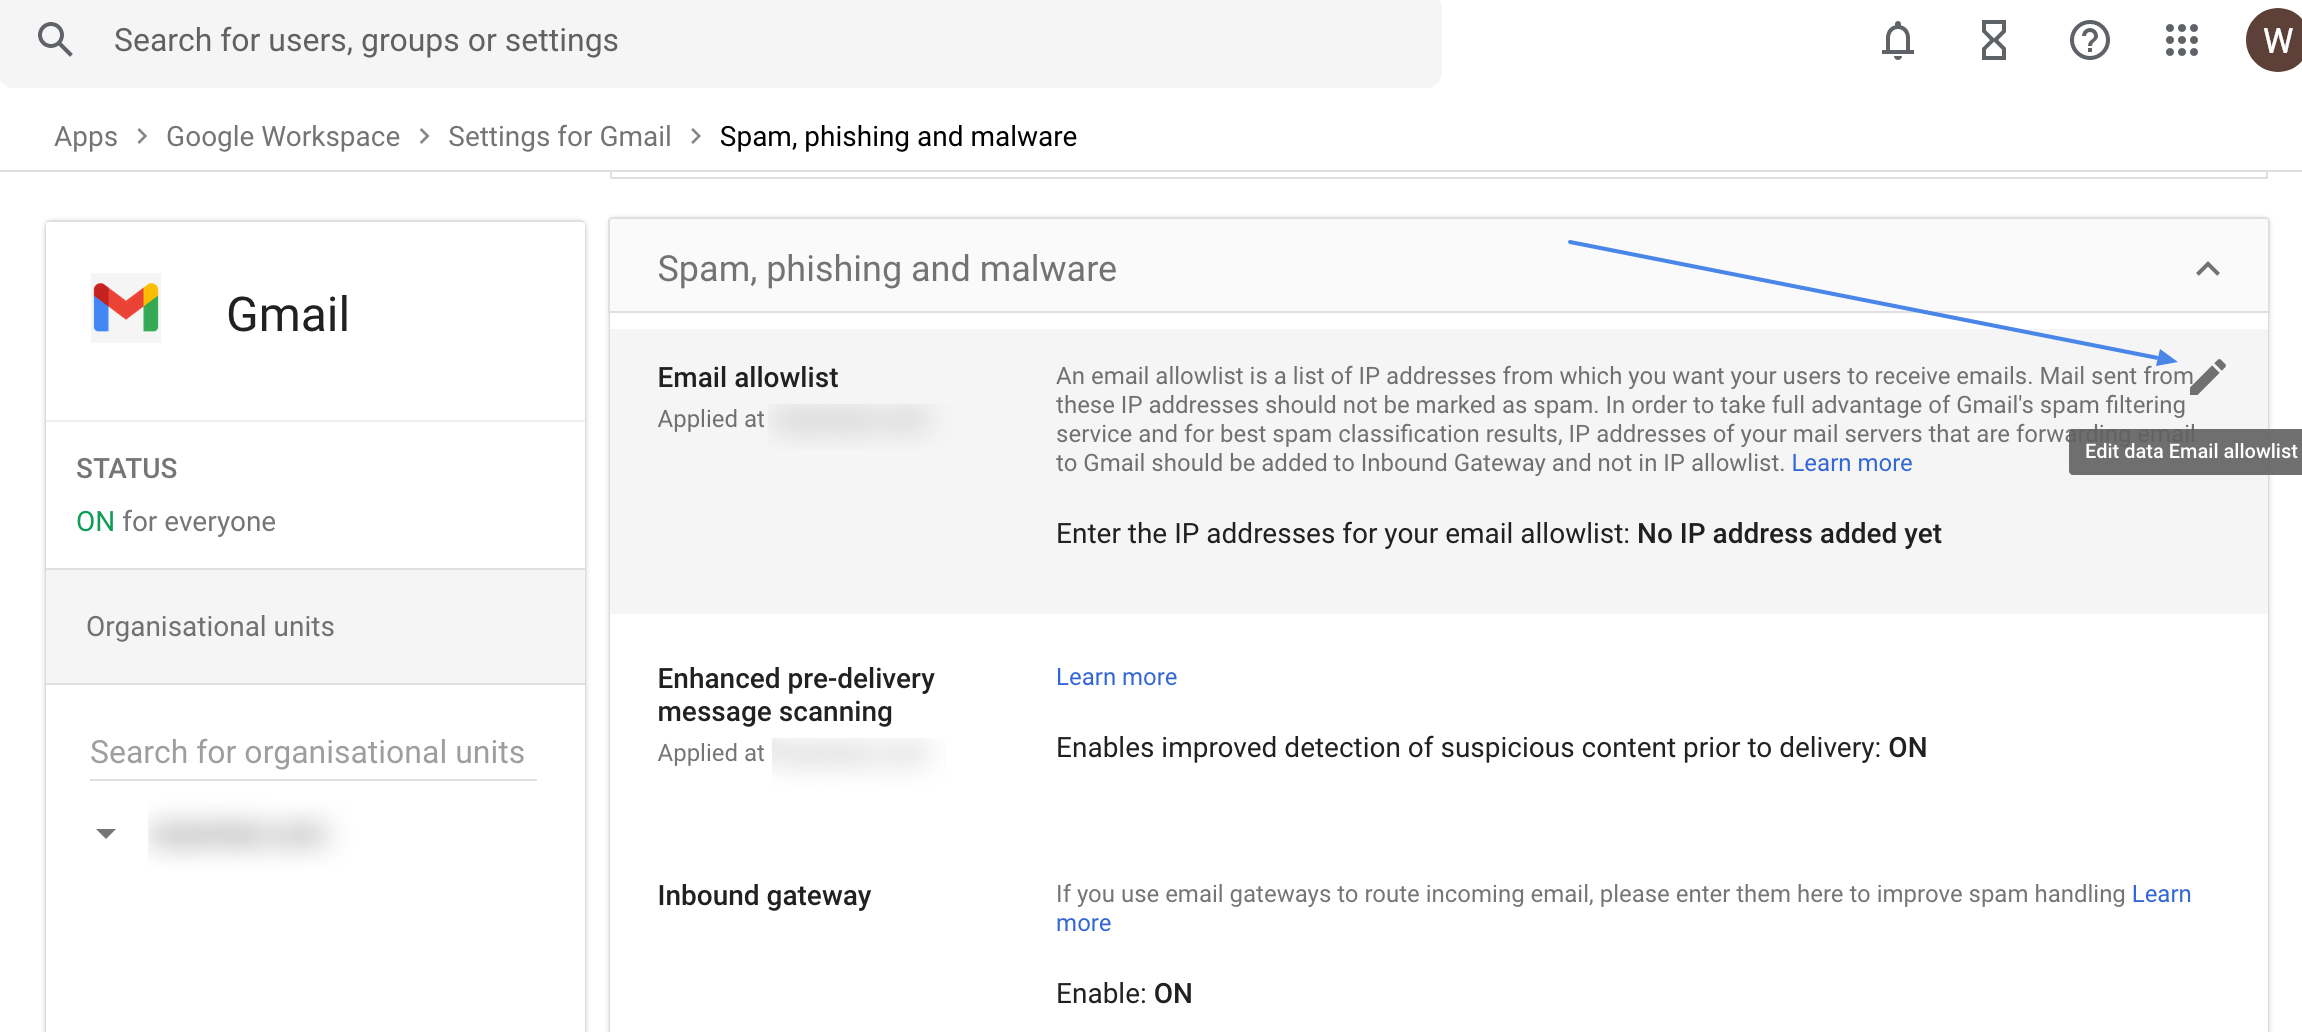
5. Navigate to the Inbound Gateway. Turn on the "Enable" checkmark
- Add the IP Addresses one by one from this list (opens in a new tab).
- Check the Automatically detect external IP (recommended)
- Leave the Reject all mail, not from gateway IPs option unchecked
- Check to Require TLS for connections from the email gateways listed above
- Check Message is considered spam if the following header regexp matches
- Enter the following text for the Regexp: dfgkhbjshfvolib3289yhb
- Select the Disable Gmail spam evaluation on mail from this gateway; only
use the header value option
Refer to the screenshot below which depicts how the fields are populated with multiple IPs, the relevant list of IP addresses is always represented in the abovementioned list: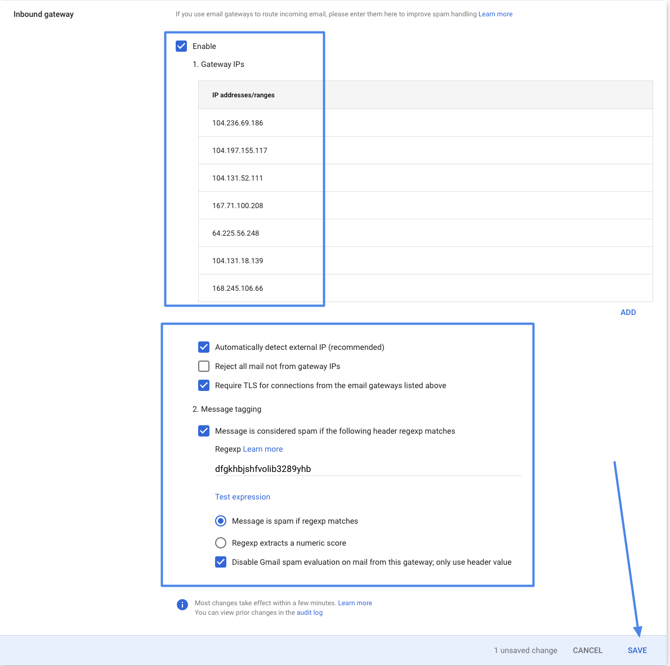
Whitelist Email Headers
Wizer PS emails contain a special header. Gmail must be configured to search for Wizer PS
headers and to ignore them if found, allowing the user to receive the PS email in their inbox.
Steps to Whitelist Email Headers
1. Go to General "Settings for Gmail"
2. Navigate to the "Compliance" section
3. Navigate to the "Content Compliance" section and click "CONFIGURE"
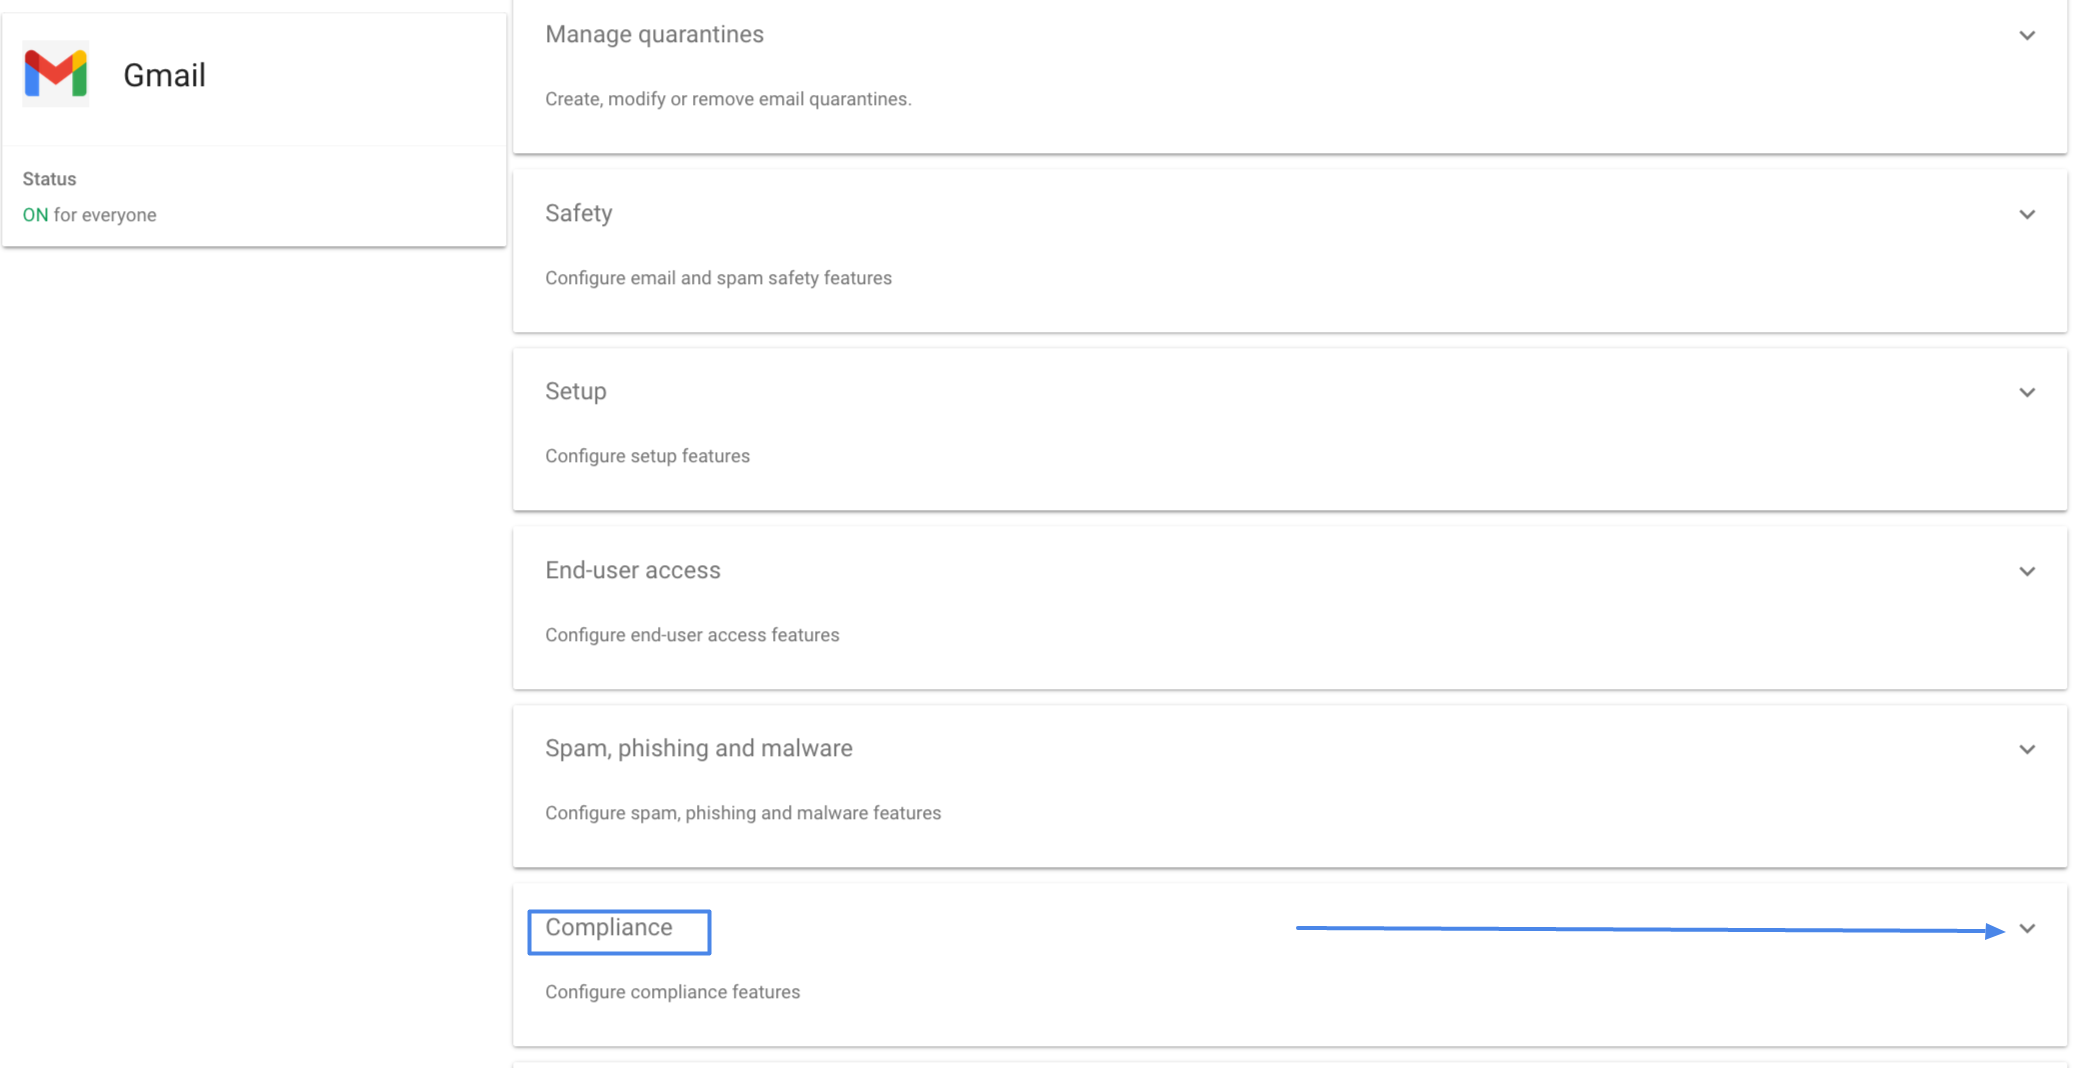
4. Create any suitable name for this content compliance (For example,* Wizer phishing content compliance)
5. Under the Email messages to affect field check "Inbound" and "Internal - receiving"
6. Click "ADD" under the Add expressions that describe the content you want to
search for in each message
- In the drop-down menu, select "Advanced content match"
- In the Location dropdown, select "Full headers"
- Leave "Contains text" in the Match type dropdown
- In the Content field, enter the text "X-TestPhish"
- Click SAVE
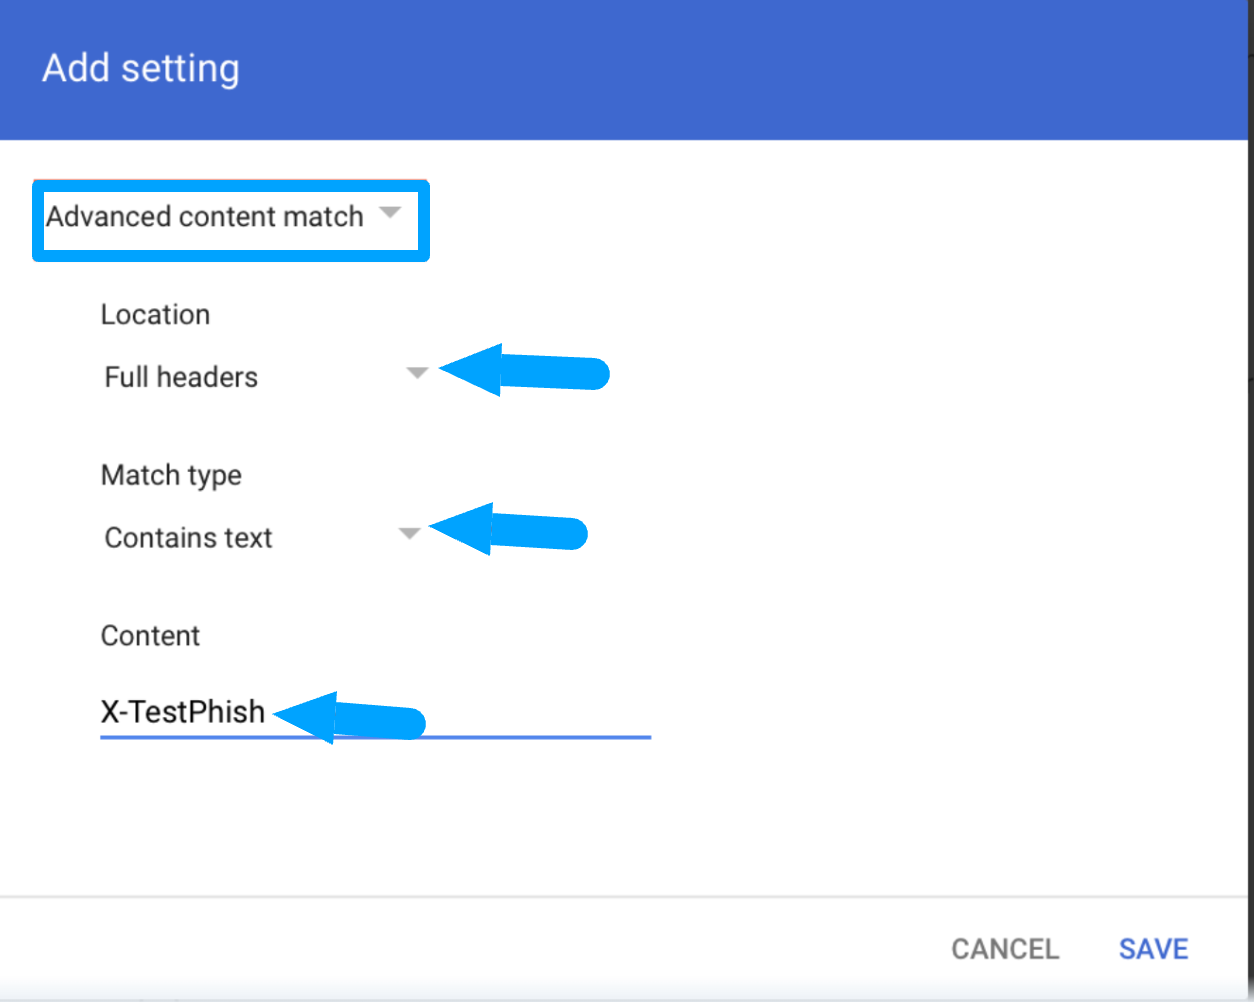
7. In If the above expressions match, do the following field, select Bypass spam
filter for this Message under Spam
8. Your final Content Compliance Setting screen should look like this: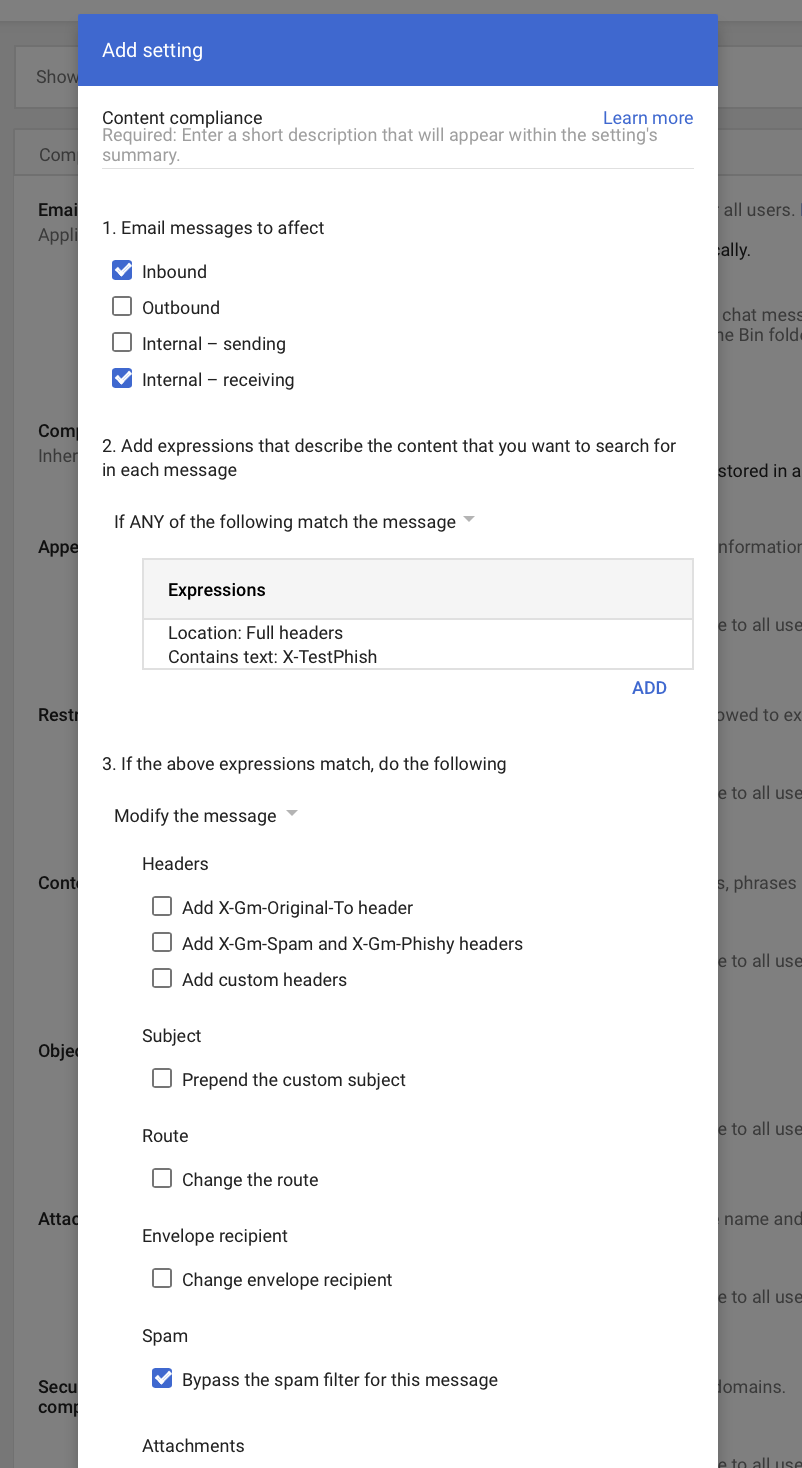
* Please do not forget that applying changes can take some time. According to Google, it
takes up to 24 hours, but typically, it should not take more than 1 hour.
Please note that your simulation emails might arrive with a spam banner,
to avoid this please see this article
Congratulations! You have just configured whitelisting!
Error banners can be removed by following the steps from the article Phishing Simulation Spam filter
The images are not shown in the simulation emails?
1) Please remove our IPs from the inbound gateway if you have any 3rd party.
2) If not, go to the Google admin console Apps >Google Workspace >Settings for Gmail >End user access>Image URL proxy allowlist and add the:
"wizer-unlayer-production.s3.us-east-2.amazonaws.com/"
"s3.us-east-2.amazonaws.com/wizer-unlayer-production/"
"ci3.googleusercontent.com/"
"ourlogin.co.uk/
"nlmns.com/"
"help-desc.com/"
"verificator.net/"
"mylogin.ltd/"
And the Landing page domains that are listed here.
.png?width=468&height=193&name=image%20(11).png)
3) If it doesn't help, please check if any 3rd party email validation system/proxy does the delivery on your end. If so please ask them to remove our IPs from the inbound gateway section.
.png?width=445&height=295&name=image%20(12).png)
If you are getting a spam gray banner on your emails follow this guide to fix it:
→ Remove Spam Filter Google
Any questions? Please contact support@wizer-training.com