When a phishing campaign is underway, users face a choice: ignore the email, fall for the trap, or report the suspicious message.
The Report Phishing Extension adds a dedicated button to the email message taskbar. This allows users to easily report suspicious emails, helping your organization assess the effectiveness of its anti-phishing training and identifying areas where users may need additional support.
Part 1: Configuring the Wizer Admin Console
Before installing the extension in Microsoft 365, you need to configure where the reported emails will be sent.
- Navigate to the Phishing Simulation tab in your Wizer Admin Console.
- Click on the Setting button.

- In the Report To Email field, enter the email address where reported emails should be forwarded.
Note: We recommend using a shared inbox or group email (e.g.,
incident-response-team@yourdomain.comorreportedemail@yourdomain.com). - Click Save.

Microsoft 365 Defender Integration (Optional)
If your organization uses Microsoft 365 Defender, you can route user-reported emails directly to Defender’s Submissions portal so your SecOps team can triage them efficiently.
How to enable:
- Go to Phishing → Settings (the same page as the "Report To Email" settings).
- Scroll down to 4. Microsoft 365 Defender Integration.
- Toggle the integration On.
- Enter your SecOps Email (a shared mailbox or group is recommended).
- Click Save.
Part 2: Installing the in Office 365
Once your Wizer console is configured, an administrator must deploy the app to your organization's Microsoft environment.
- As an Admin, navigate to the Phishing Report Button in the Microsoft Marketplace found here: Phishing Report Button for Microsoft 365
- Click Get it Now. You will be redirected to the Integrated Apps section of the Microsoft 365 Admin Center (requires admin login).
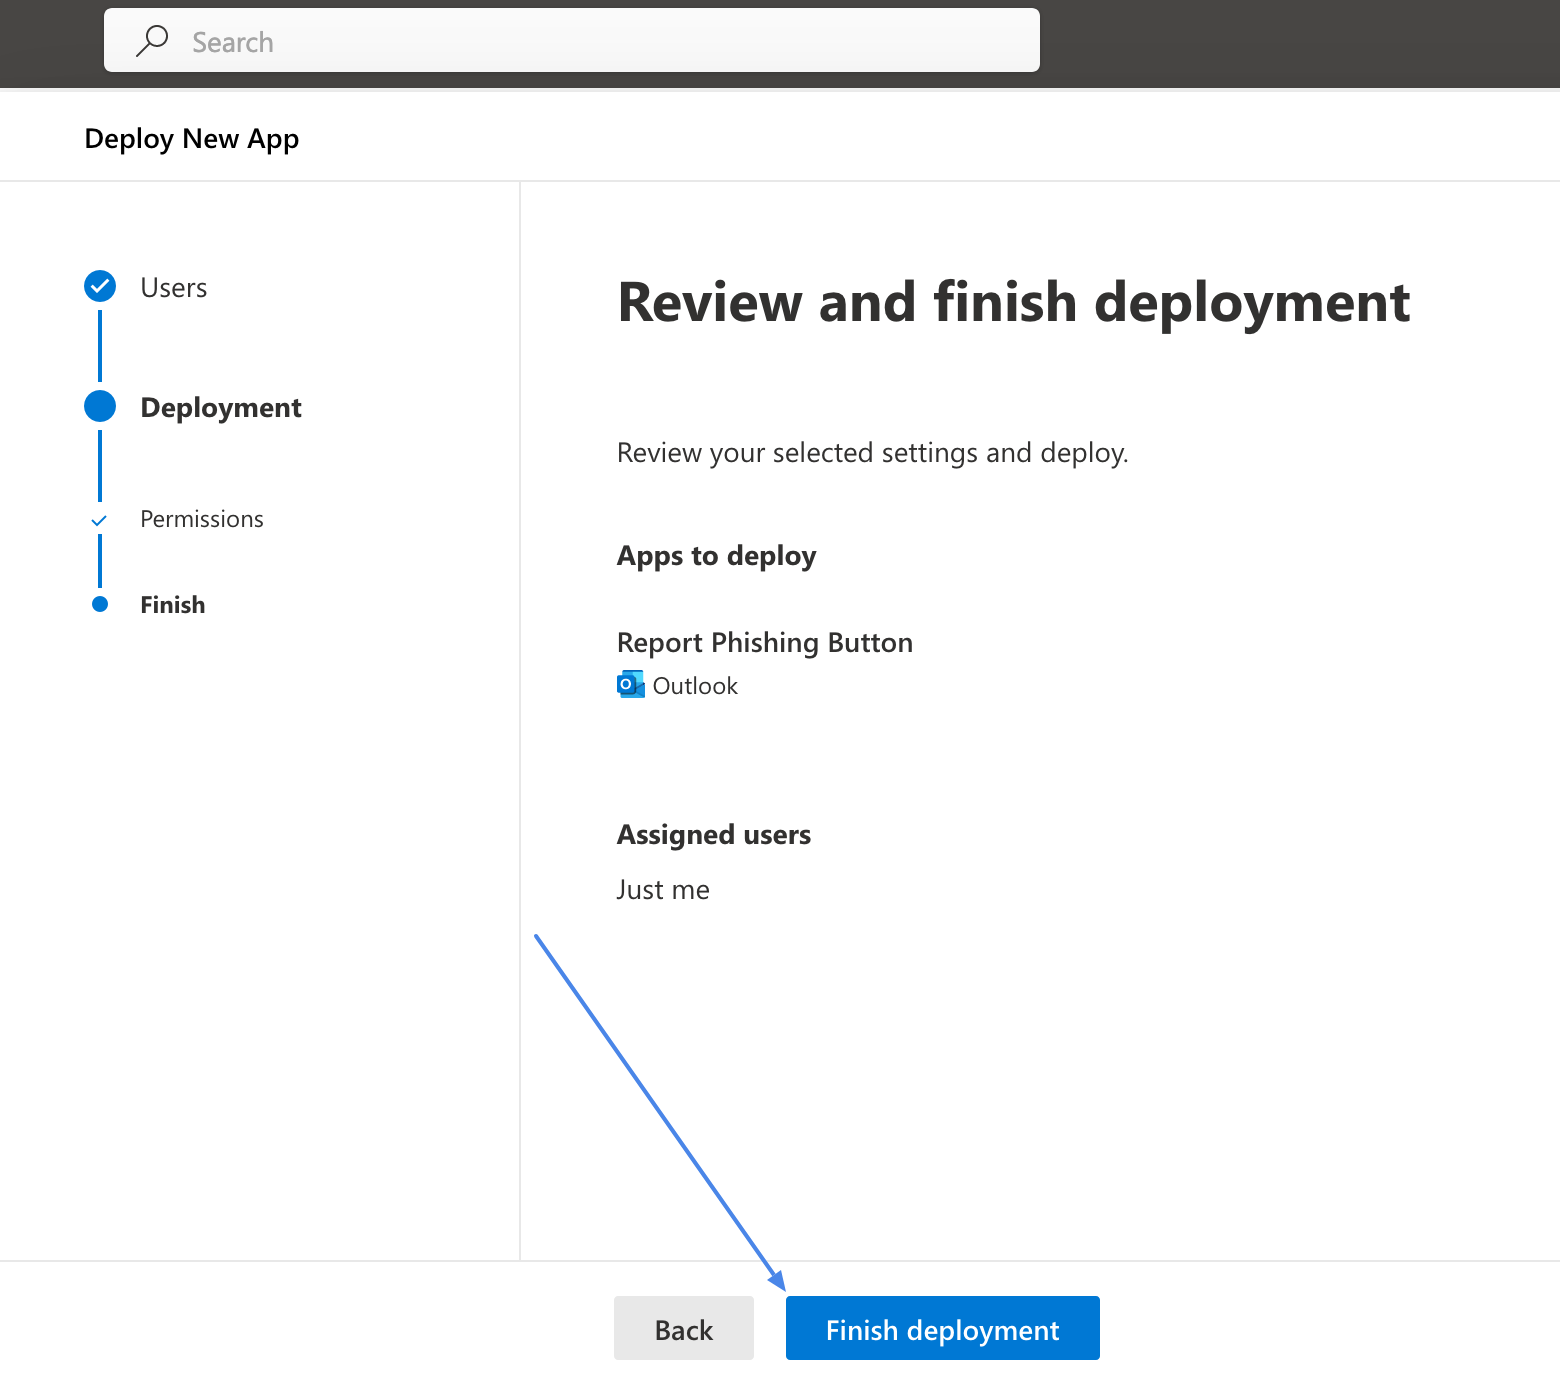
- Follow the prompts to deploy the app. You will be asked to select the specific user(s) or groups who should receive the extension.
- Accept the app permissions and click Next.
- Proceed to finish the deployment.
Pinning and Customizing the Button
Once deployed, users should see the Wizer extension (a hook logo) when they open their emails.
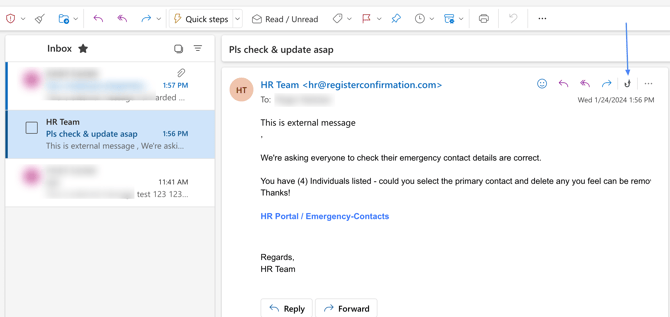

If users cannot see the button due to a cluttered taskbar, they can pin it manually (available for both Web and Desktop versions of Outlook):
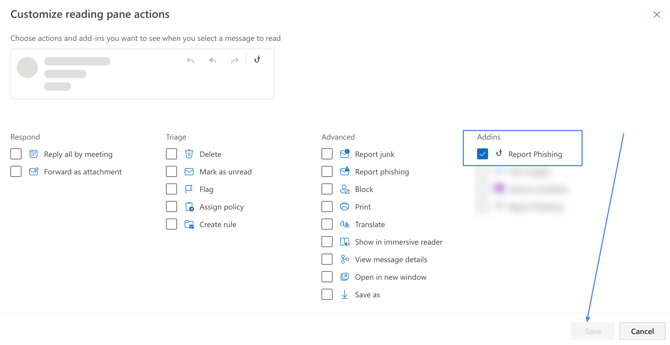
- Select any email message.
- Click More actions (the three dots) and select Customize actions.
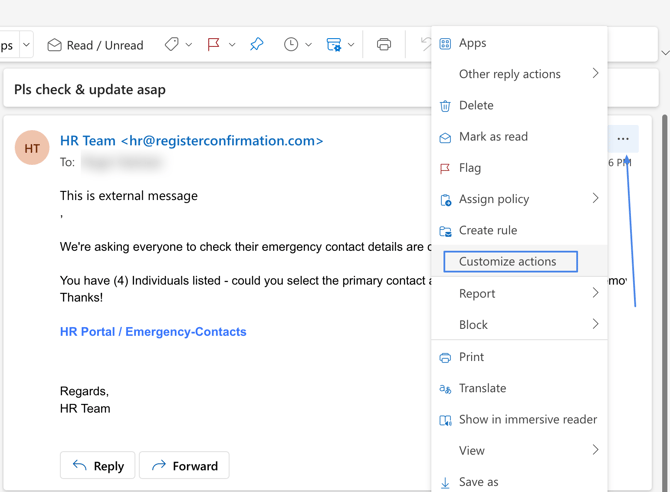
- Check the box next to the Report Phishing extension from Wizer.
- Click Save.
Part 3: Approving App Updates
We constantly work to improve our product, meaning new extension versions are released periodically with enhanced functionality. Because Microsoft does not update these apps automatically for users, admins must approve them manually.
- Navigate to the Integrated Apps section in the Microsoft 365 Admin Center.
- Select the Wizer app from the list. A window will inform you of any pending updates and provide an option to install them.
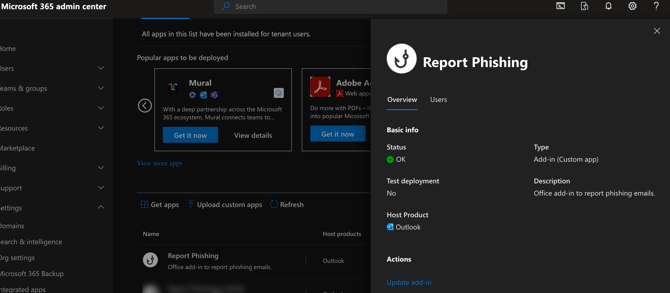
- Review the update summary and proceed with the installation. The latest version will be deployed based on your initial deployment settings.
-png-3.png?width=670&height=702&name=image%20(1)-png-3.png)
Part 4: User Interaction Scenarios
When a user clicks the Wizer Report Phishing button, the system responds differently based on the type of email and the user's status.
| Scenario | System Response & Actions |
| Wizer User reports a Wizer Phishing Simulation |
Message: "Well done! It was a simulation phishing email." Forwarding: Email is not forwarded to the 'Report To' address. Admin View: Status marked as 'Reported' in the campaign report. Handling: Follows your Report Email Handling Settings. |
| Wizer User reports a Real (Non-Wizer) Email |
Message: "Thank you for doing your part to keep our organization safe." Forwarding: Email is forwarded to the 'Report To' address. Defender: Submitted to Defender → Submissions (if enabled). Handling: Follows your Report Email Handling Settings. |
| Non-Wizer User reports ANY Email |
Message: None (The extension will not react to clicks). Forwarding: Email is not forwarded to the 'Report To' address. |
Part 5: Troubleshooting & FAQs
First-Time Admin Approvals
On the first use of the Report Phishing button, administrators will see a permission request prompt.

If a regular user attempts to report an email before these permissions are approved, they will be prompted to send a request to their administrator. The button will remain unavailable for all users until an admin grants the necessary permissions.

The Phishing button is not visible. How do I fix it?
- Pin the extension: The user may simply have too many extensions. Follow the "Pinning and Customizing" steps above.
- Update the extension: Ensure the admin has approved any pending updates in the M365 Admin Center.
- Reinstall: Remove and redeploy the extension following the main installation guide.
- Check permissions: Ensure the admin is allowed to upload custom Outlook apps.
Why is the button not working in Old Outlook (2019 or earlier)?
The Report Phishing button is not supported in Outlook 2019. Microsoft has deprecated an old API, and modern Microsoft Graph API authentication methods do not work out-of-the-box in older versions of Outlook. We have updated the UI to display "Your version of Outlook is not supported."
Report Phishing Button Checklist
1. Check Compatibility
Ensure you’re using a supported version:
- Outlook 2013 or later (Windows)
- Outlook 2016 or later (Mac)
- Outlook on the Web
- Note: Office LTSC 2021 may have limited support for modern add-ins.
2. Clear Cached Permissions and Cookies
To rule out session issues, try clearing browser cookies or opening the add-in page in an Incognito/Private tab.
3. Permissions Issue (Common in M365 Enterprise/Business)
Installation might be blocked by an admin policy. To fix this:
- Open Microsoft 365 Admin Center → Settings → Org Settings → Services → User-owned apps and services. Ensure users are allowed to install Office Store add-ins.
- Check the Integrated Apps section to approve the add-in.
- Check Azure Active Directory → Enterprise Applications to ensure it isn't blocked at the AAD level.
4. Try the Outlook Web App (OWA)
If local Outlook clients fail, OWA often works. Click the "Open in Outlook Web" button from the error screen to test if the add-in loads.
5. Check Browser Console for Errors
Press F12 and go to the Console tab to check if any CSP, CORS, or API errors are blocking the install.
6. Tenant Restrictions or CSP Policies
If you are under a CSP (Cloud Solution Provider) or heavily restricted tenant:
- Ask your IT admin to review Office Add-ins policies and Microsoft Defender settings (ensure phishing add-ins aren't blocked).
- If using Defender integration, ensure SecOps can access Microsoft 365 Defender → Submissions, and that add-in permissions are approved in Integrated Apps.
Still need help?
If you have any questions or the extension is still not operating as intended after validating your configurations, please contact our Support Team by emailing us at support@wizer-training.com.