This article describes instructions that handle Step 2: Configuring the SCIM Automatic user provisioning
Requirements:
-
Configured OneLogin SSO application. Users won’t be able to log in without it
-
SCIM bearer token that will be provided by the Wizer team
-
OneLogin administrator account
Instructions for SCIM application setup:
The SCIM application must be set up for OneLogin Provisioning (users and department synchronization) to work. Users will continue to use the SSO application created previously to login.
Instructions:
-
Log into the OneLogin Administration Dashboard https://www.onelogin.com
-
Click the Administration Tab

-
Click Applications -> Applications -> Add App

-
Find the SCIM Provisioner with SAML (SCIM v2 Enterprise) from the search field and click on it
Make sure you pick “SCIM v2 Enterprise” version!
-
Setup a Wizer SCIM application:
-
Enter a name for your application in the Display Name field: Wizer (Provisioning only)
-
Turn off visibility
-
Click Save
-
-
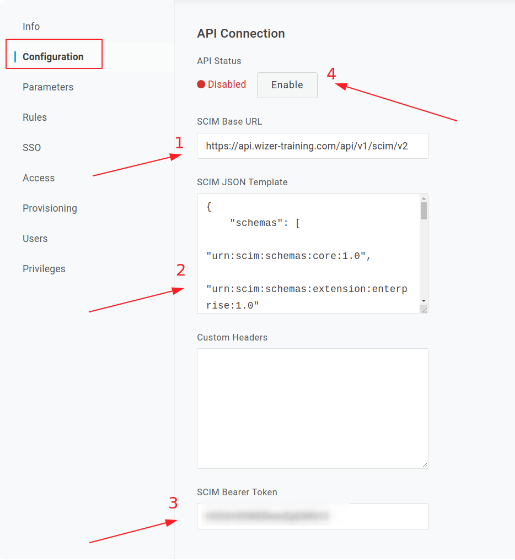
Under the Configuration Tab, enter SCIM Base URL and SCIM Bearer Token:
-
(1) For SCIM Base URL enter: https://api.wizer-training.com/api/v1/scim/v2
-
(2) For SCIM JSON Template enter Enterprise User Schema:
{
    "schemas": [
        "urn:scim:schemas:core:1.0",
        "urn:scim:schemas:extension:enterprise:1.0"
    ],
    "userName": "{$parameters.scimusername}",
    "name": {
        "familyName": "{$user.lastname}",
        "givenName": "{$user.firstname}",
        "formatted": "{$user.display_name}"
    },
    "emails": {
        "value": "{$user.email}",
        "type": "work",
        "primary": true
    },
    "title": "{$parameters.title}",
    "urn:ietf:params:scim:schemas:extension:enterprise:2.0:User": {
        "department": "{$parameters.department}",
        "manager": {
            "managerId": "{$parameters.external_manager_id}",
            "displayName": "{$user.manager_firstname} {$user.manager_lastname}"
        }
    }
}
For now, the Wizer application synchronizes only first name, last name, email, and department fields. However, we can add support of other fields later, so it’s better to leave the schema unchanged.Optional: If you don’t want to synchronize user departments with Wizer departments you can turn it off by deleting the “department” field from mapping. -
(3) For the SCIM Bearer Token enter the value that was generated in the Wizer admin console
-
(4) Enable API status
-
Click Save
-
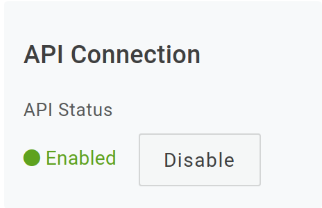
If all went OK, the API status should be changed to Enabled:
-
-
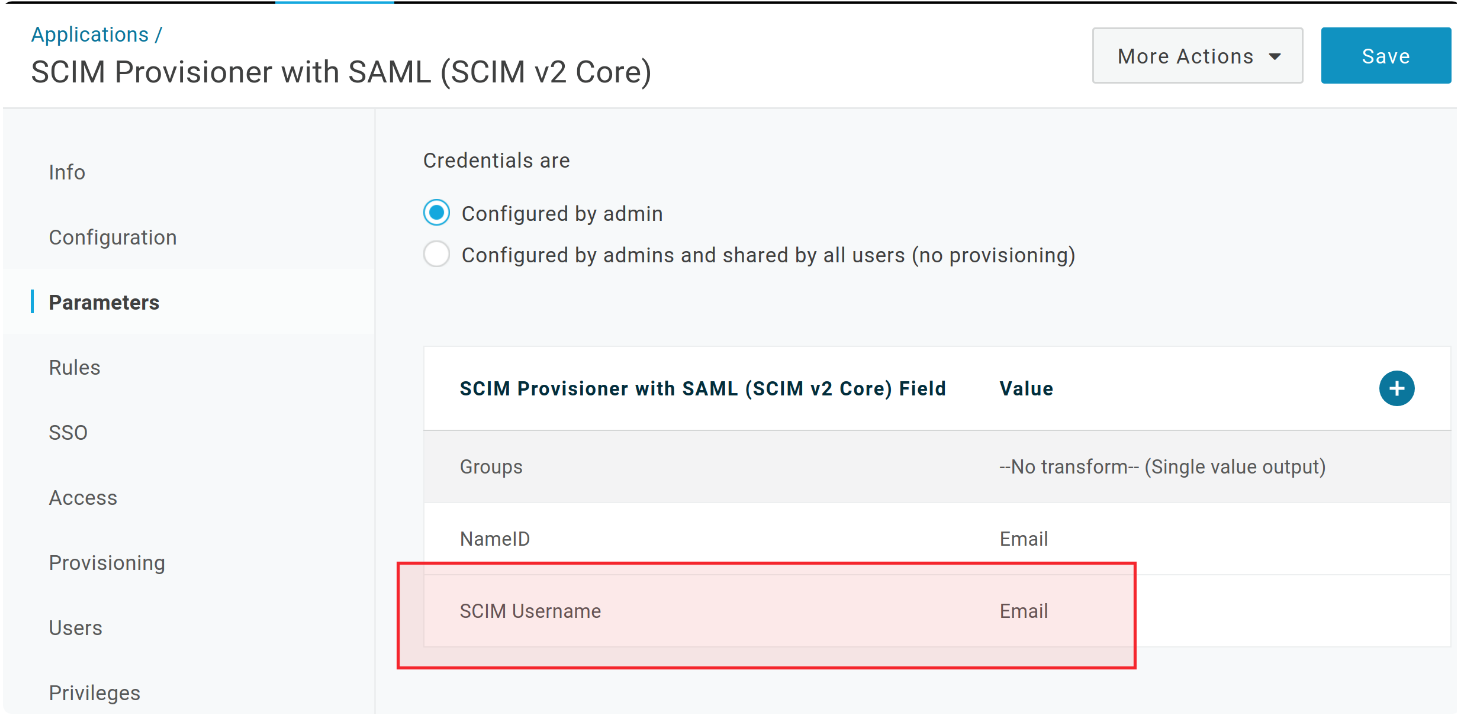
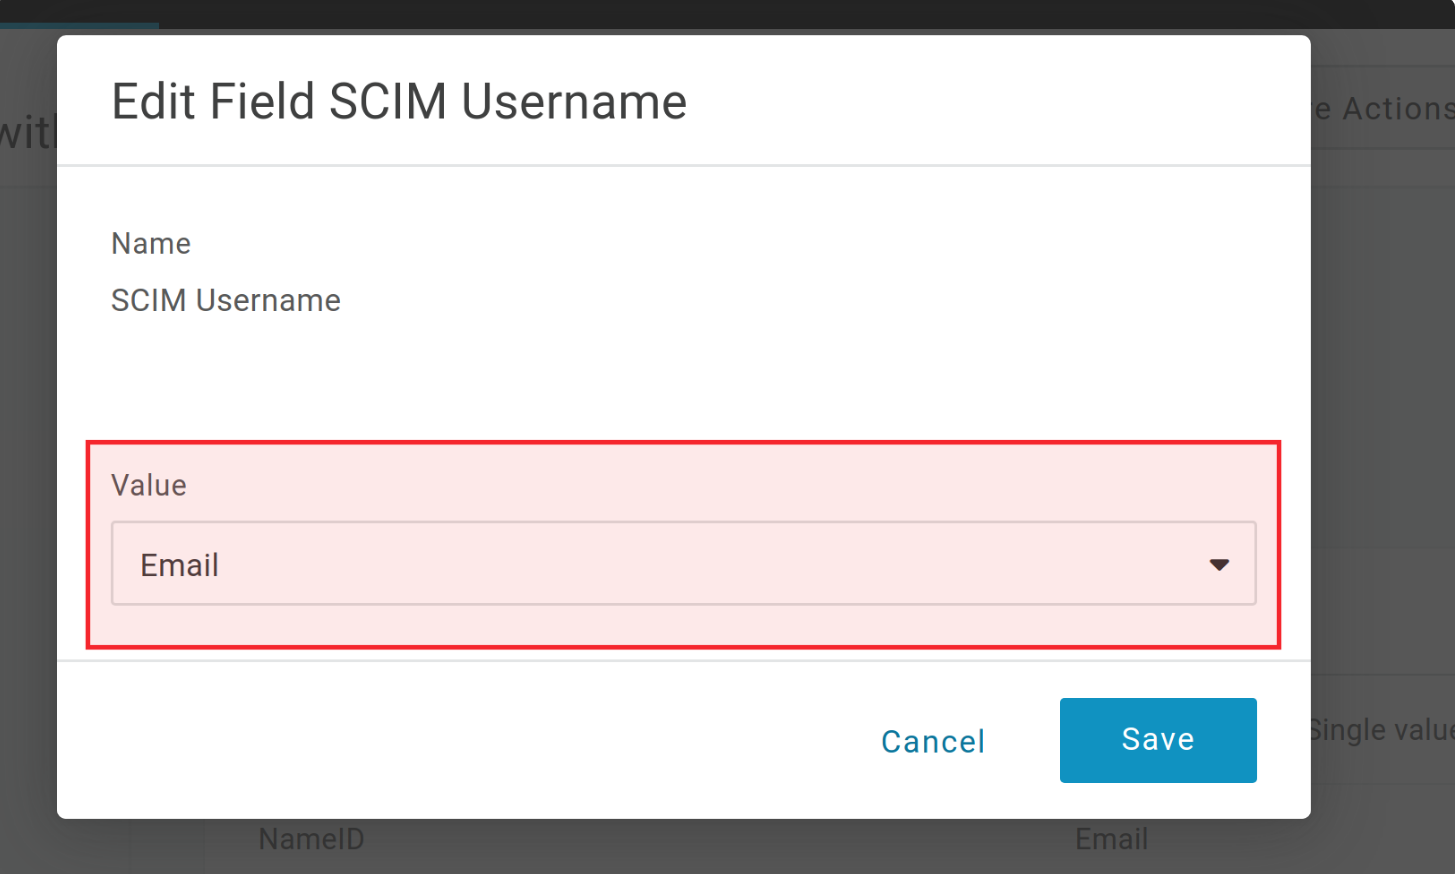
Under the Parameters Tab:
-
Change SCIM Username mapping to Email
-
Click Save
-
-
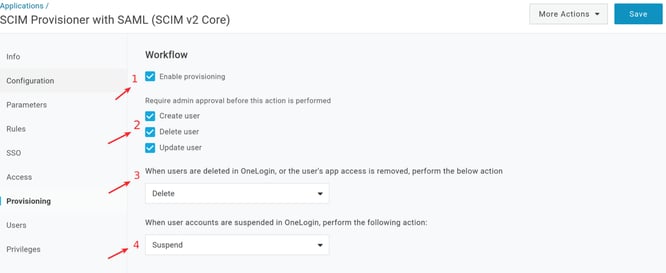
Under the Provisioning Tab:
-
(1) Check "Enable provisioning"
-
(2) Configure which actions require admin approval. Choose your preference. For testing, it’s recommended to mark all the fields. Those settings can be changed at any time.
-
(3) and (4) Configure actions on user deletion/suspension. Choose your preference.
-
Click Save
-
-
Assign Users (user provisioning)
Only assigned users will appear in Wizer.
We recommend provisioning users through assigning OneLogin Roles to the Wizer SCIM application.
Assign the same users and group of users (OneLogin roles) as for the SSO application. If some users are assigned to the SCIM application but aren’t assigned to the SSO application, they won’t be able to log in.-
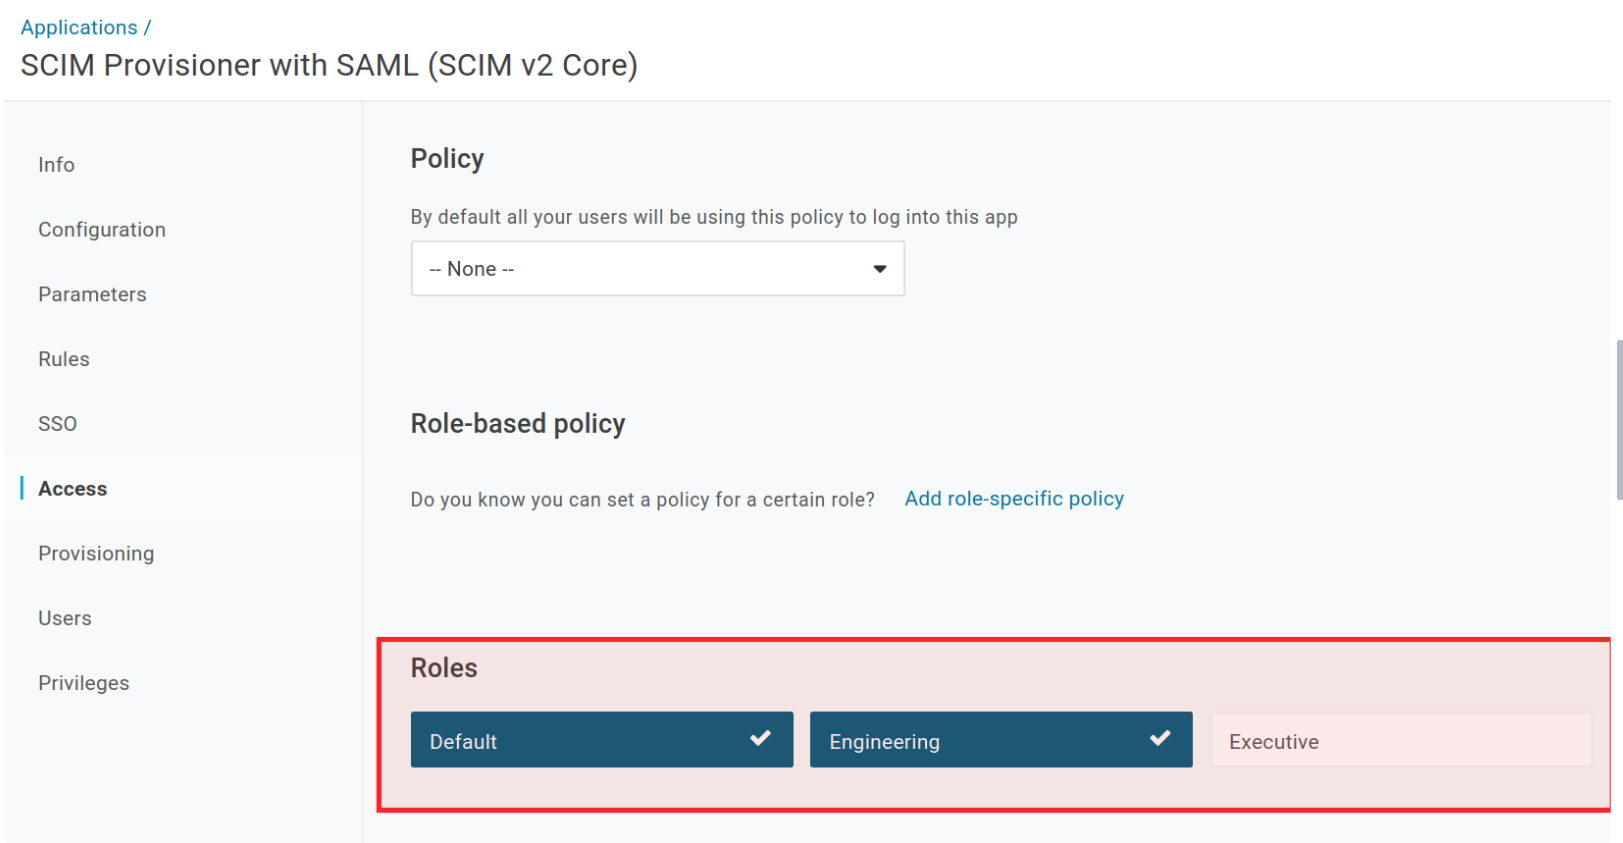
Under the Access tab, assign roles to the application and click Save
-
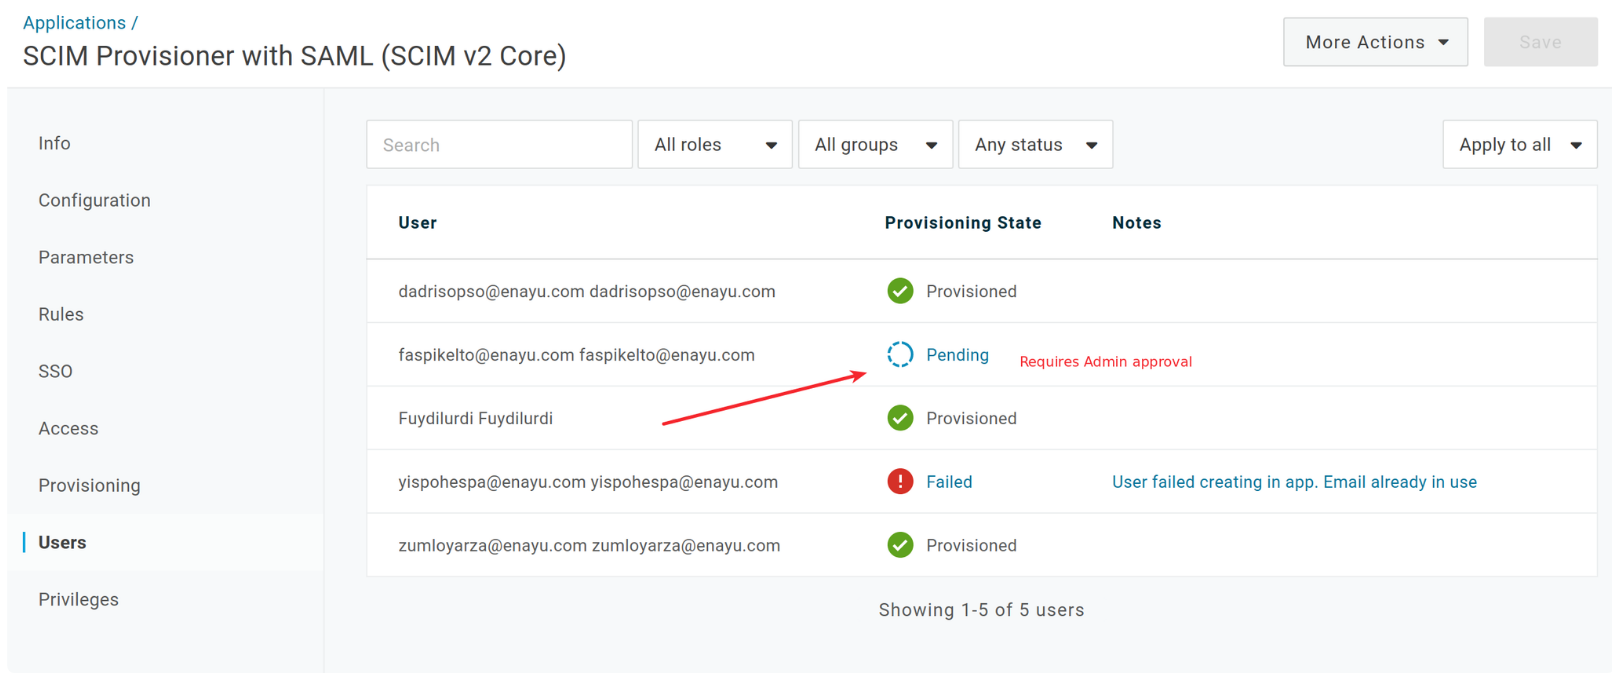
Under the Users tab, you can see the users that are assigned to the application and their provisioning status. If in previous steps you configured it to require admin approval, you should approve all the provisioning operations that require admin approval.
-
To Approve, click on the “Pending” status column. A pop-up will appear. Click Approve.
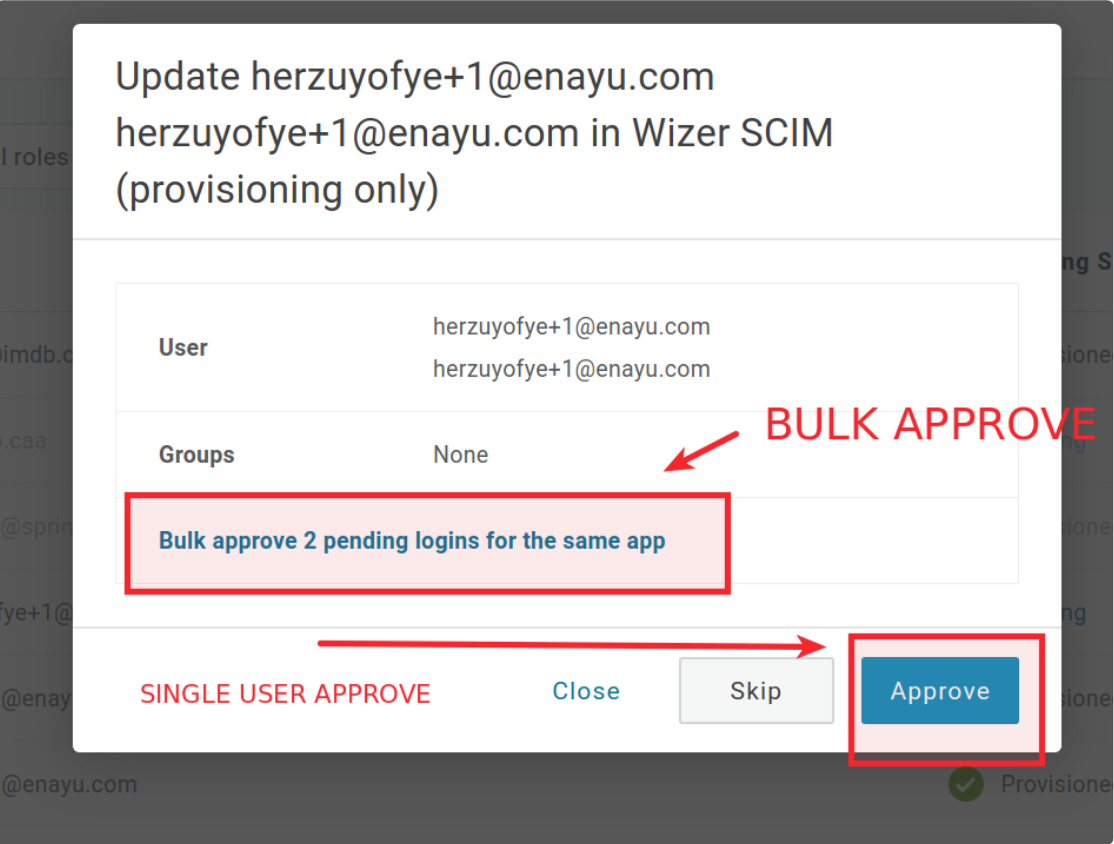 Note, that there’s also a bulk approval functionality.
 -
Users with a “Provisioned” status should appear in Wizer.
-
Groups provisioning (OPTIONAL)
You can define rules to provision subsets of your OneLogin users into Wizer departments. For example, you can define a subset of users by filtering on a specific OneLogin user attribute value and then defining an action that provisions the subset of users to a specific Wizer department.
Enabling groups provisioning:
-
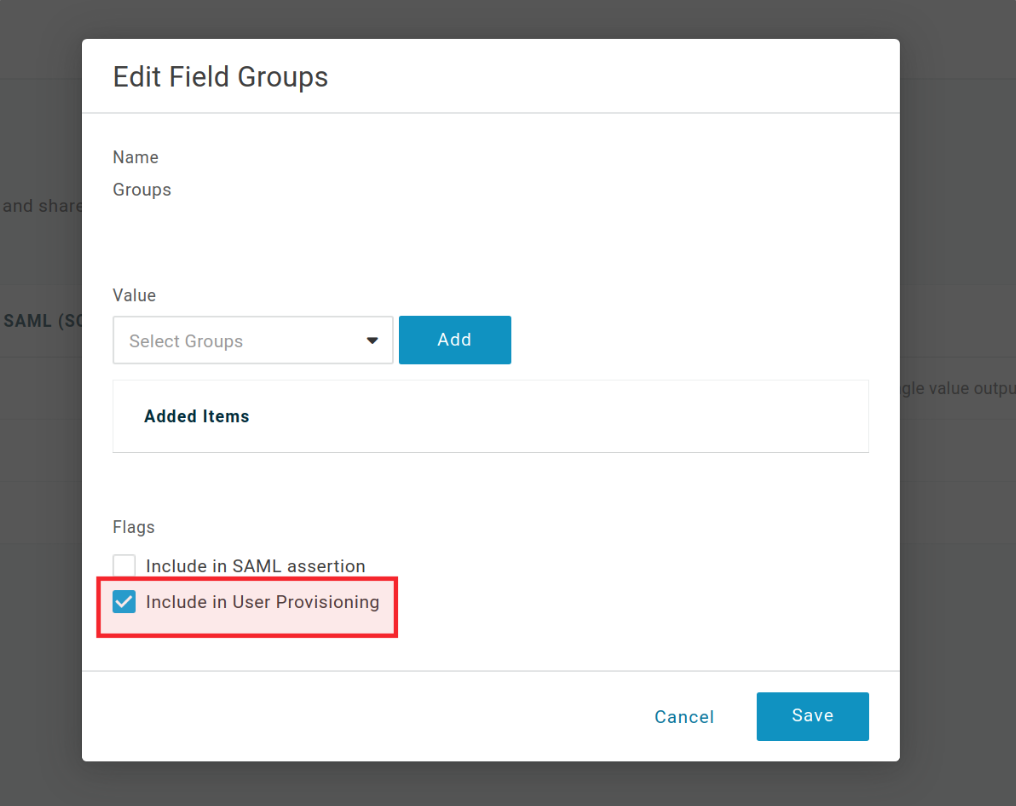
Under the Parameters tab, click Groups
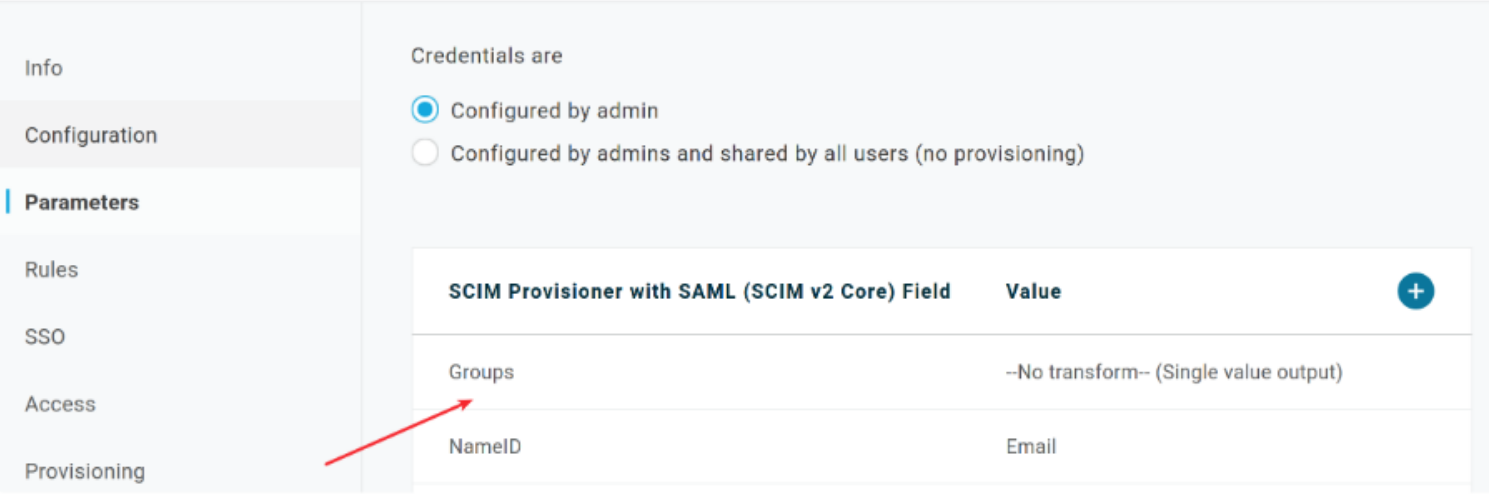
-
Enable the Include In User Provisioning option and click Save:
Assigning subsets of users to selected groups:
If you want to assign a subset of users to groups, you should use OneLogin Rules.
Go to the Rules tab
-
Click Add Rule
-
Under Actions choose Set Groups option
-
Configure conditions/parameters based on users will be assigned to Groups
-
From Existing option - if you want to assign users to groups (departments) that are already in Wizer
-
Map from One Login option - if you want to create new groups in Wizer
Example: Mapping OneLogin Roles to Wizer Departments. Creating departments in Wizer based on OneLogin Roles.
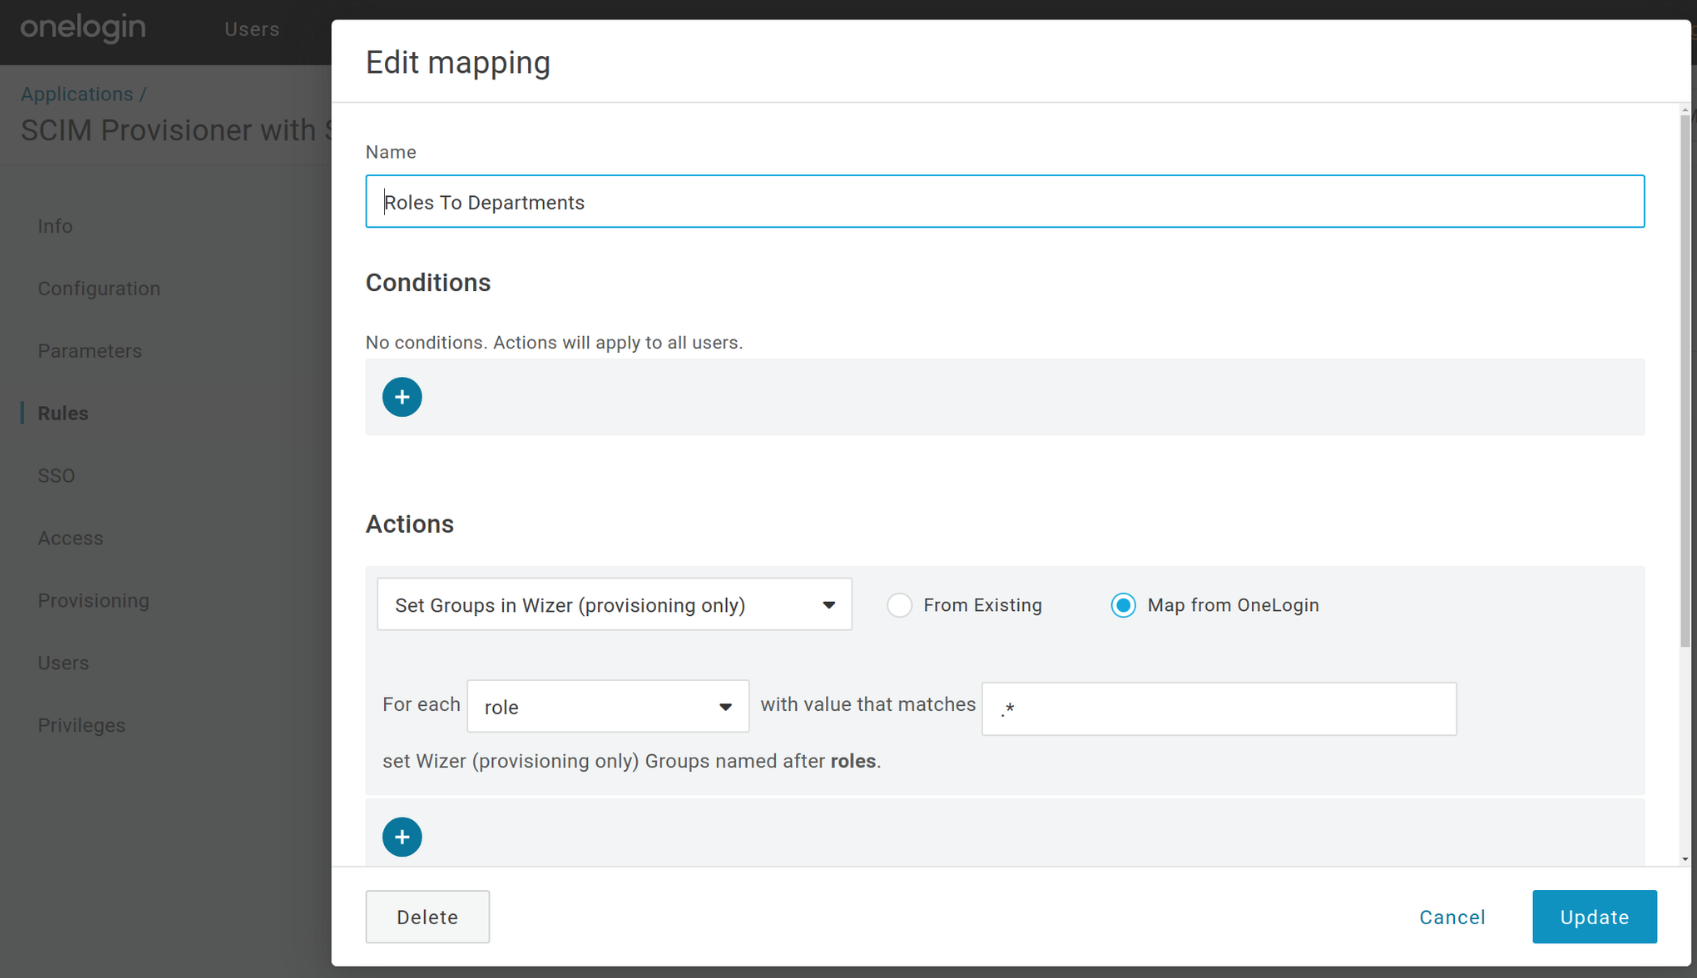 .* value in the screenshots is a regex that matches any value
-
-
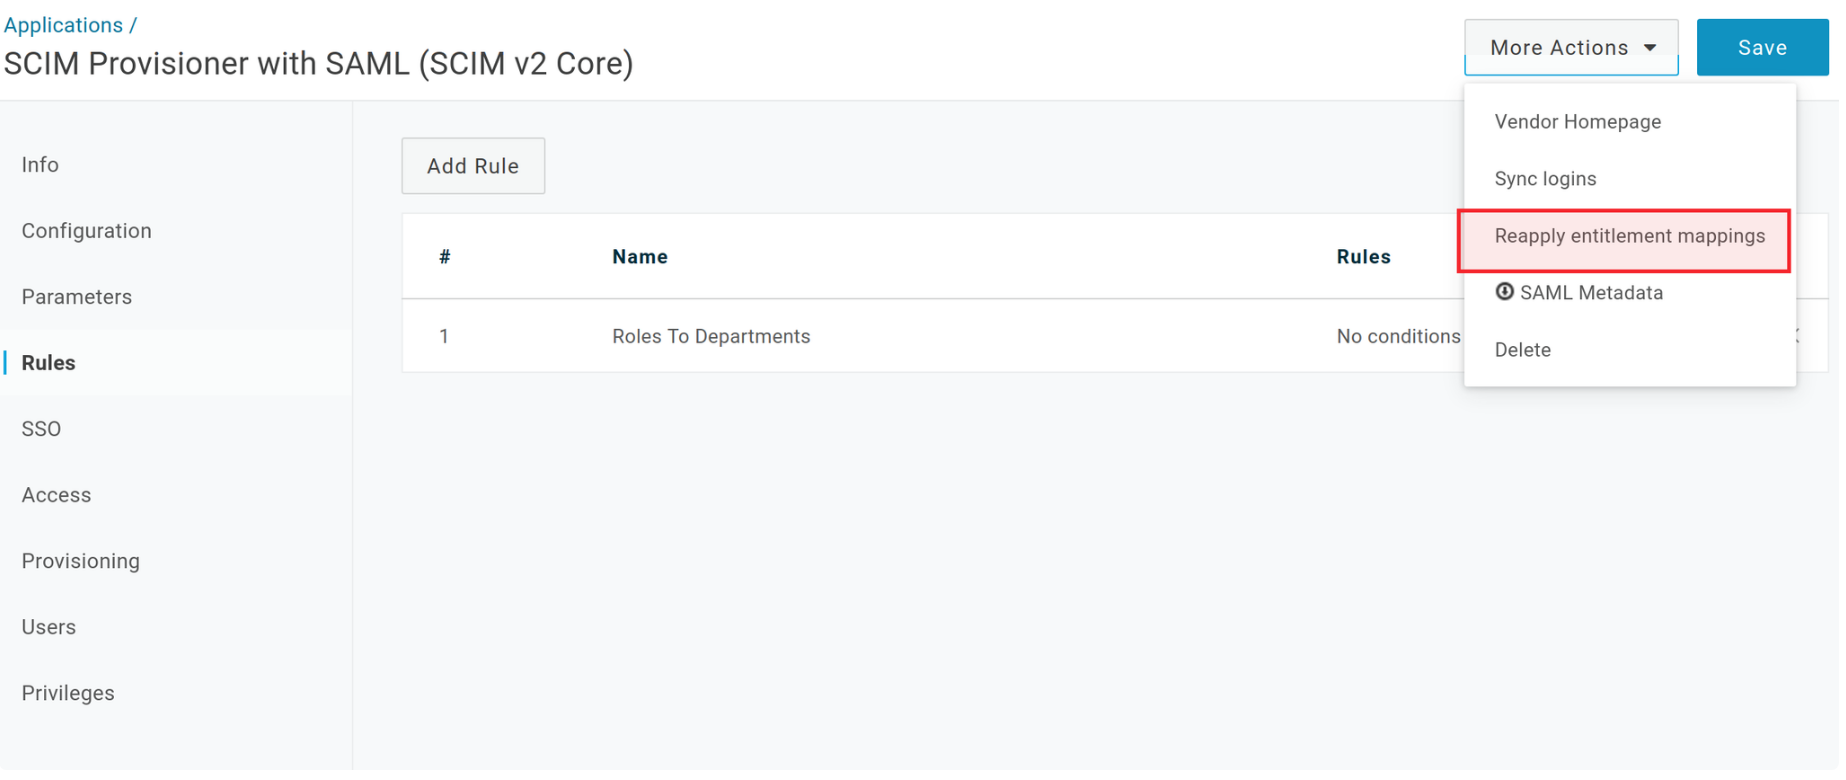
After the rule is configured and saved, press the Reapply entitlement mappings button so the rule will be applied and groups provisioning will be triggered
-
Any time a rule changed or a new rule is created, Reapply entitlement mappings should be pressed again
-
If your application requires admin approval for a user update operation, go to the Users tab and approve User Update operations (groups assignment) if needed
-
If the rule is configured correctly, departments should appear in Wizer