After your Partnership is activated, you are able to invite your customers. Go to Admins Console, and click on Partnership => My Customers.
To invite new customers, click the "+ Invite Customers" blue button at the bottom of the page. 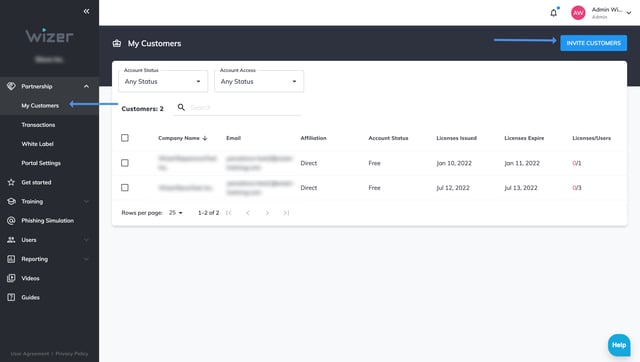
Add the company's name, email, first name, and last name. You can invite more customers by clicking "Invite Customers". Fill out the forms with the company name, email, and first and last name of the admin. You can activate a trial for your customers if you want, request access to their account, or set them as a partner so they will be able to invite other companies. Click add another customer in an instance if you want to add more than one company. Then click on "Next" to add your customers and be transferred to your customers list.

After adding the customers, they will appear on the My Customers page, and the number of customers will be shown in bold. You can then filter by Name, Account Status (licensed, trial, free, not registered), and account access (available, requested, not available), or search for companies on the bar by word.
There are following information you can see about every company by moving the grey slider at the bottom of the form to the right or to the left:
![]()
![]()
Company Name*, Email*, Affiliation* (Direct, ______), Account Status (Licensed, Free), Licenses Issued (date), Licenses Expire (date), Licenses/Users (number), Actions (Buy Licenses, Boost activated, ____), Manage Company (Request, Resend request, Log in), Created* (date).
* - can be sorted by item.
Requesting the access to the customer's account
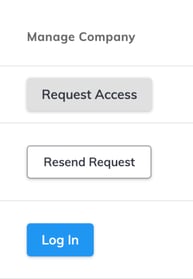
Click "Request Access" or "Resend Request", the customer will get the email notification and will be able to give permission to manage their account. After the permission is granted, you will be able to access their account by clicking "Log In".
Removing Customer
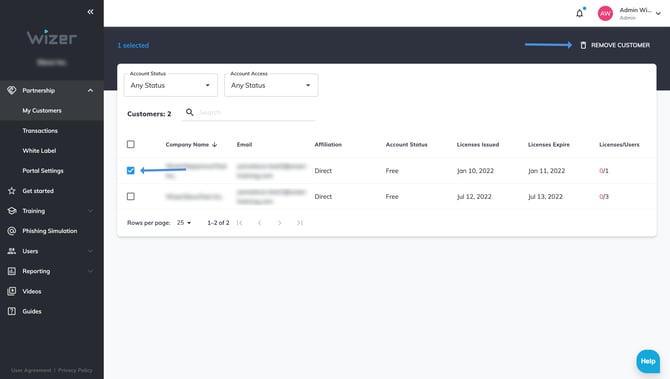
Select the customer(-s) in the left checkboxes and click on the "Remove Customer" button on the right top of the page. You will be no longer their partner, the customer will have still their account active on the Wizer platform.
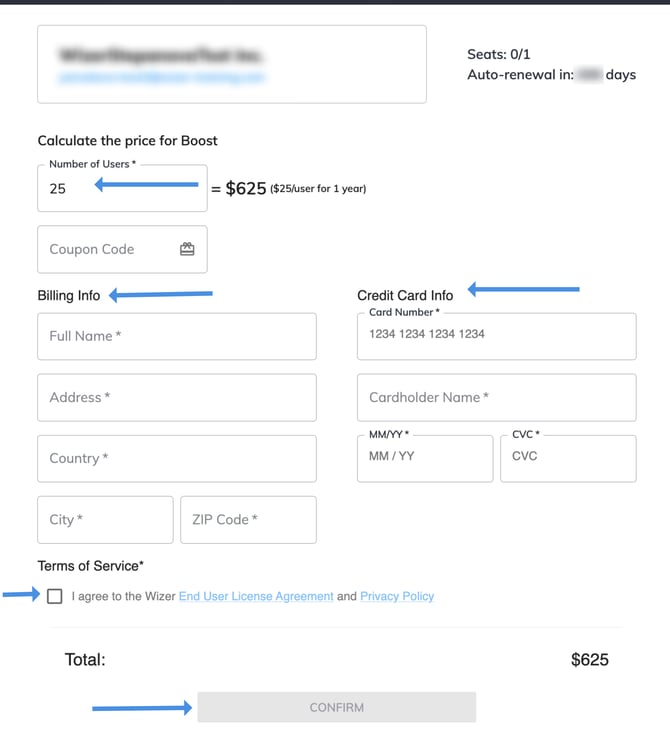
Buying Licenses

Click on "Buy Licenses" and you will be transferred to the Payment form, where you select a number of users (minimum is 25), fill in the billing and credit card info, and add a coupon code in case you have it. You can calculate and check the Total sum. Agree with the Terms of Service and click "Confirm".
The payment will be reflected in the account.
The Account status of the customer will be changed to Licensed, the Licenses Issued date is the date of the purchase, the Licenses Expired date (in one year), the Licenses/Users will show the number of seats purchased and users invited, Actions "Boost Active".
The customer receives the confirmation email about Boost started. Now all the Boost features are available in their account.
- Navigate to the left sidebar menu on the platform.
- Click on the 'Partnership' section.
- In the 'Partnership' section, locate the customer you want to manage.
- Go to the 'Actions' column corresponding to that customer.
- Click on 'Allocate Licenses' adjacent to the selected customer.
- In the pop-up form, enter the desired number of licenses.
- Confirm the allocation by clicking 'Confirm allocation'.
Any questions? Please contact our support specialists at support@wizer-training.com