Why Whitelist in Mimecast?
Whitelisting ensures the Wizer phishing simulation (PS) functions without issue and prevents PS emails from being automatically moved to the spam folder or notifying users about potential phishing emails.
You can find our IPs in CIDR notation format below:
104.236.69.186/32 |
Anti-Spoofing Policy
- Log on to your Mimecast Administration Console.
- Click the Administration toolbar button.
- Select the Gateway | Policies menu item.
- Select Anti-Spoofing from the list of displayed policies.
- Select the New Policy button.
- Please add Policy Narrative 'Wizer Phishing Simulation Anti-Spoofing Policy' and select the relevant policy settings under the Options, Emails From, Emails To, and Validity sections. For more information on these settings, see Mimecast's Configuring an Anti-Spoofing Policy article (opens in a new tab).
- In the Source IP Ranges field, enter our IP ranges, please see this list (opens in a new tab).
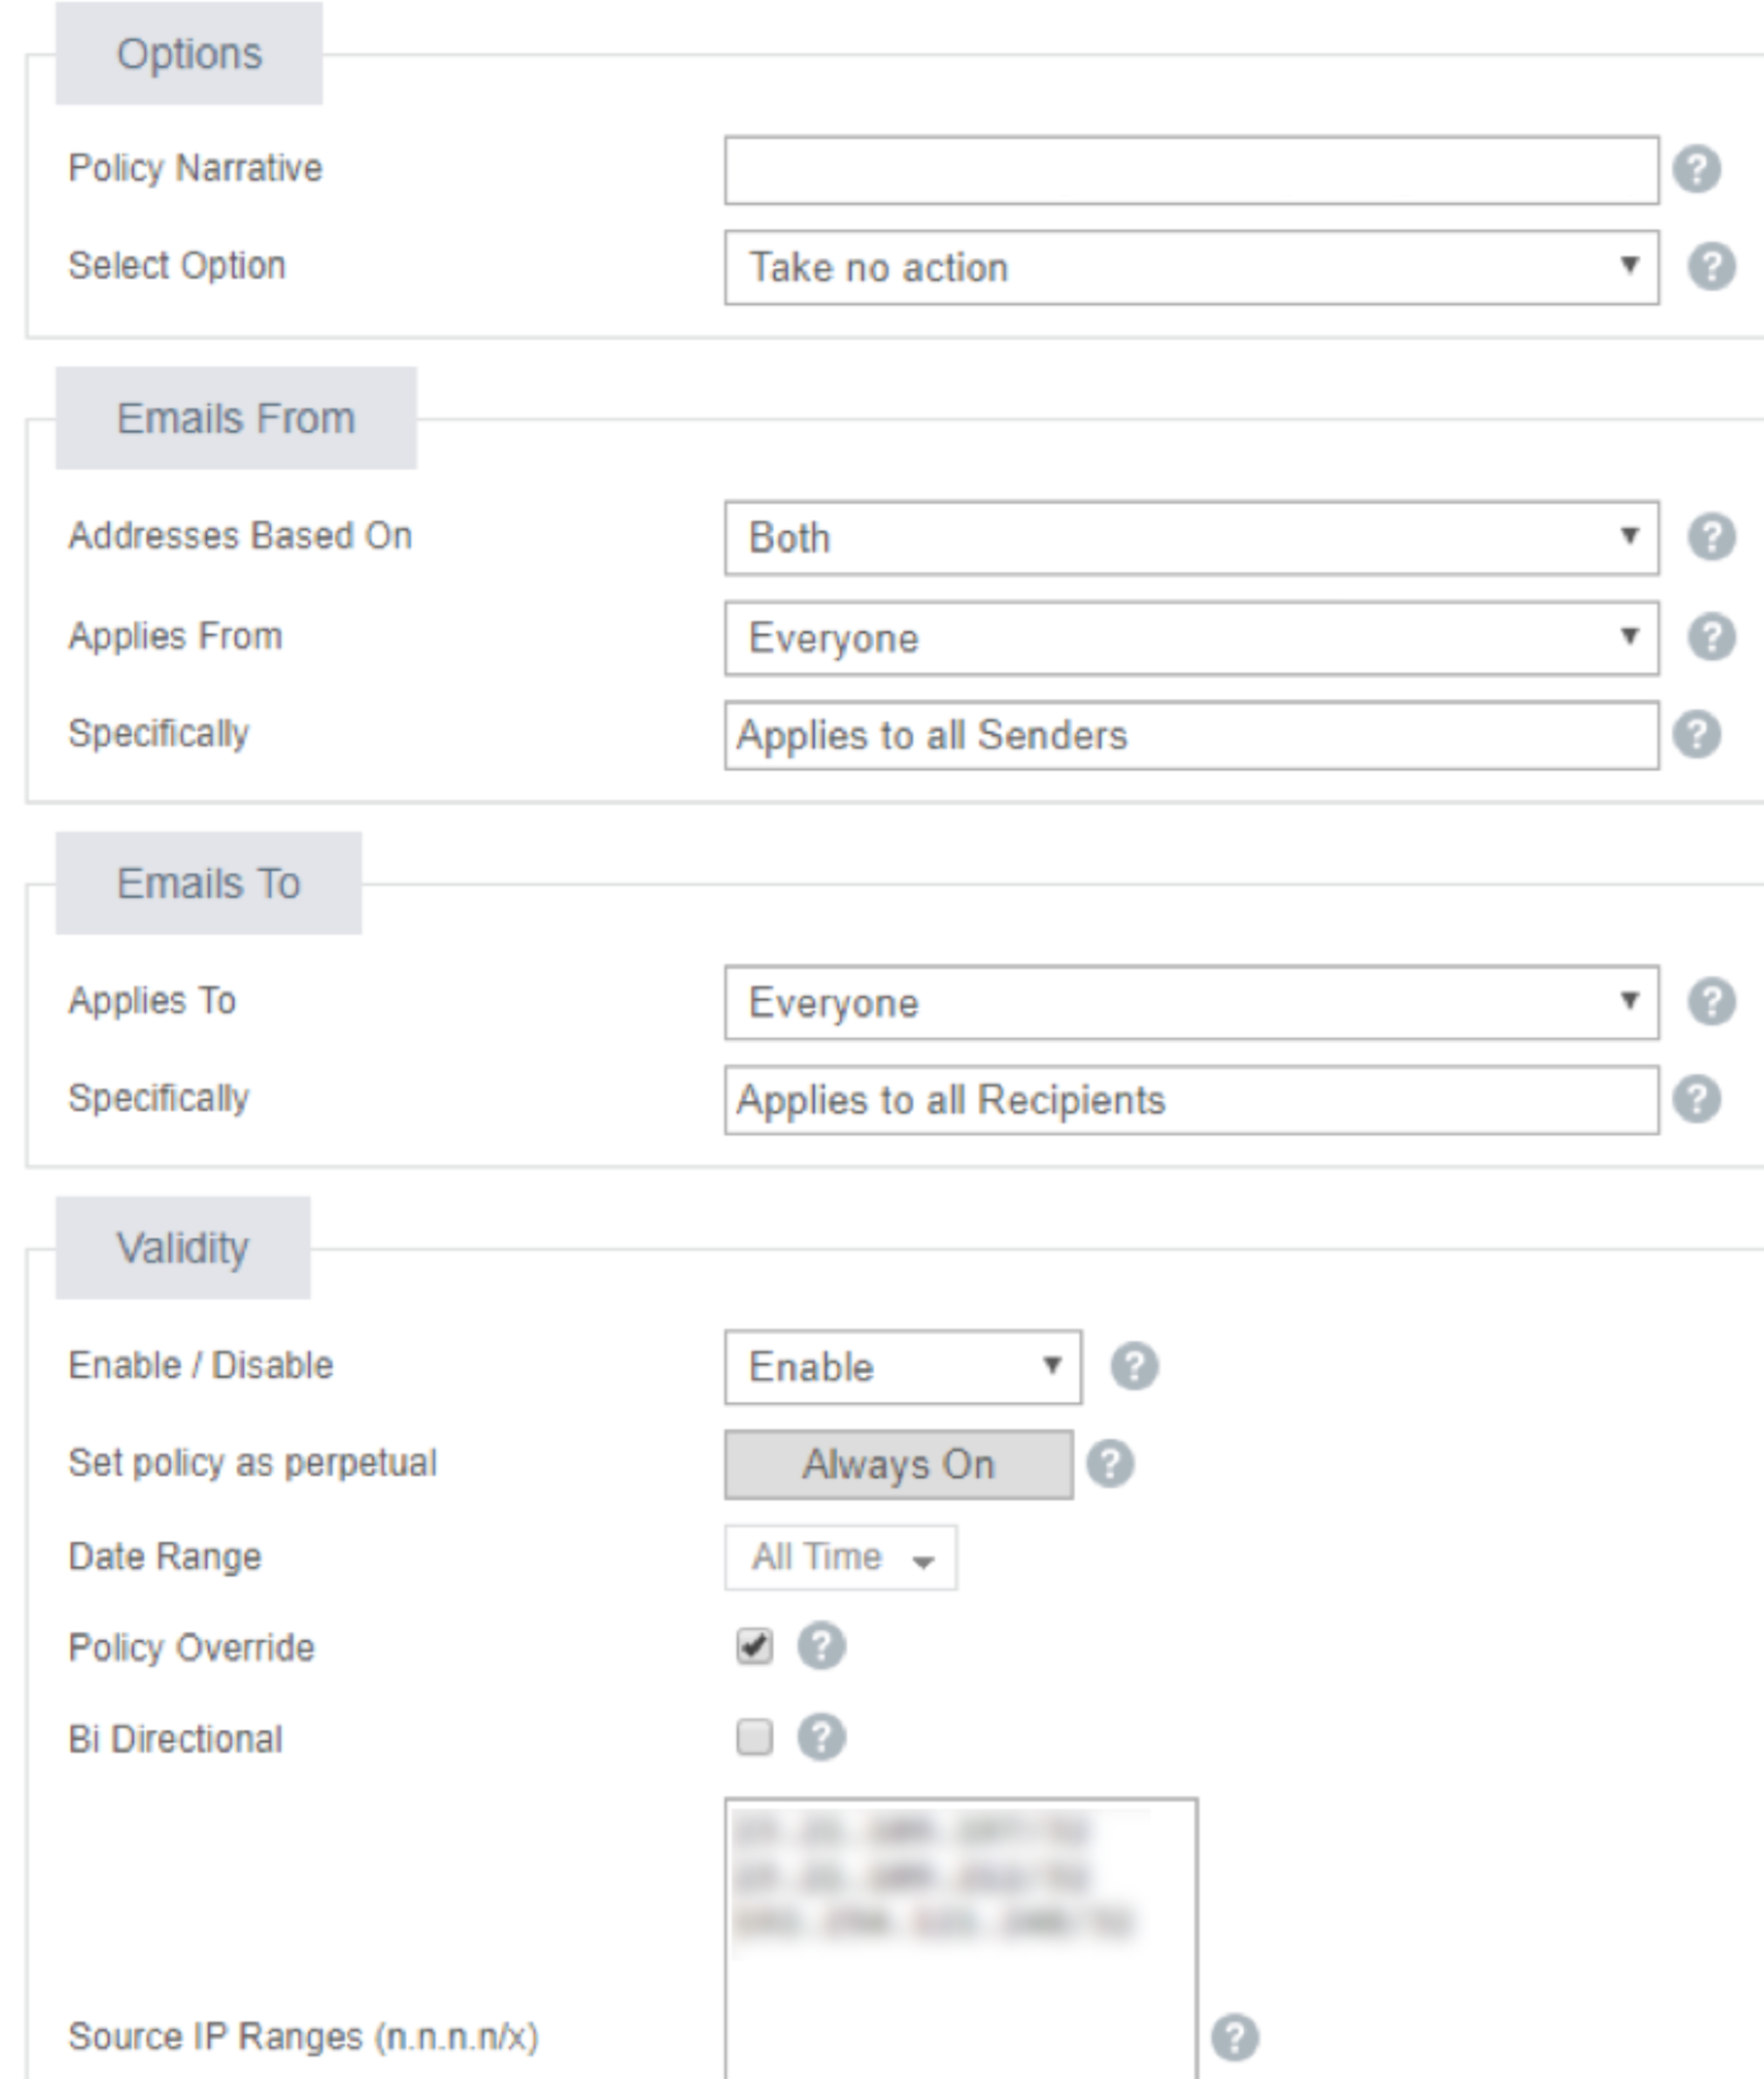
- Please save the policy.
Permitted Senders Policy
- Log on to your Mimecast Administration Console.
- Click the Administration toolbar button.
- Select the Gateway | Policies menu item.
- Select Permitted Senders from the list of displayed policies.
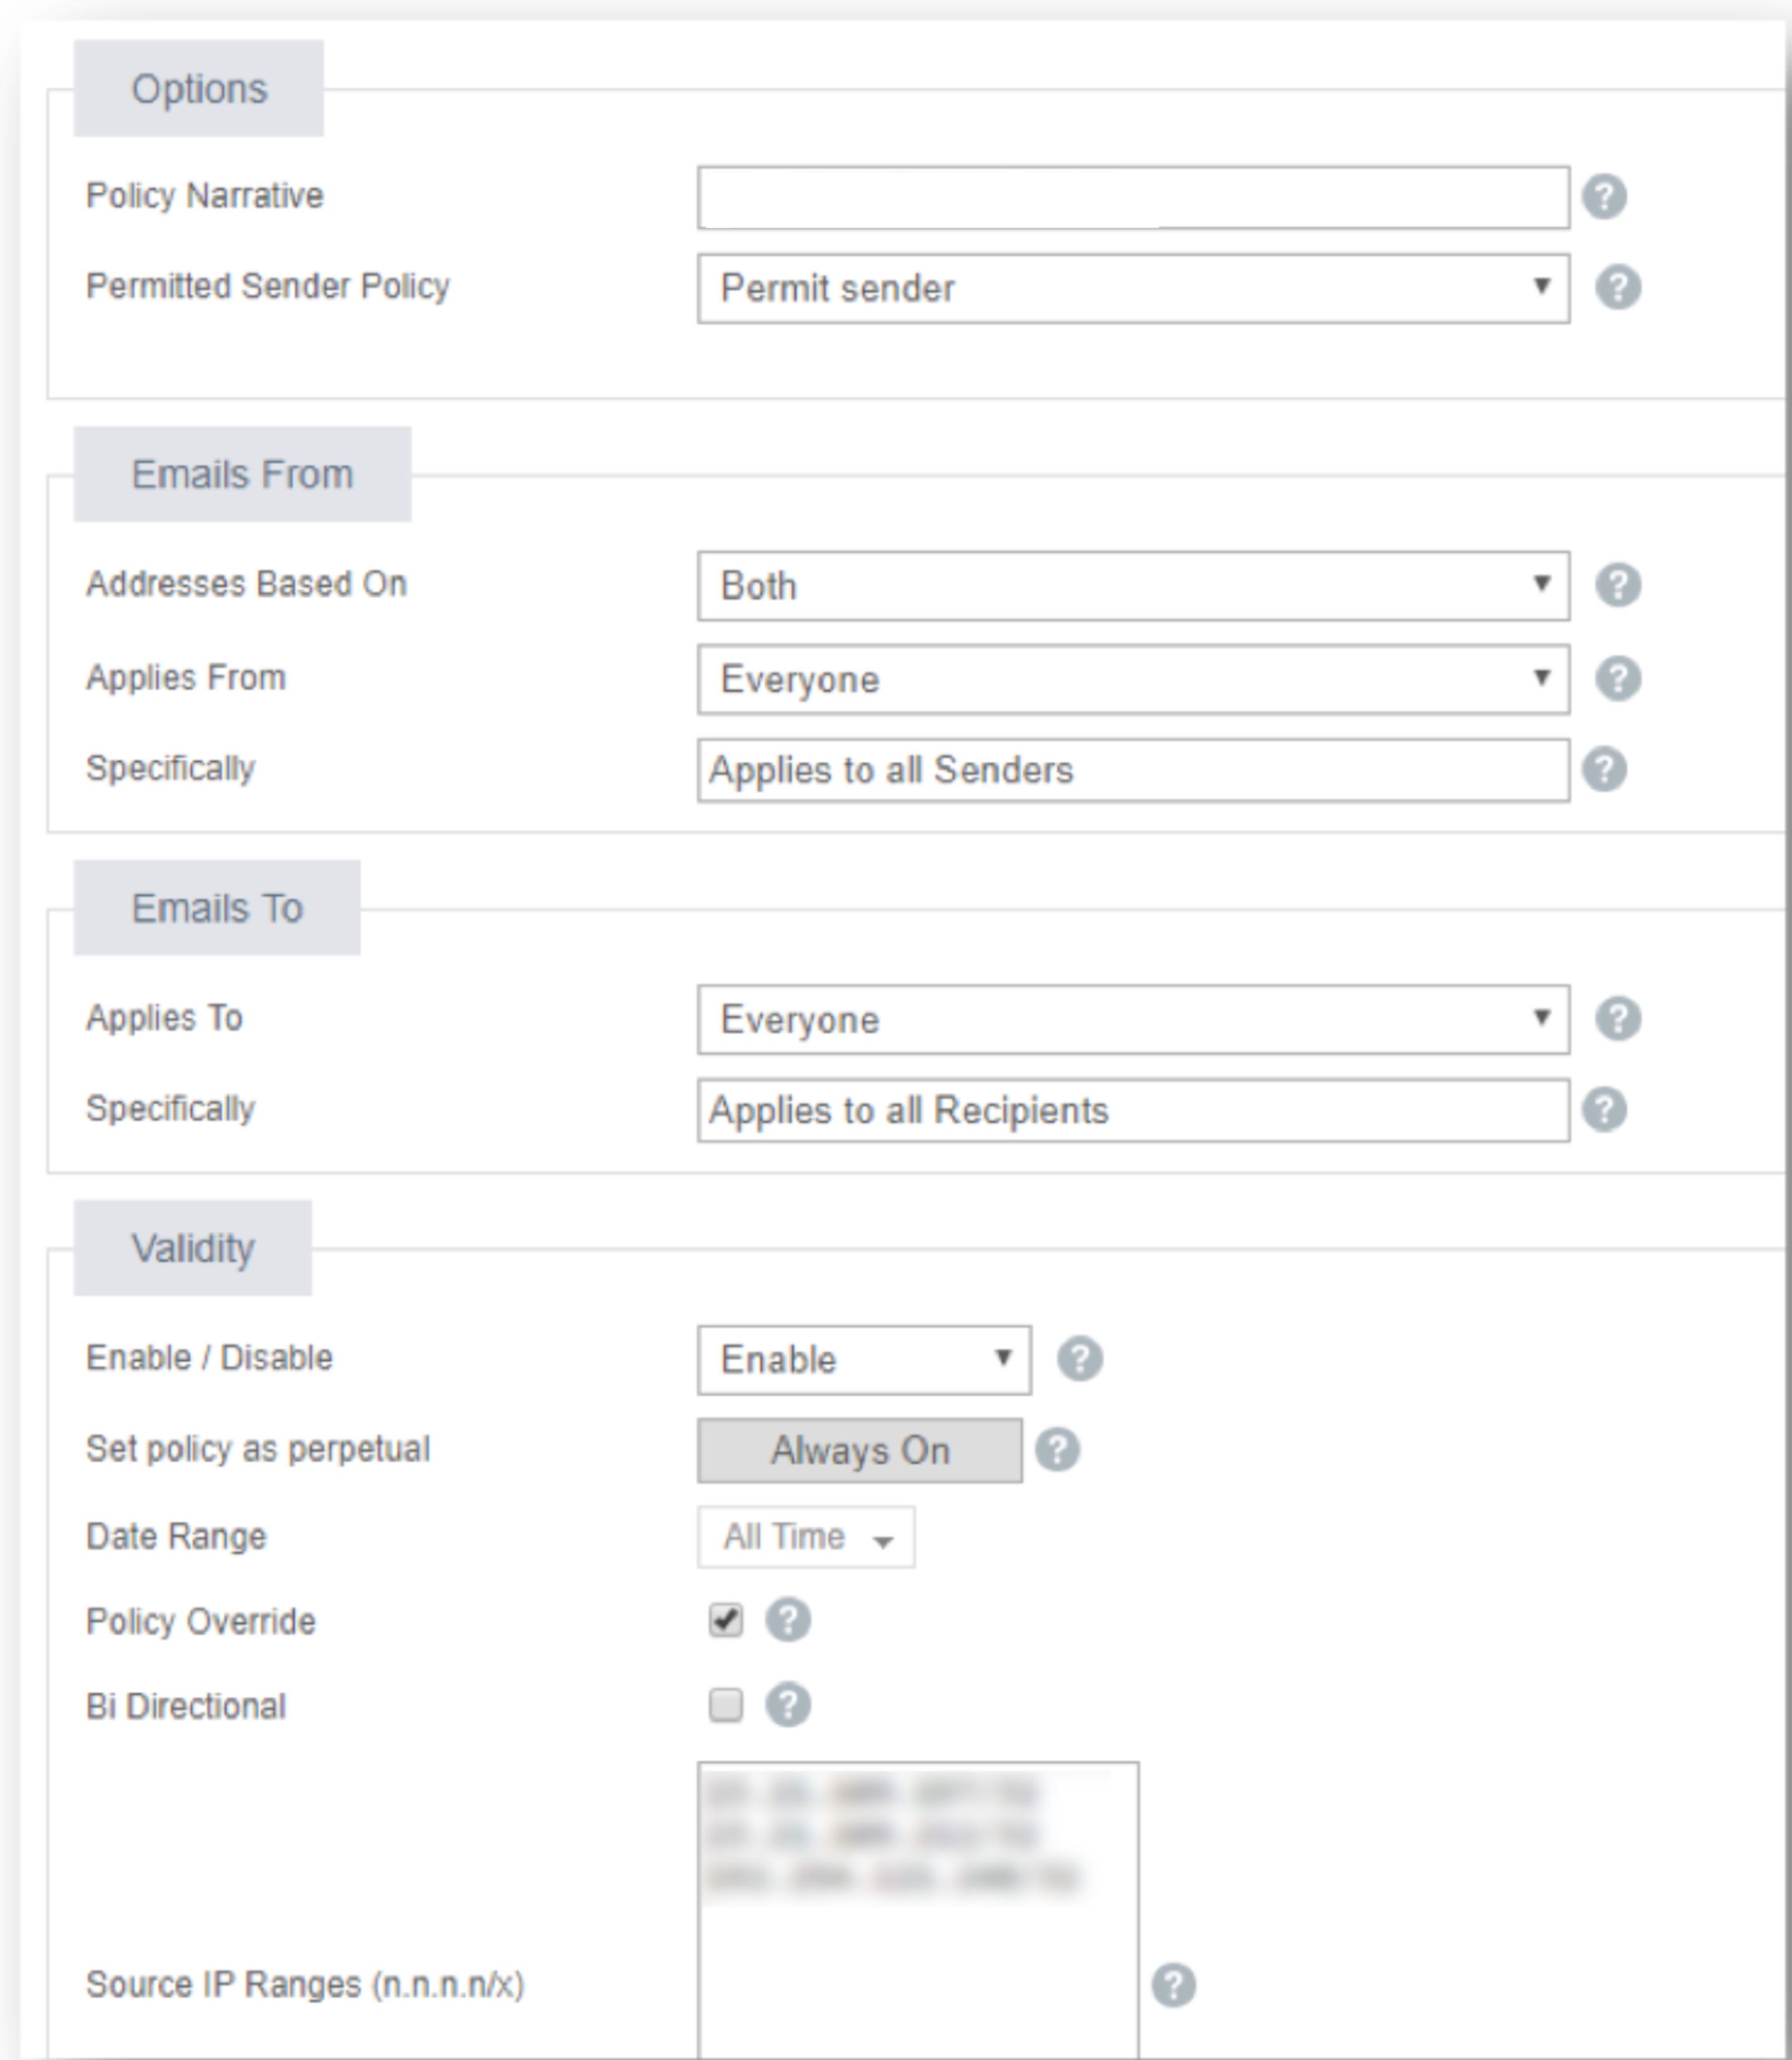
- Select the New Policy button (please do not edit your default Permitted Sender policy; a new one must be created)
- Please add Policy Narrative 'Wizer Phishing Simulation Permitted Senders Policy' and select the relevant policy settings under the Options, Emails From, Emails To, and Validity sections. For more information on these settings see Mimecast's Configuring a Permitted Senders Policy article (opens in a new tab).
- In the Source IP Ranges field, enter our IP ranges, please see this list (opens in a new tab).
- Please save the policy.
Attachment Protection Bypass Policy
- Log on to your Mimecast Administration Console
- Click the Administration toolbar button.
- Select the Gateway | Policies menu item.
- Select Attachment Protection Bypass from the list of displayed policies.
- Select the New Policy button.
- Please add Policy Narrative 'Wizer Phishing Simulation Attachment Protection Bypass Policy' and select the relevant policy settings under the Options, Emails From, Emails To, and Validity sections. For more information on these settings, see Mimecast's Configuring Attachment Protection Bypass Policies article (opens in a new tab).
- In the Source IP Ranges field, enter our IP ranges, please see this list (opens in a new tab).
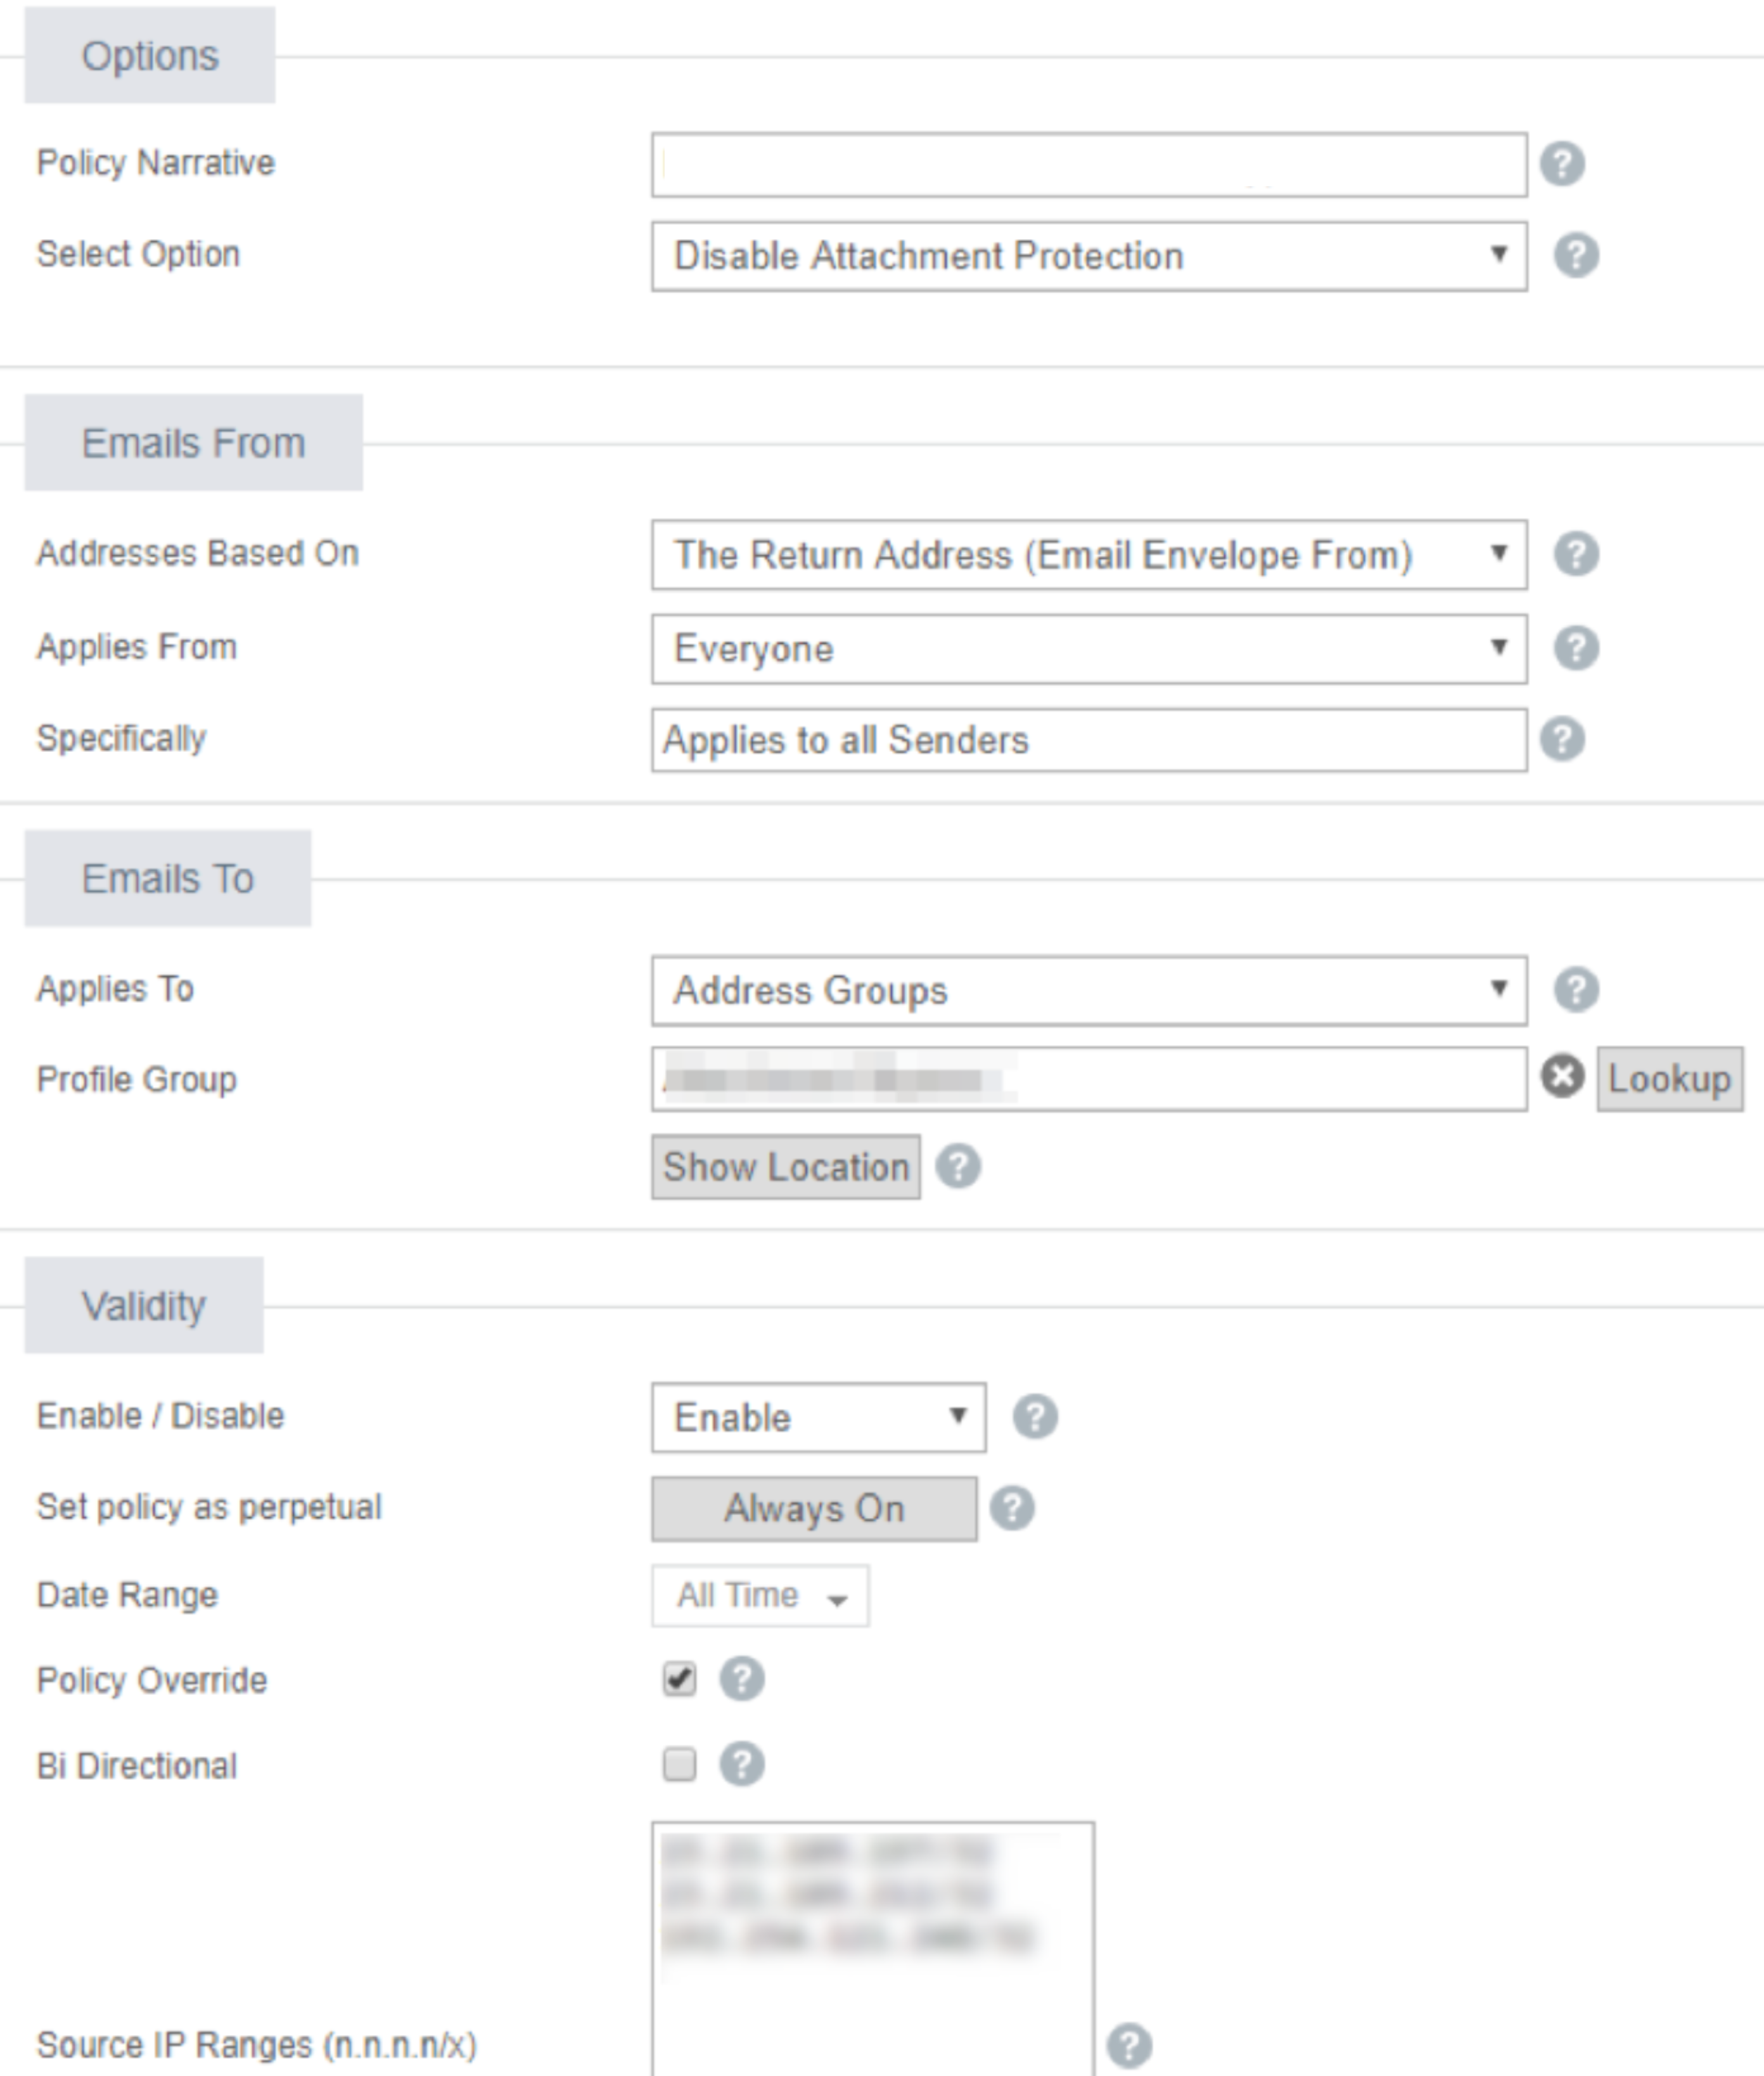
- Please save the policy.
URL Protection Bypass Policy
Mimecast's URL Protection service scans and checks links in emails upon delivery. This can lead to false-positive results for your phishing security tests. Follow the steps below to create a URL Protection Bypass policy for accurate phishing simulation reports.
- Log on to your Mimecast Administration Console
- Click the Administration toolbar button.
- Select the Gateway | Policies menu item.
- Select URL Protection Bypass from the list of displayed policies.
- Select the New Policy button.
- Please add Policy Narrative 'Wizer Phishing Simulation URL Protection Bypass Policy' and select the relevant policy settings under the Options, Emails From, Emails To, and Validity sections. For more information on these settings, see Mimecast's Configuring Attachment Protection Bypass Policies article (opens in a new tab).
- In the Source IP Ranges field, enter our IP ranges, please see this list (opens in a new tab).
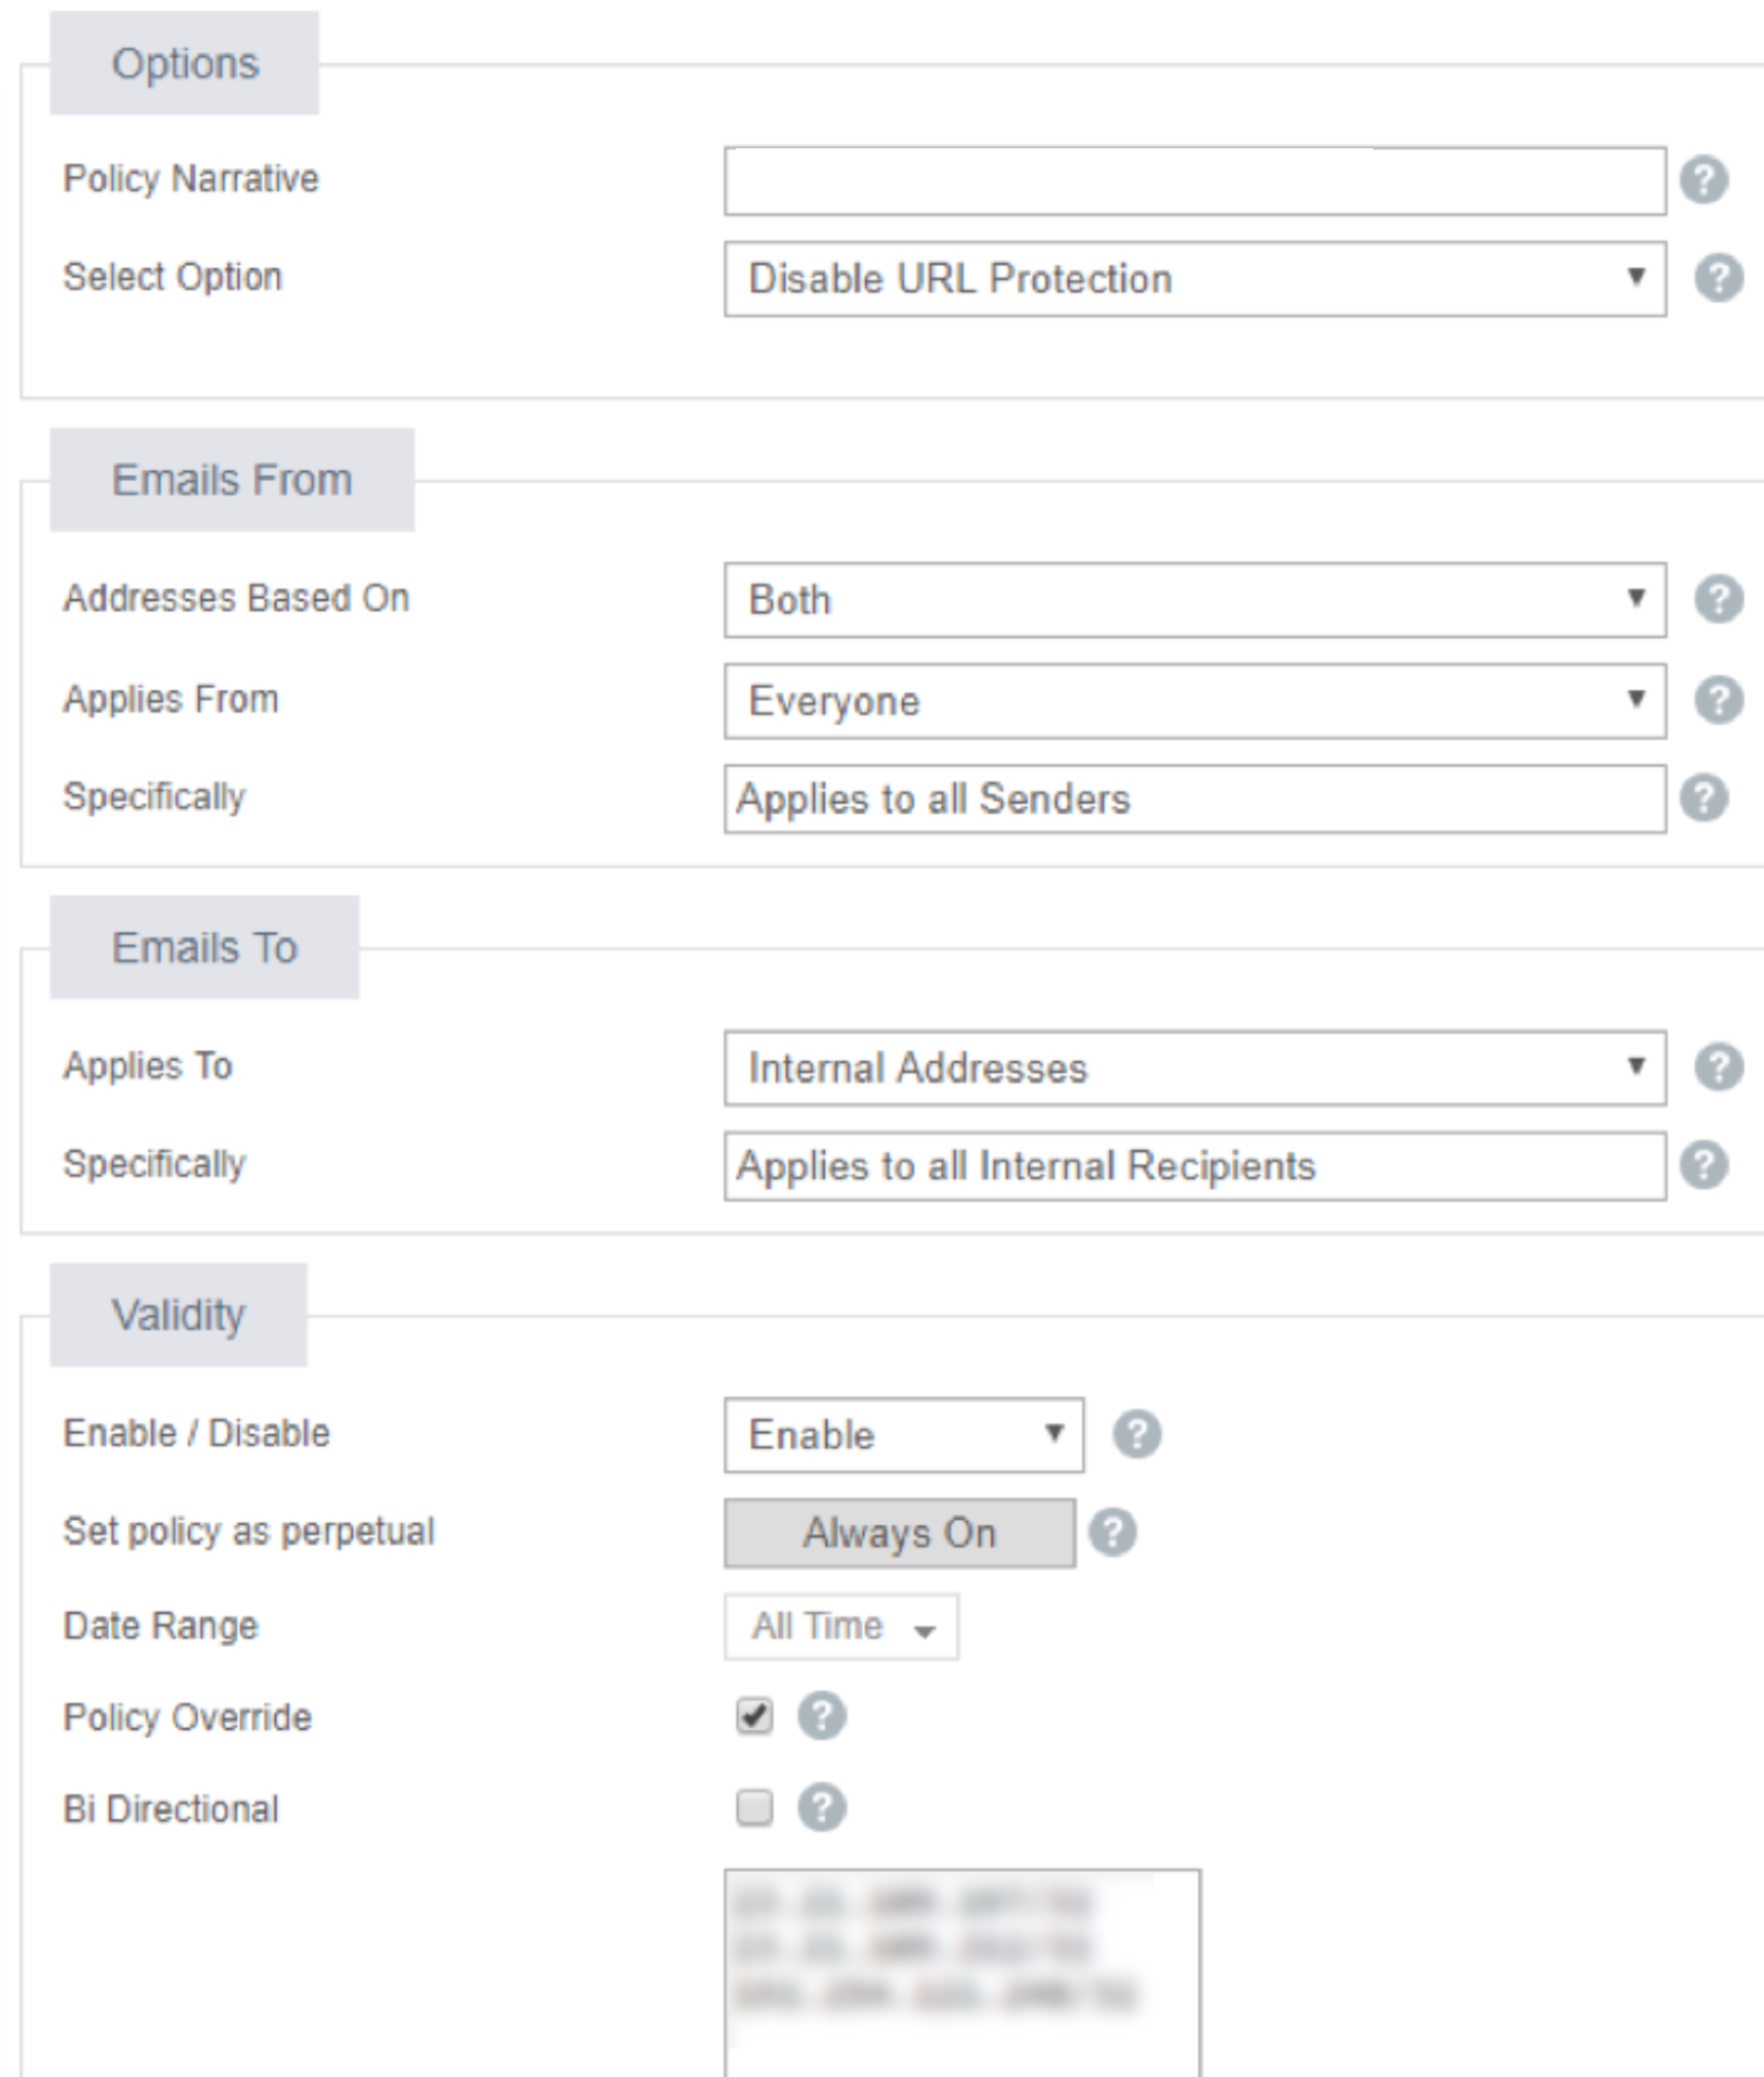
- Please save the policy.
Congratulations! You have just configured whitelisting!