We recommend using DED (Direct Email Delivery) to improve reliability and delivery performance unless you have a reason preventing you.
→ How To Set Up DED for Microsoft 365
Also keep in mind this is one step in the configuration process see the Wizer Phishing Simulation Checklist for more info.
Why Whitelist in Office 365?
Whitelisting ensures the Wizer phishing simulation (PS) functions without issue and prevents PS emails from being automatically moved to the spam folder or notifying users about potential phishing emails.
Whitelist Connection Filter Policy
The Office 365 Exchange Connection Filter identifies good or bad source email servers by their IP addresses. The actions below will allow all emails from Wizer IP addresses to be received.
Whitelist the Connection Filter Policy
1. Go to the https://security.microsoft.com/antispam
2. Click on "Connection filter policy"
3. Then click on "Edit connection filter policy"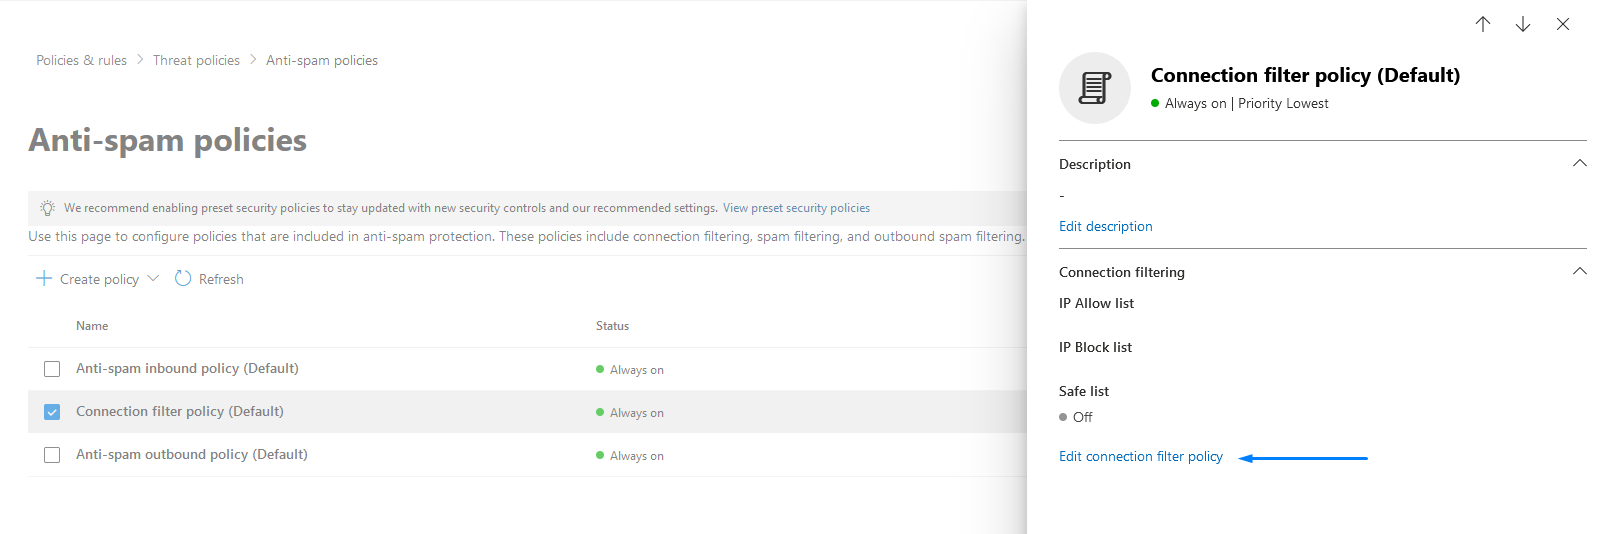
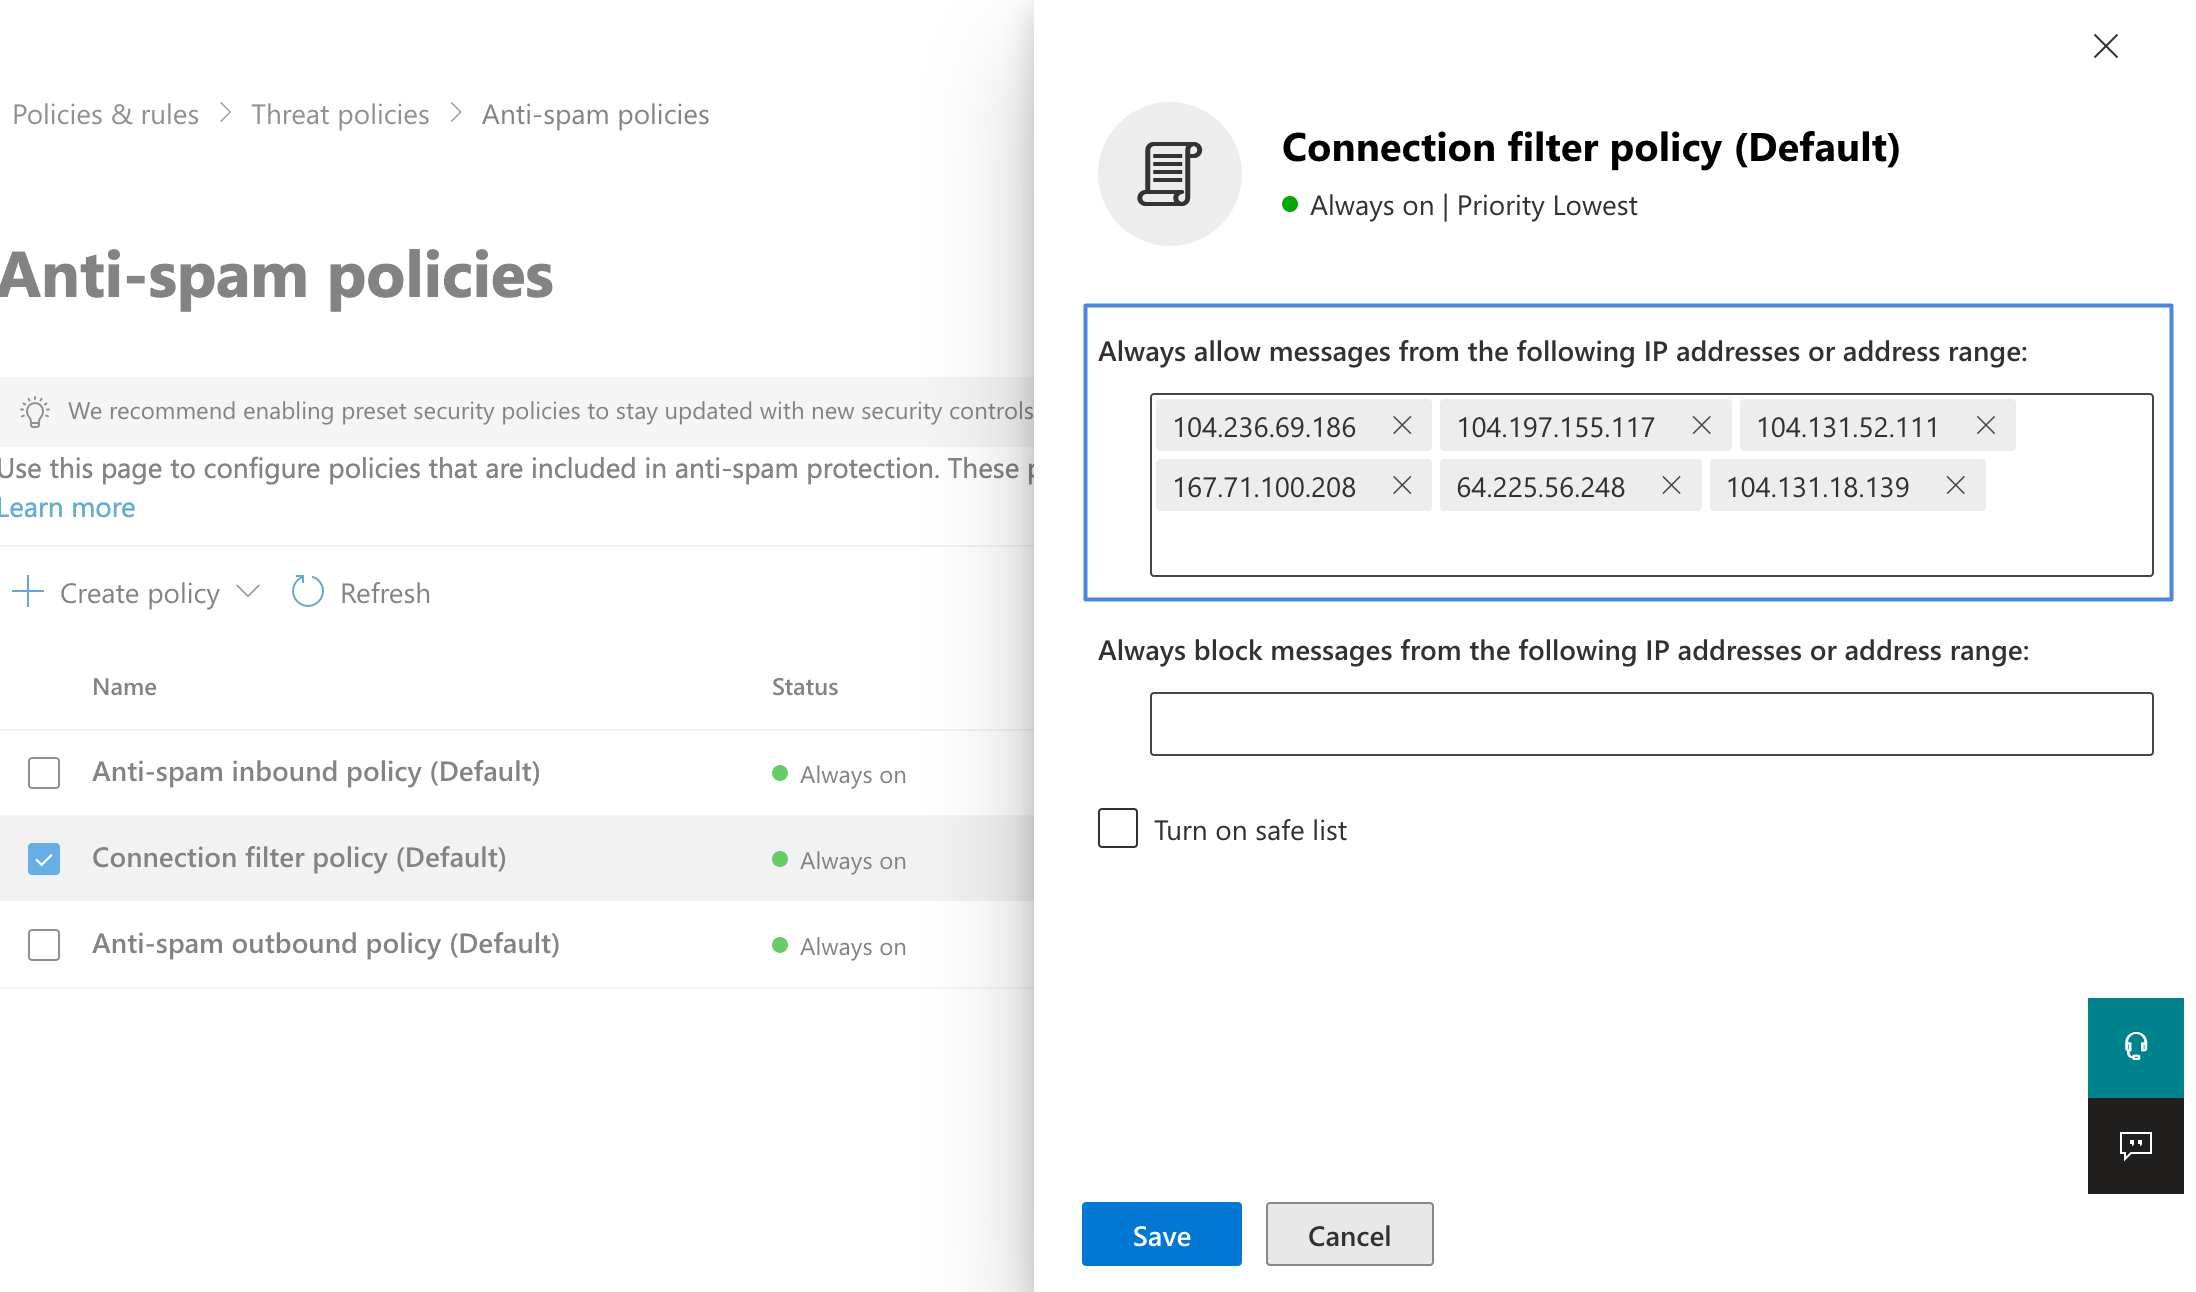
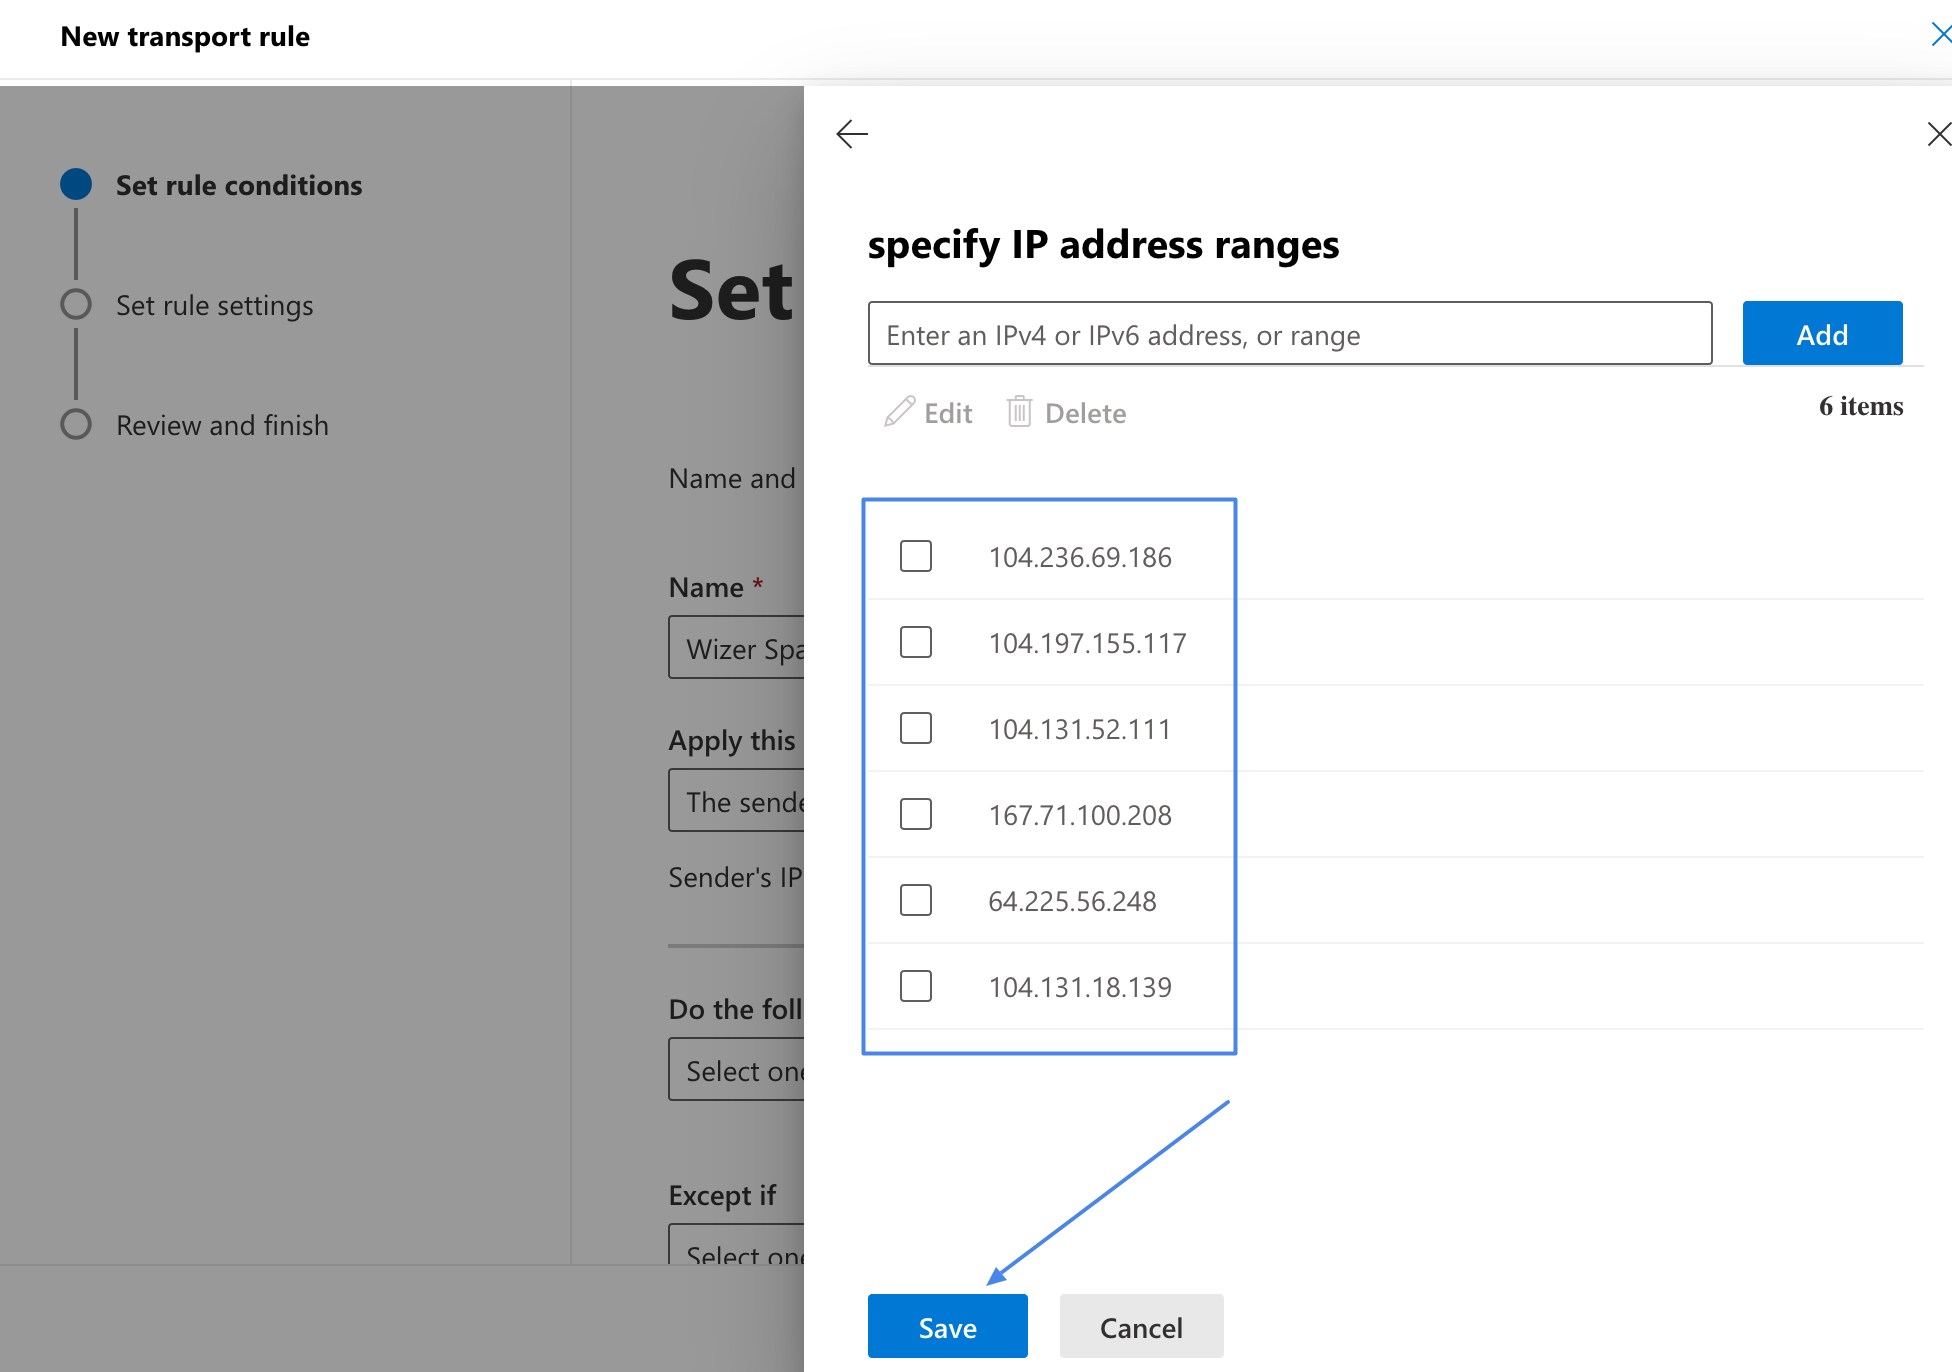
address range" input, one by one from this list (opens in a new tab).
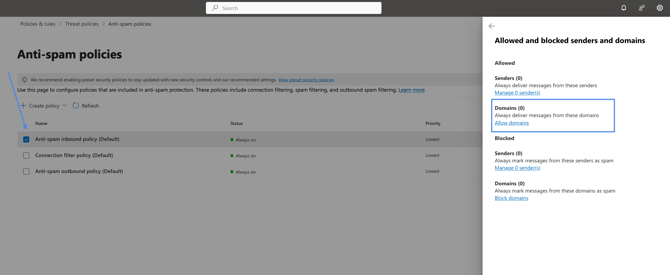
6. Select the anti-spam inbound policy and add our sending domains to allowed domains from this list:
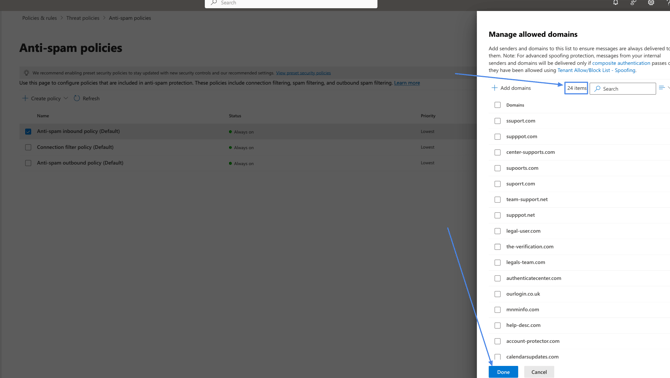
Please make sure all 24 domains are added as in the screenshot below, once finished press Done:
Whitelist Spam Filtering
All mail systems have spam filtering. As the Wizer PS emails are "phishing: by definition, the Microsoft spam filter must be whitelisted. The steps below outline how to disable all spam checks for Wizer PS emails so you won't experience issues with 100% clicked and 100% opened emails, even if the users don't click on them.
1. Go to the https://admin.exchange.microsoft.com/#/transportrules
2. Click on the plus sign → "Create a new rule"
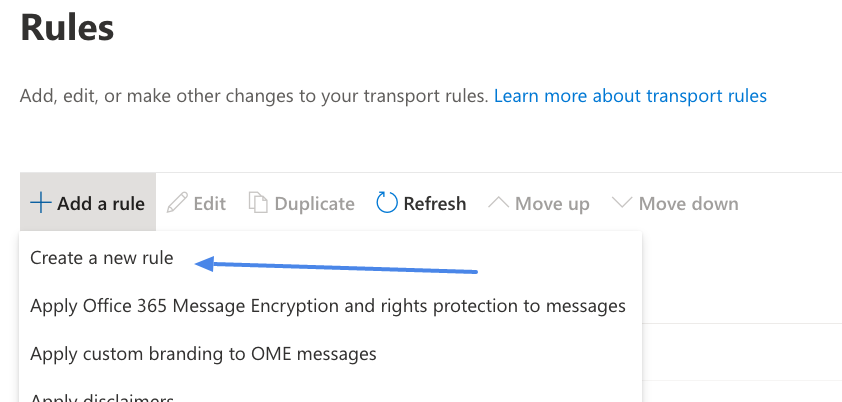
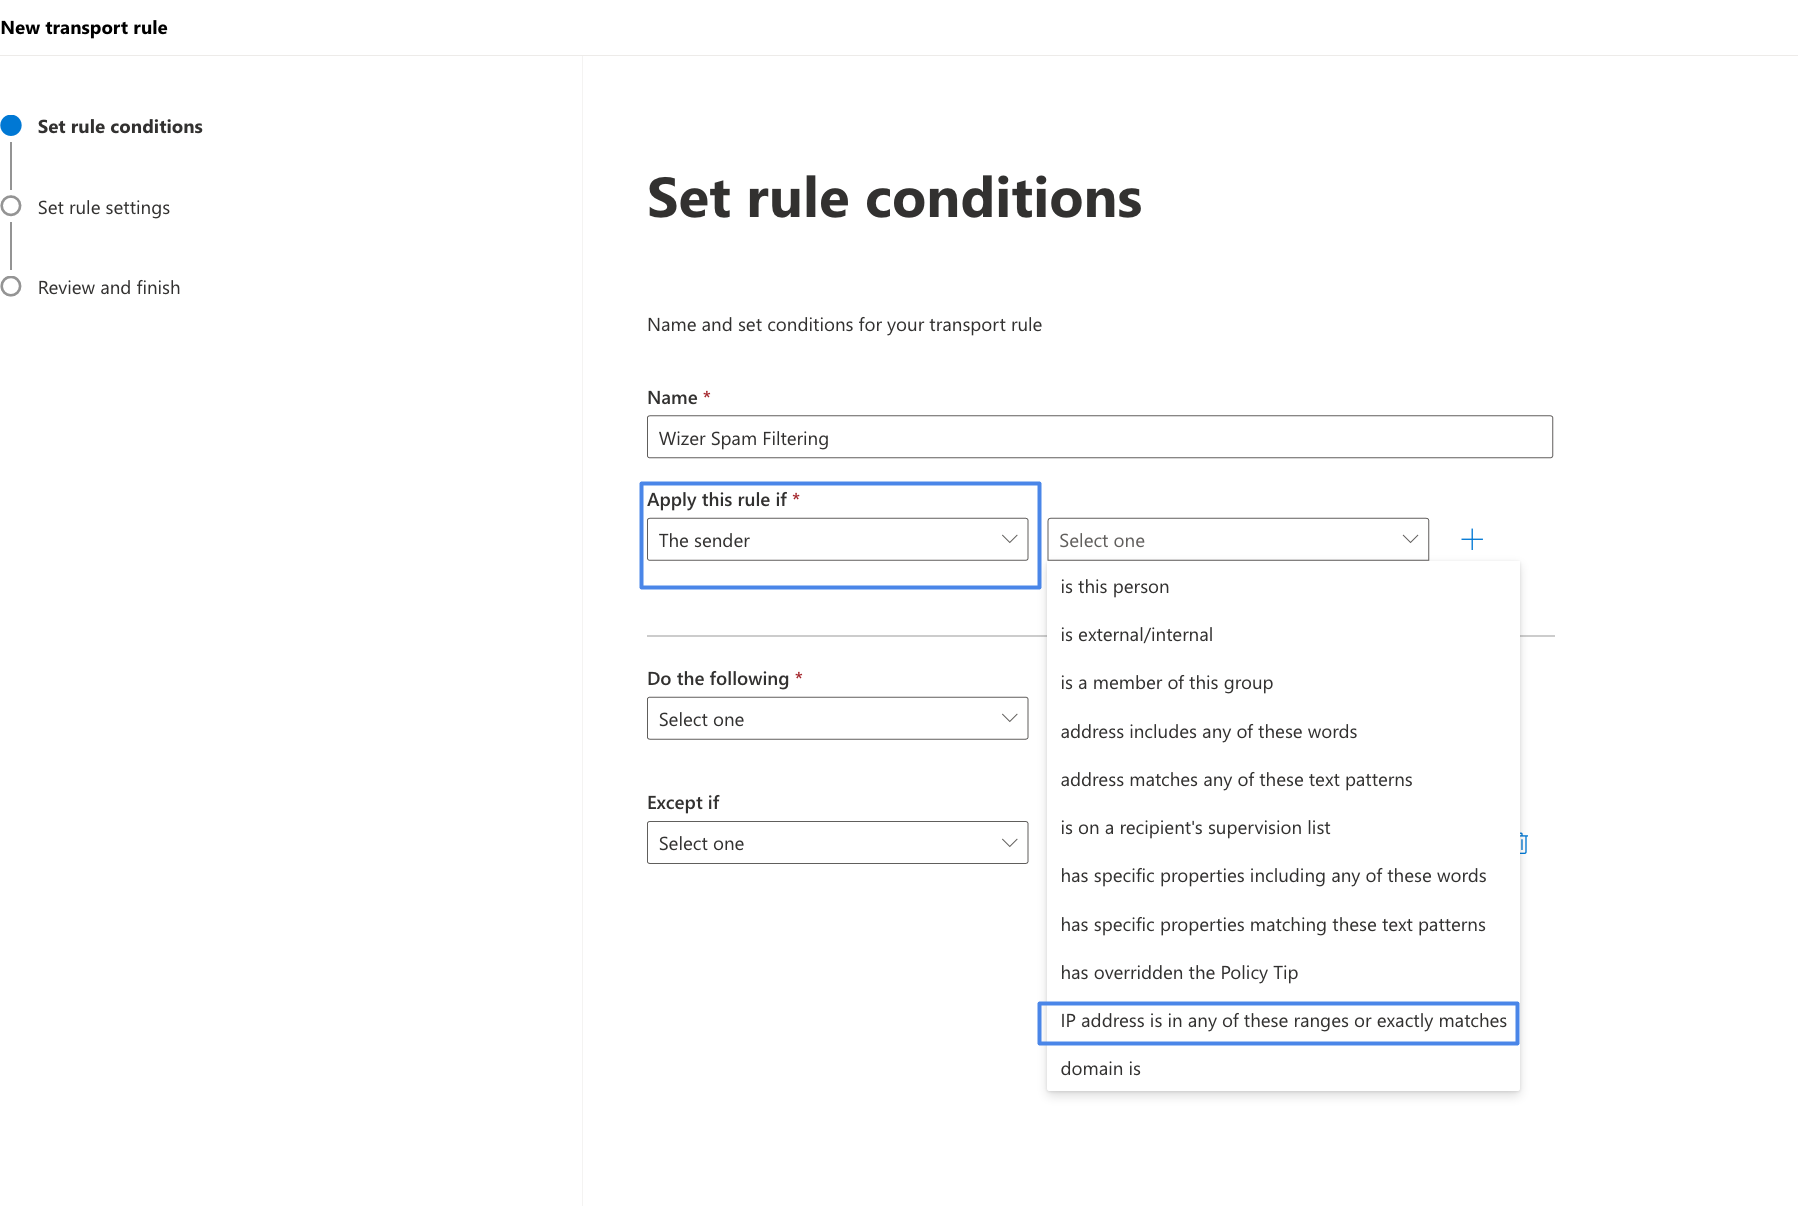
3. Give the rule a name, such as "Wizer Spam Filtering"
4. Click on "Apply this rule if → The sender → IP address is in any of these ranges or
exactly matches"
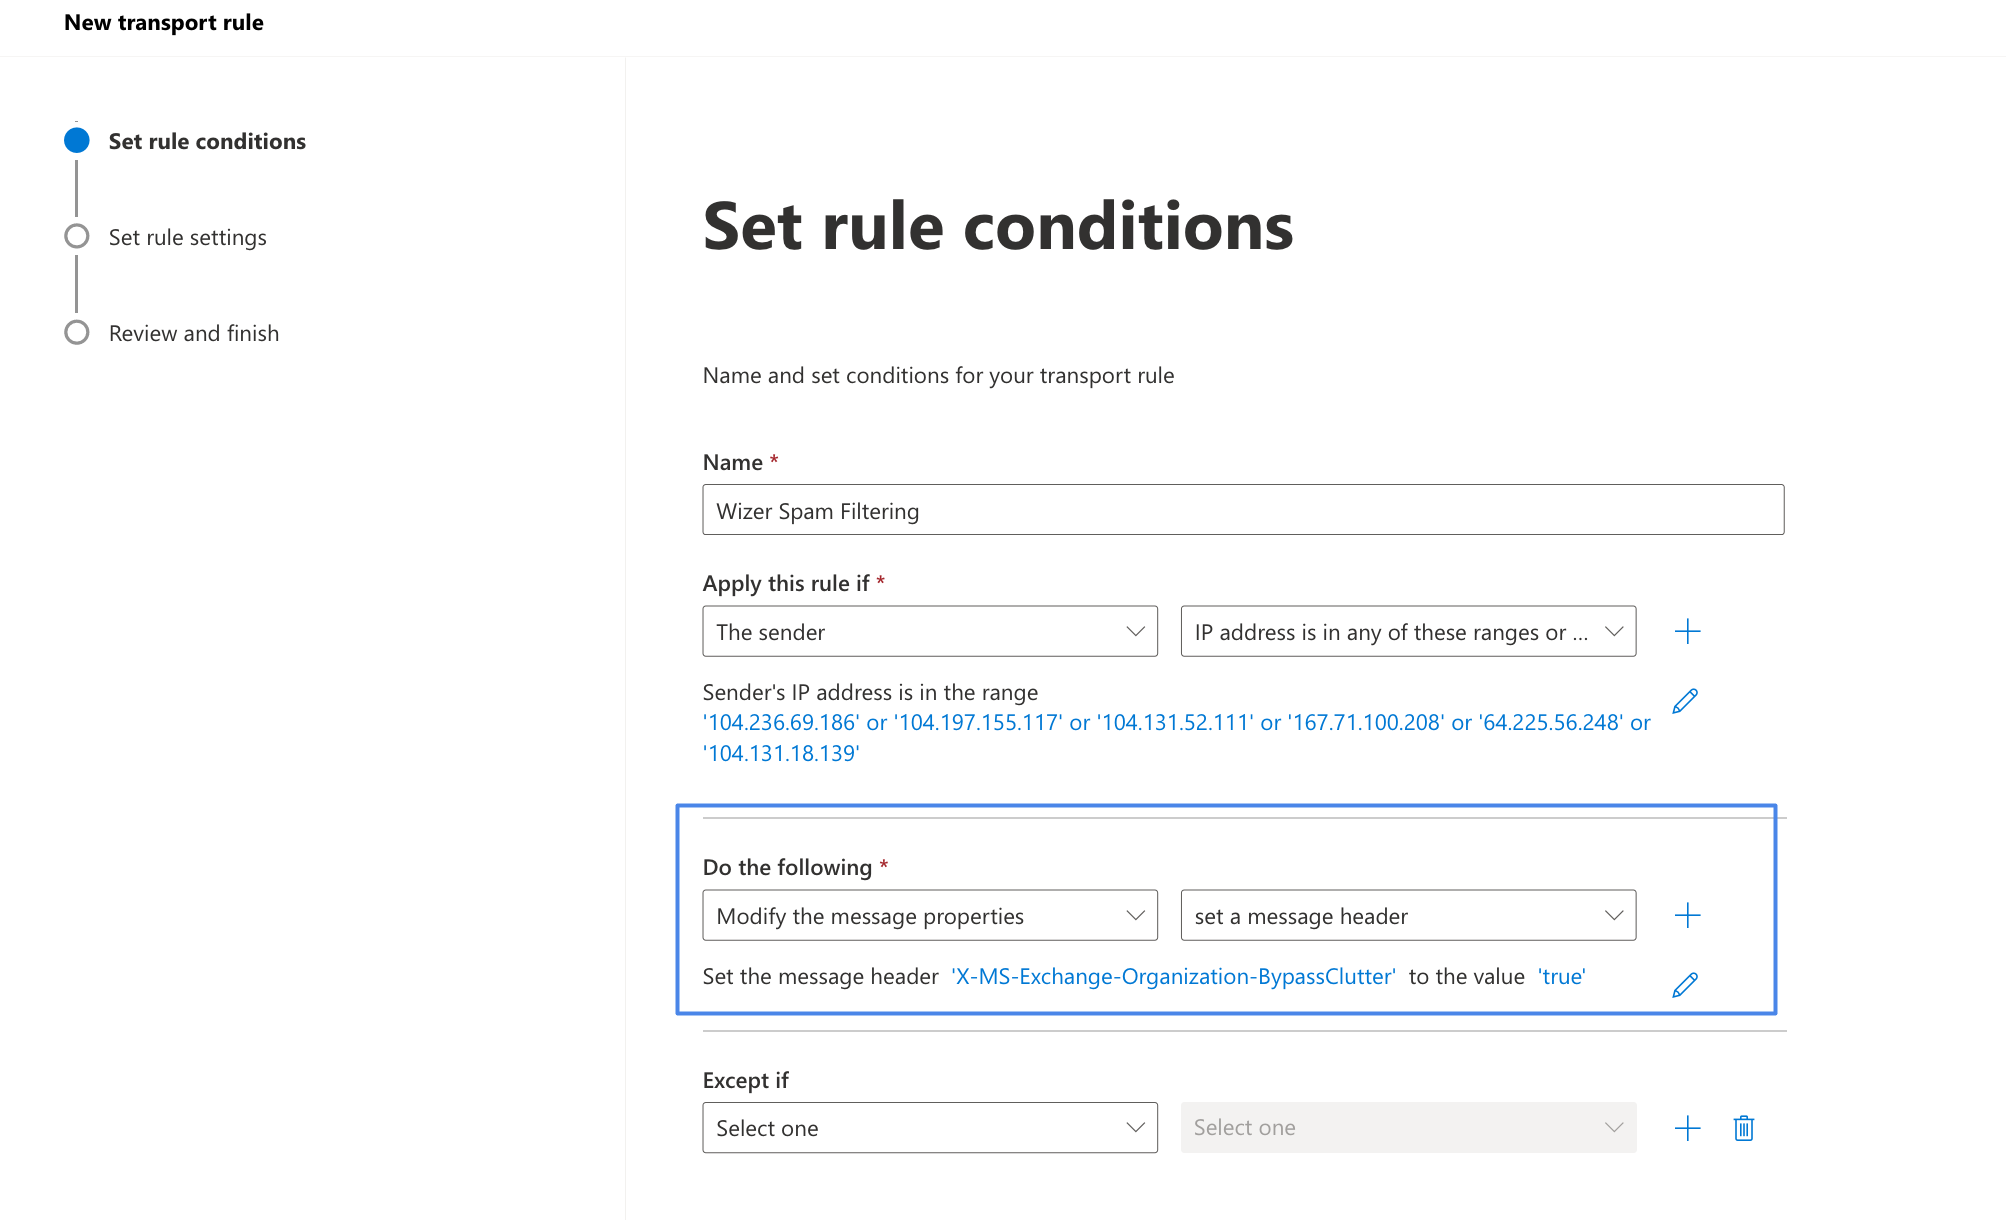
Message Header"
7. Choose the "Enter text" buttons by the right side of the "Do the following" field
and enter these values: "X-MS-Exchange-Organization-BypassClutter" and "true"
to... and select "Bypass Spam Filtering", which will set the value of SCL to -1
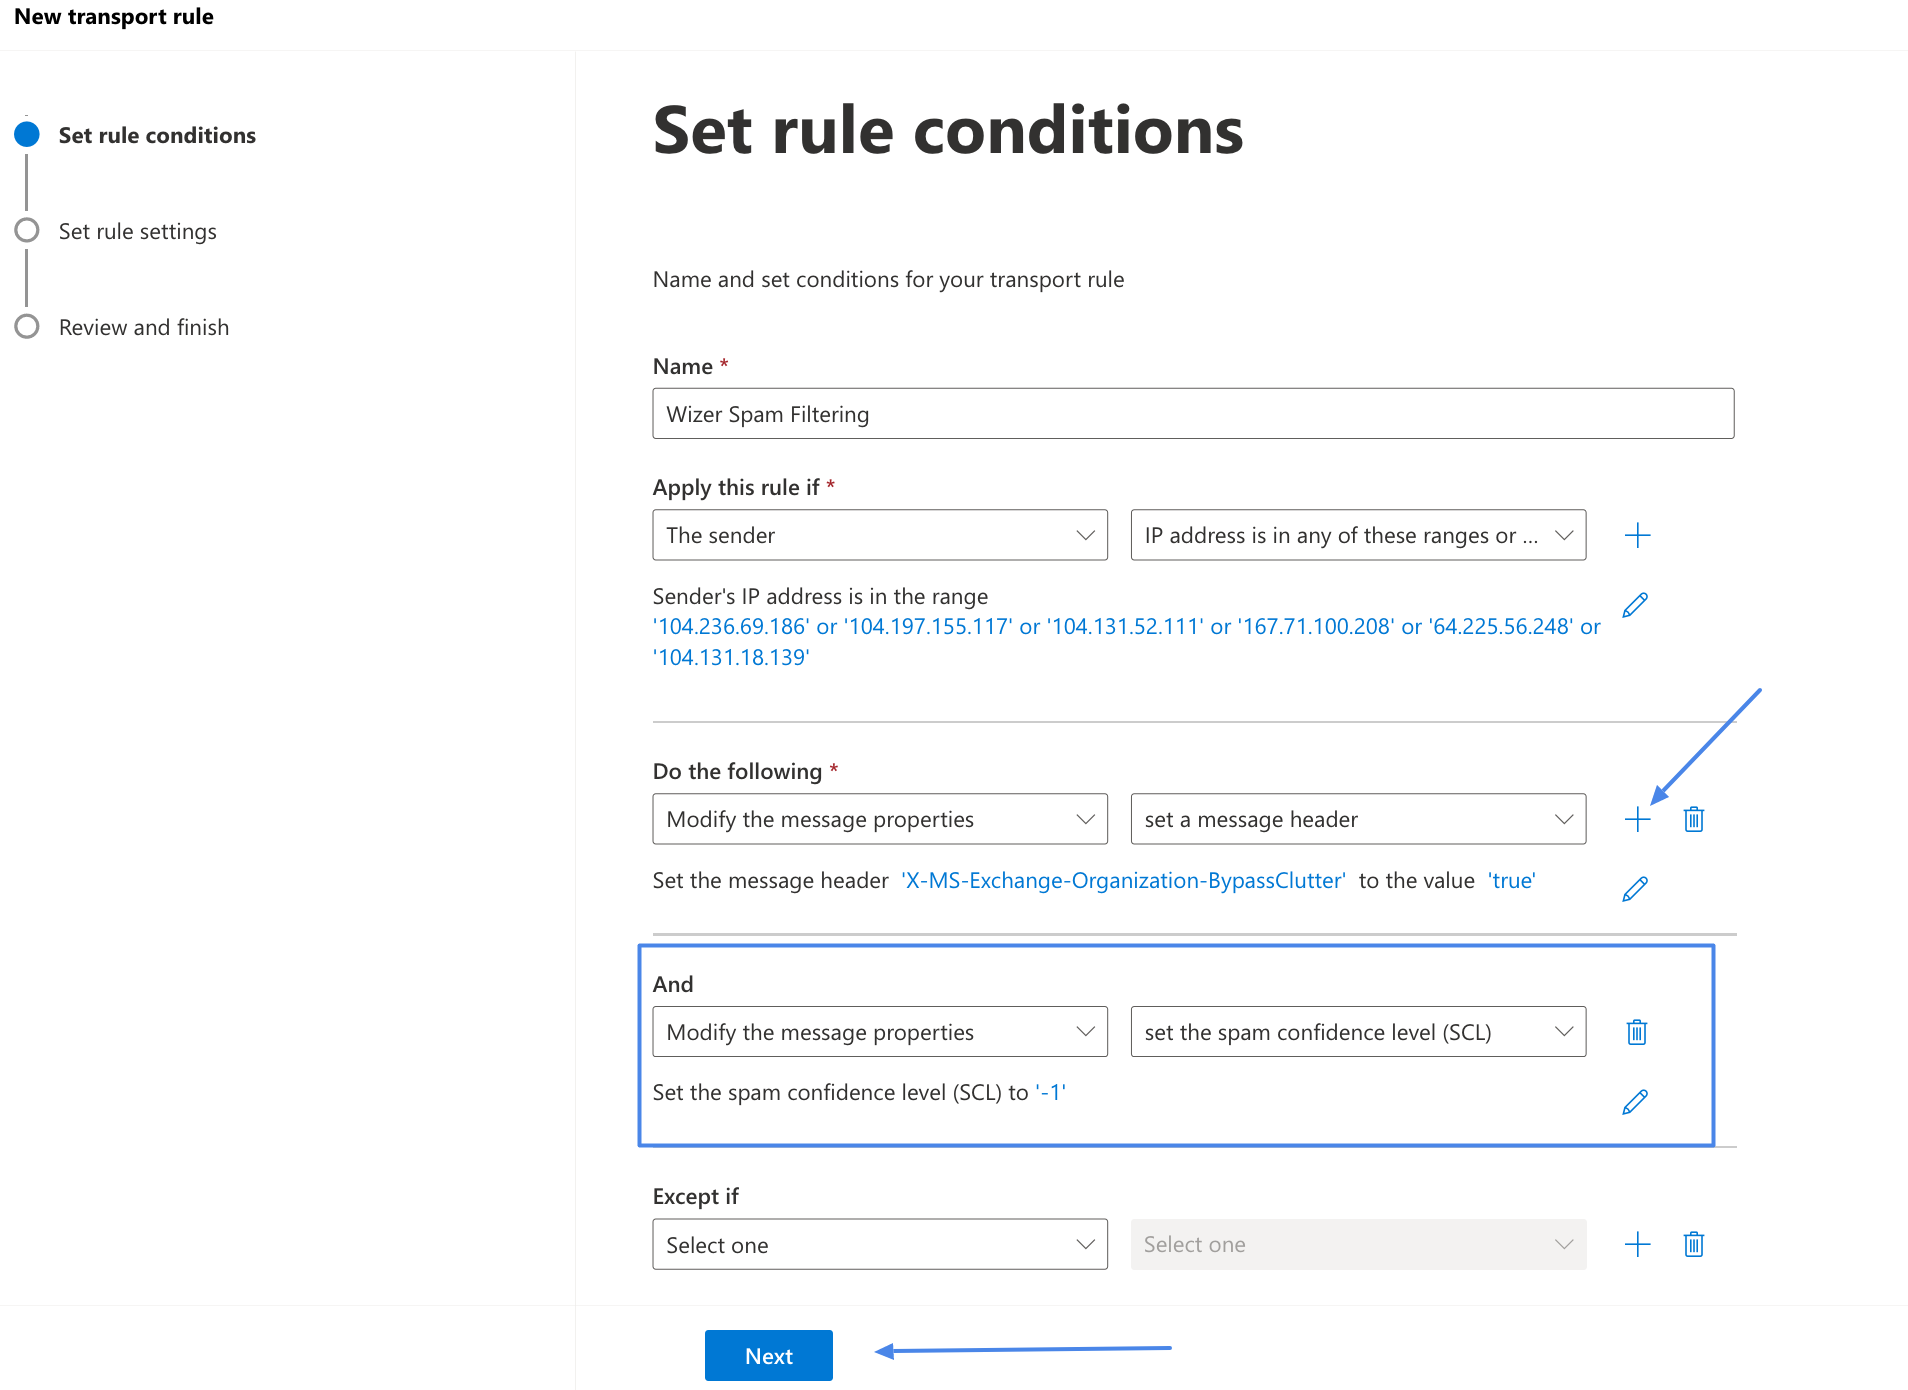
10. Click on the "Next" button
11. Leave the Set Rule settings as is proceed to the Review and Finish window and save the rule.
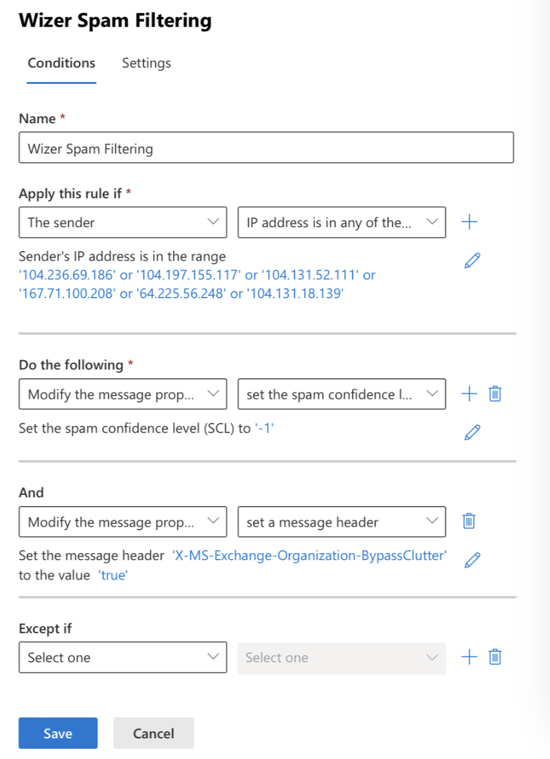
Please make sure the rule is Enabled, and priority is set to 0.
Whitelist ATP by email header for mail filtering and safelinks bypass
To configure the mail flow rule to bypass ATP link processing by header:
1. Navigate to https://admin.exchange.microsoft.com/#/transportrules
2. Create a new rule and name it "Bypass ATP Links". (this is an example name, as it can be set as desired)
3. In the "Apply this rule if" condition select The message headers and then select "includes any of these words"
4. In the Enter text type the header name X-TestPhish.
5. In the Enter words type in X-TestPhish (alternatively please enter the value you are using instead of X-TestPhish in Wizer phishing settings)
6. In the "Do the following" condition select "Modify the message properties" and "set a message header"
7. Insert below into the "Enter text" fields:
- Click the first *Enter text... link and set the message header to X-MS-Exchange-Organization-SkipSafeLinksProcessing
- Click the second *Enter text... link and set the value to 1
Please refer to the below screenshot which illustrates how should the configuration look:
Set the rule settings according to your needs in the next tab, and in the Review and Finish tab, press Finish.
Proceed to finish with the rule creation.
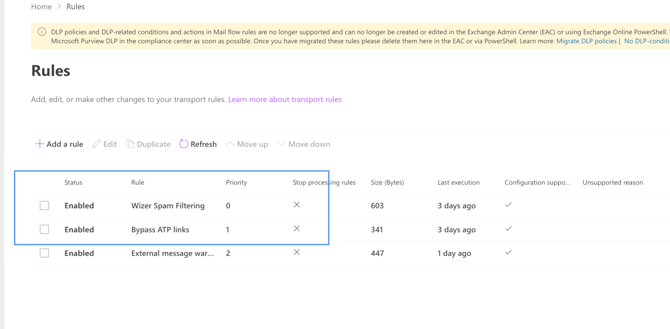
Once finished please ensure the Wizer filtering rules have the highest priority (if possible)
Microsoft Defender allowed 3rd party phishing simulations
1. In the Microsoft 365 Defender portal at https://security.microsoft.com, go to Email & Collaboration > Policies & Rules > Threat policies > Advanced delivery in the Rules section.
Alternatively, you can use the following link https://security.microsoft.com/advanceddelivery?viewid=PhishingSimulation to navigate directly to the Advanced delivery page.
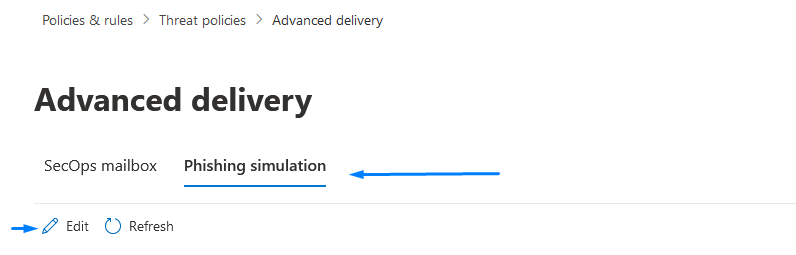
2. In the Advanced delivery menu, navigate to the Phishing simulation tab and press Edit to either add new or configure existing values (refer to the screenshot below).
3. On the Edit third-party phishing simulation menu that opens, configure the following settings:
Domain: Insert the phishing (sending) domains specified in the following articles sending domains. Below is a reference screenshot of how it should look like on your end: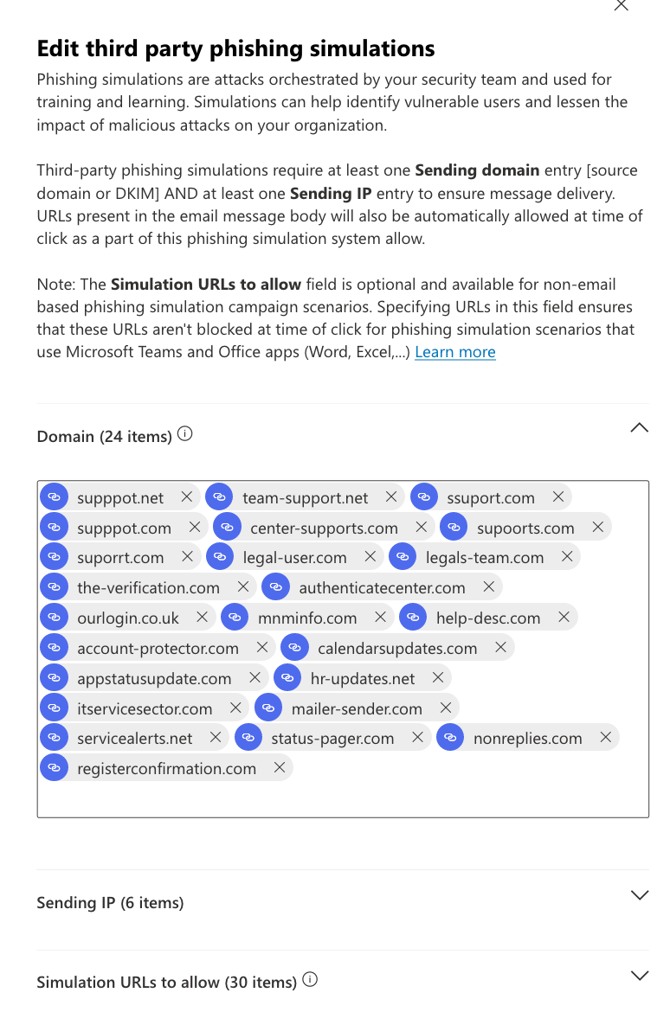
Sending IP: Insert the IP addresses specified in the following article's phishing IP section.
Below is a reference screenshot of how it should look like on your end: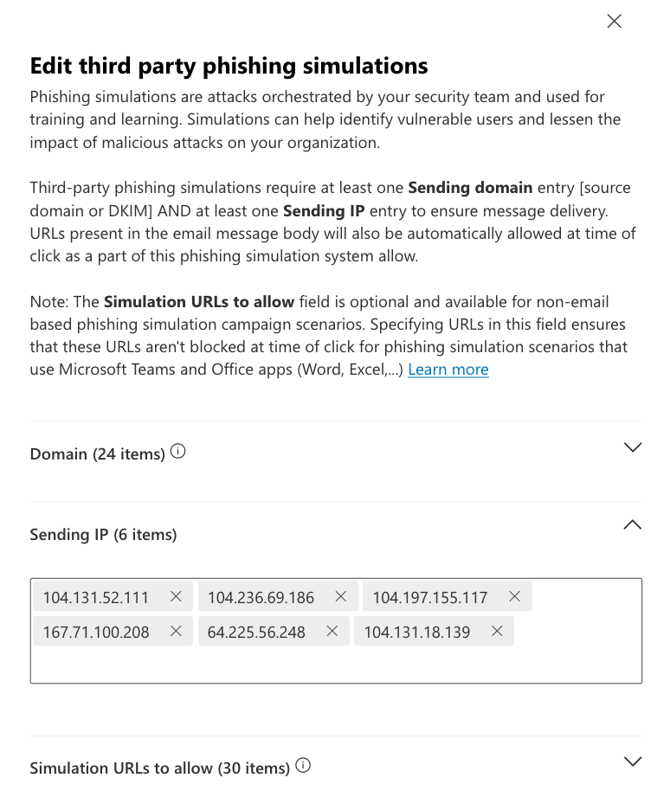
Simulation URLs to allow: Insert the landing page domains specified in the following article landing page domains section. The reference screenshot of how it should look on your end is below: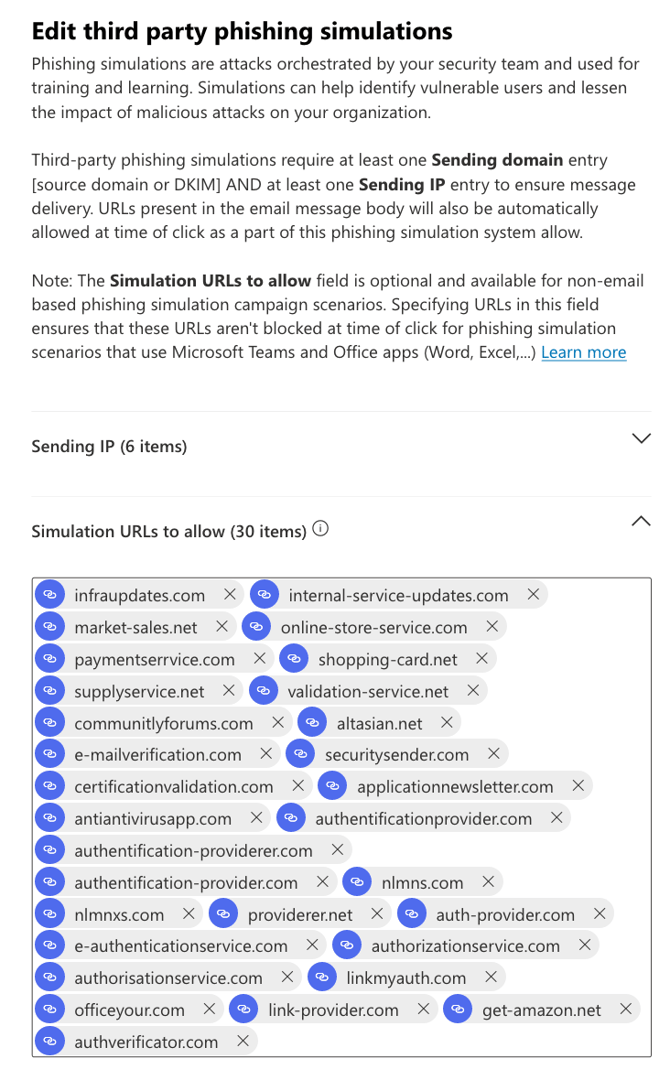
When you're finished, you can click Add, and click Close afterward if this was a first-time addition, or if you were editing existing values click Save and then click Close.
Once all of the above is implemented you should be all set.