How To Set Up Custom SAML
Setup Custom SAML in Wizer
-
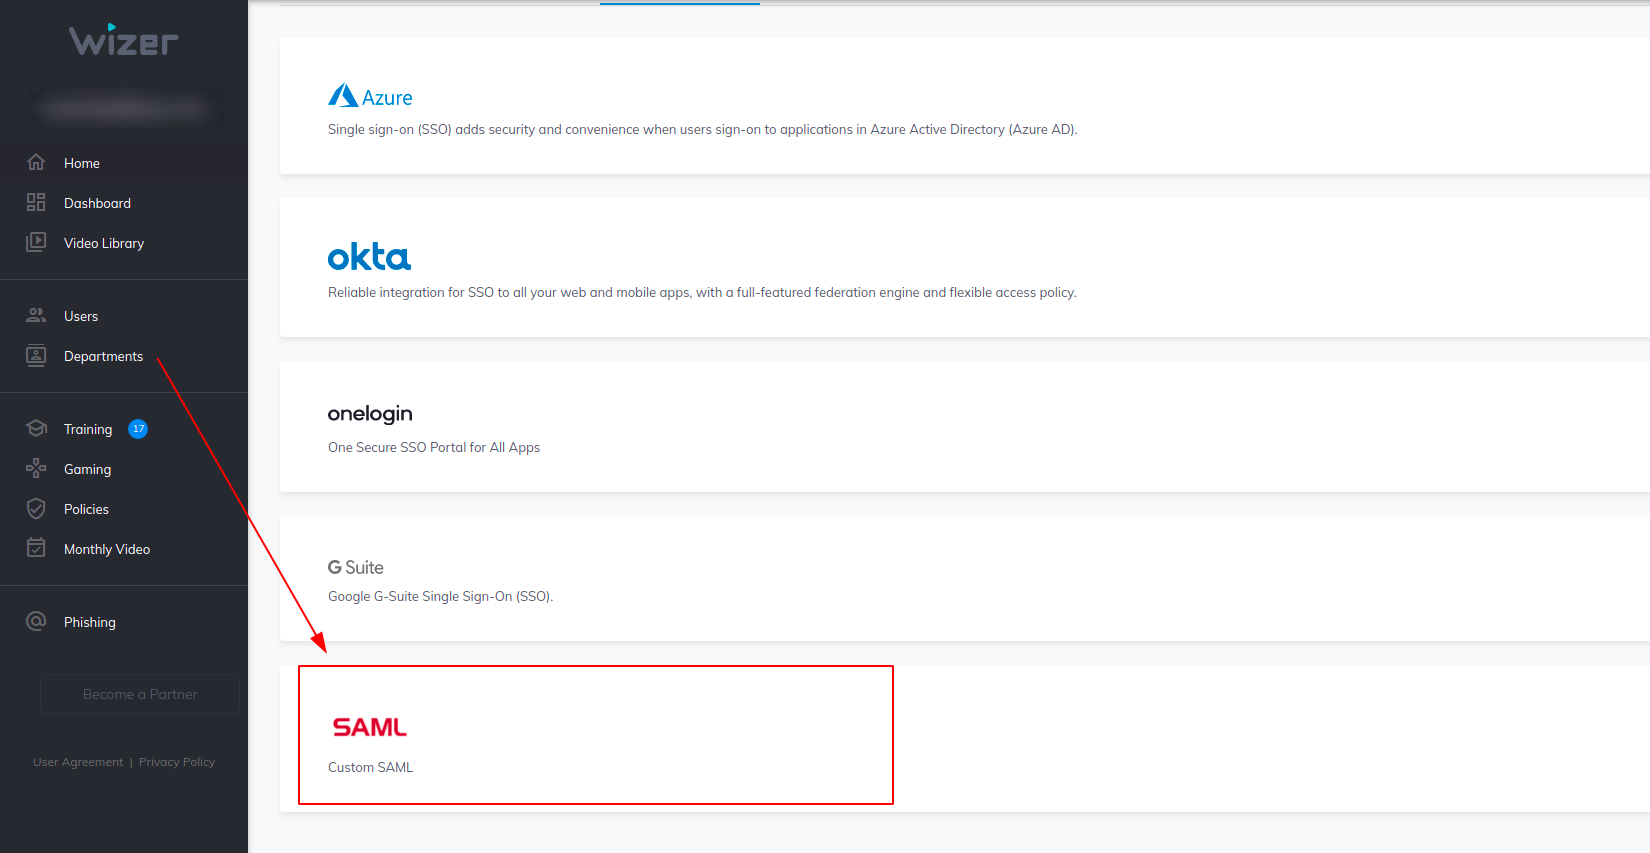
Go to https://admin.wizer-training.com/settings/single-sign-on and click the Custom SAML tab

-
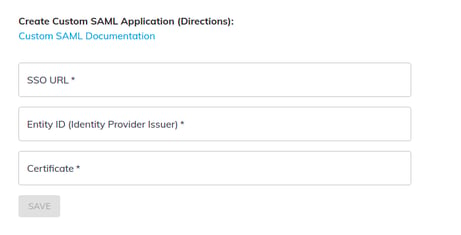
Enter the details from your identity provider:
- SSO URL (also known as Assertion Consumer Service (ACS) URL, POST Binding Endpoint)
We will use this link to connect to the Identity Provider when someone from your Organization attempts to log in via SAML SSO.
Please note that Wizer’s endpoint uses HTTP-POST bindings.- Entity Id (also known as Identity Provider Issuer, Audience URI, Identifier URL)
This lets us know which Identity Provider you are using.
- Certificate (also known as X.509 public certificate, Signing Certificate)
We use this to verify your Organization via your Identity Provider. Wizer requires that the SAML response is signed, and you will need to paste a valid X.509.pem Certificate to verify your identity. This is different from your SSL certificate.
The certificate must be Base64-encoded and may contain the -----BEGIN CERTIFICATE----- and ----END CERTIFICATE----- tags.- Click Save

Complete the setup with your Identity provider
-
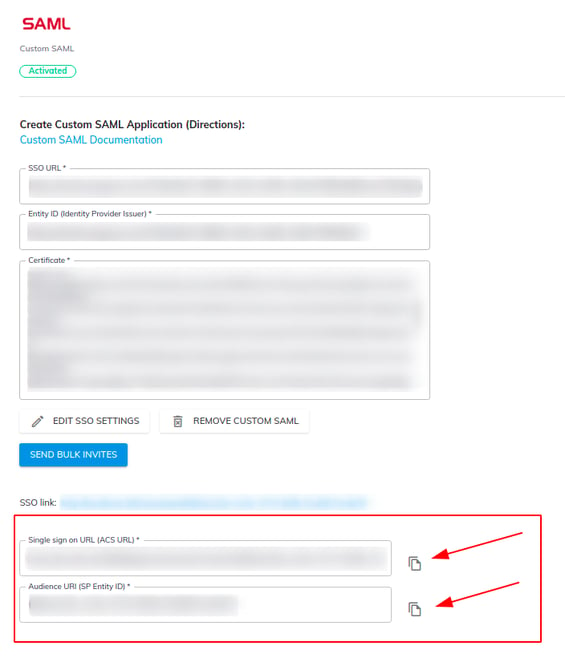
View the details of your SAML SSO configuration in Wizer Admin Panel. You'll need these to complete the configuration process with your Identity Provider.
Copy values from the Custom SAML tab in the Wizer Admin Panel and paste them into your Identity Provider Application Wizard:
- SSO URL (also known as Assertion Consumer Service (ACS) URL, POST Binding Endpoint)
- Entity Id (also known as Identity Provider Issuer, Audience URI, Identifier URL)

-
Assertion Settings. Wizer SAML SSO requires assertions with the following attributes.
Please note that attribute names are case sensitiveThe NameID is a required setting and must be a permanent identifier unique to each user.
NameID (Required)
<saml:Subject>
<saml:NameID Format="urn:oasis:names:tc:SAML:2.0:nameid-format:persistent"
>
Your Unique Identifier
</saml:NameID>
</saml:Subject>-
email Attribute (Required)
<saml:Attribute Name="email"
 NameFormat="urn:oasis:names:tc:SAML:2.0:attrname-format:unspecified">
 <saml:AttributeValue xsi:type="xs:anyType">testuser@youremail.com
 </saml:AttributeValue>
</saml:Attribute>-
firstName Attribute (Required)
<saml:Attribute Name="firstName"
 NameFormat="urn:oasis:names:tc:SAML:2.0:attrname-format:unspecified">
 <saml:AttributeValue xsi:type="xs:anyType">firstName
 </saml:AttributeValue>
</saml:Attribute>-
lastName Attribute (Required)
 <saml:Attribute Name="lastName"
 NameFormat="urn:oasis:names:tc:SAML:2.0:attrname-format:unspecified">
 <saml:AttributeValue xsi:type="xs:anyType">lastName
 </saml:AttributeValue>
</saml:Attribute>-
department Attribute (Optional)
  <saml:Attribute Name="department"
 NameFormat="urn:oasis:names:tc:SAML:2.0:attrname-format:unspecified">
 <saml:AttributeValue xsi:type="xs:anyType">Department
 </saml:AttributeValue>
 </saml:Attribute>
Test your Custom SAML login
Log out if you are logged in the Employee App (https://app.wizer-training.com).
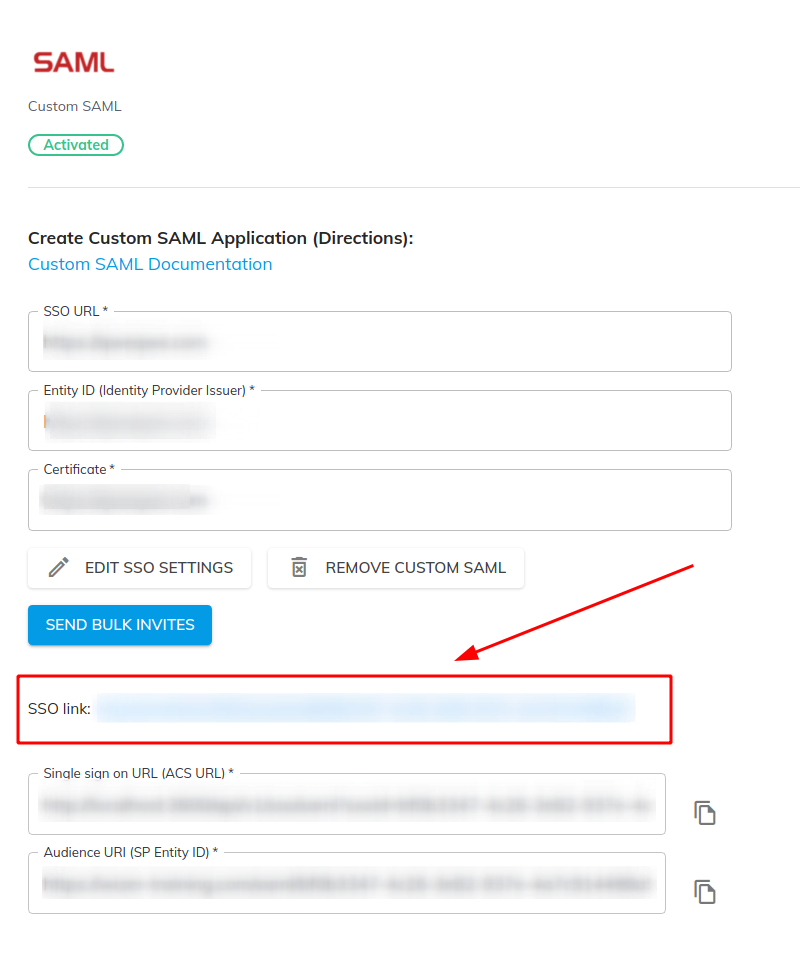
In the Wizer Admin Panel, click your SSO Link in the Custom SAML tab
https://admin.wizer-training.com/settings/single-sign-on

You will be redirected to the Employee App.
Click Log in.
You will be redirected to your Custom SAML login web page. Enter your SSO credentials. You should be redirected back to the Wizer Employee App and should be Signed In.
-
You do not have to send bulk invites, because the links will be sent to all users at once. Instead, you can send this SSO link to a few users so they can try it out.
Any questions? Please contact our support specialists at support@wizer-training.com